Author: Vandana Pradeesh

  • Best VPN For the Future

    Best VPN For the Future

    Best VPN For the Future

    Here we take a look at the best VPN for Mac , Windows , android , streaming , kodi , torrenting and more about VPN.

    Have you ever thought about the data sent and received via a network? Did you know that the network used by you could be unsafe sometimes?

    Data Security has a prominent role in the present scenario. It is very important to protect the data and hence the network should also be secure. A poor and unprotected network easily lets unsafe data enter your PC.

    Here enters the VPN or Virtual Private Network. We shall learn more about VPN through this article.

    We shall get to know about the best VPN that could be effectively used in future.
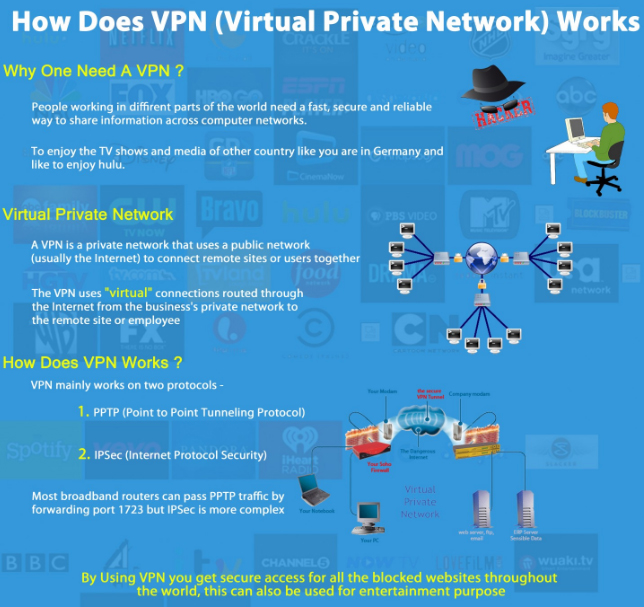
    What is VPN ?

    VPN or Virtual Private Network is a service, creating a restricted, protected network over a public network. As you get connected to VPN, the whole traffic gets encoded and the IP (Internet Protocol) address is reinstated by VPN server address.

    Hence your personal information and the activities performed online remain private and protected.

    Moreover, VPN usage also means:

    • Overcoming geo-restrictions
    • Enjoying true online anonymity
    • Freely speaking your mind online

    Advantages of VPN

    You can enjoy the following benefits while using VPN:

    • Online Anonymity
    • Unlimited Access to Internet content
    • Enjoy online Freedom of Speech
    • Gets permission for file-sharing platforms
    • Online safety while connecting the public WiFi hotspots
    • Total data security

    The above mentioned are the advantages of Vpn service usage .

    How useful is VPN ? 

    I am sure you would not ask this once you start using the Buffered VPN. You will not be ignored just because you have no idea about VPN and its functions.

    As mentioned earlier, VPN keeps the traffic and data encrypted. In such case, Buffered is an expert. This is because only 256 bits of Blowfish Encryption is used. The good news is that no cryptanalysis attempt could break it till date. Moreover, its security standard is the same as that of the US military. Hence, your private data will be protected from

    -ISPs (Internet Service Providers)

    -Surveillance Agencies

    and Hackers

    Is Free VPN Safe ? 

    If you think free VPN is safe due to its convenience, then you are wrong!

    However, maintaining a good VPN service will cost you high, irrespective of how you look at it.

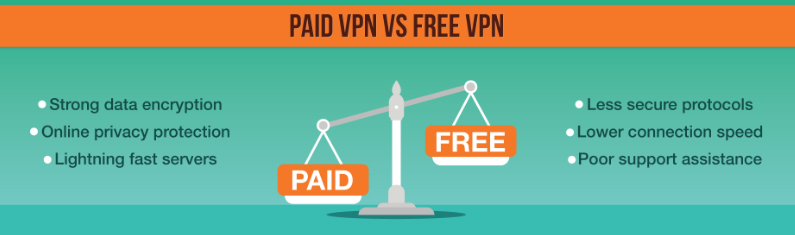
    Ever wondered how these free VPN providers get their money?We will show you how these free VPNs seize you:

    • Selling your private data- Free VPNs do sell your confidential data. Their services gather such private data and sell them to other data collectors.
    • Spam with ads: Here, the browsers and the VPN interface would be filled and you will be covered up with spam ads.

    Now, would you still go with these free VPN ?

    Best VPN Services

    As we discussed earlier, VPN is the safest way to protect the private data that you send and receive online. Finding a good VPN service and signing up could be quite confusing, as there are loads of VPN services having similar features. Hence choosing the right and suitable one is very tricky.

    The great news is that most of them are tested and so the choice is made easier for you. Lately, more than 100, of both the best and the worst VPN services of 2017-18 have been retested. These services are regularly retested to make it more convenient for the users to choose the right out of the best VPN services.

    Let us look at some of the best VPN services for the year .

    • ExpressVPN
    • IPVanish
    • VyprVPN
    • NordVPN
    • TunnelBear

    Let’s look at each of the services in detail:

    ExpressVPN

    This has been the best VPN service. It is the all-time favorite option regarding the speed, privacy as well as unblocking certain websites.


    • Number of servers: more than 1800
    • Server locations: 148
    • IP addresses: 30,000
    • Maximum devices being supported: 3

    ExpressVPN provides 145 locations across 94 countries, parallel to a great set of established clients, having accomplishments in mobile and desktop with software on the lead.  There are genuine clients for Windows, Mac, Linux, plus iOS, Android and even Blackberry on the mobile platform. Moreover, routers, VPN browser extensions and DNS content freeing up for a variety of streaming media devices and Smart TVs, thereby giving a broad VPN solution.

    The website of ExpressVPN provides Live chat support, along with the agents supervised 24/7 to answer any queries about the service. There is also a P2P (peer-to-peer) support, a Kill switch (to conceal the IP in case the network drops) and a robust performance levels in total.

    However, like any product, ExpressVPN also has certain limitations. This VPN service supports only three connections per user at a time and the service includes a premium price tag. However, if you need a reliable, ultra-fast and highly protected, ExpressVPN is the most suitable. This is because it does not have a free trial version and also a ‘no trouble’ 30-day money back guarantee in case you are not convinced with the service. The available packages are:

    • 15 months for $100.05, i.e. $6.67 per month
    • 6 months for $59.94, i.e. $9.99 per month
    • 1 month for $12.95

    IPVanish

    This VPN type is more suitable for torrenting and P2P traffic.


    • Number of servers: 950 and more
    • Server locations: 60 or more
    • IP addresses: more than 40000
    • Maximum number of devices supported: 5

    As most of the VPN services strive to stay in the market with the free plans and cheaper commercial products, IPVanish promises service quality. A website describes it as the fastest VPN with over 40000 shared IPs, more than 950 VPN servers in over 60 countries, with boundless P2P traffic, five synchronized connections and no logs policy etc.

    Though the price would be an issue for some of you, being costlier than the usual VPN, the high-speeds, ability to choose from multiple locations and the great clients make this best VPN unbeatable. If you are focussing on quality, this VPN service is the right one, in case you are not so happy with the service at some point, this VPN service has an option of a 7-day money back guarantee. Following are the packages available for this VPN service.

    • 12 months for $77.88 i.e. $6.49 per month
    • 3 months for $26.97 i.e. $8.99 per month
    •  1 month for $10

    VyprVPN

    This VPN service is best known for its performance and security having

    • 700 and more servers
    • About 73 server locations
    • IP Addresses being more than 200,000
    • Up to 3-5 devices supported to the maximum

    This service of VPN is established in Switzerland wherein there are certain supportive privacy laws. It is a well-described service including 73 server locations and boundless data usage. Additionally, there are features like auto-connect options to make your work easier, a kill switch, and a boosted security consideration from the firm’s exclusive Chameleon protocol and VyprDNS. An important point to be noted is that in the logging side certain logs are maintained like the number of times connected and IP addresses.

    VyprVPN also provides effectively a great variety of clients and the Windows software favors from a user-friendly interface. The best feature of this VPN service is about the performance, that it is really speedy. You may also note that this VPN service has no option for a refund. However, it has an option of a 3-day trial. Based on the offers provided, you could go for a monthly or annual subscription with a Basic or a Premium plan. Basic plan offers 3 connections while the Premium plan offers 5 connections. Available packages are as follows:

    • Golden Frog VyprVPN with 12 months for $60, i.e. $5 per month
    • Golden Frog VyprVPN with 12 months for $80.04, i.e. $6.67 per month
    • Golden Frog VyprVPN with 1 month for $9.95
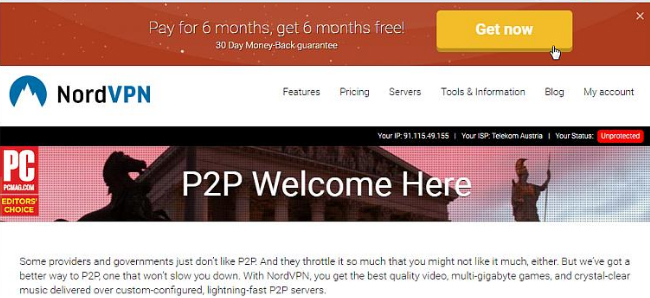
    NordVPN

    Known as the ultra-secure provider.


    Features added are:

    • Number of servers are 2029
    • 61 server locations
    • No IP addresses associated
    • Up to 6 supported devices

    Despite being an origin of Central America, which is hardly a technology hub, NordVPN‘s current products are good competitors and could beat in almost every area.

    This VPN service has over 2000 servers in 61 countries, 2048 bit encryption, standard support to 6 devices, strong leak protection for DNS, automatic kill switch, easily available extra security, great set of dedicated IP addresses as well as payment options which include Bitcoin, PayPal and credit cards.

    It shows quite a good performance with notable speed in the case of short connections giving pleasant results accompanied by longer distances too. There is a criticism regarding the privacy policy as there is a ‘no logs policy’ maintained by the service provider. The opinion is the same regarding session logging and if its occurrence is not clear.

    NordVPN has three options for service and the most preferred and the best plan is the 1-year subscription. The available packages are:

    • Tefincom S.A NordVPN 24 months for $78.96, i.e. $3.29 per month
    • Tefincom S.A NordVPN 12 months for $69, i.e. $5.75 per month
    • Tefincom S.A NordVPN 1 month for $11.95

    TunnelBear

    This VPN service is known for its easy-to-use feature.


    • Around 1000 servers
    • Over 20 server locations
    • No associated IP addresses
    • Up to 5 devices supported

    This VPN service is Canadian based, notable for certain reasons, out of which is its ease-of-use. Here, you can find a good set of clients, including both desktop and mobile devices in detail and the software is quite user-friendly.

    The website drives out of using complex words, hence talking in simple words as to how VPN works. However, the experts might observe some lack of the details rather disturbing. It is also important to note that there aren’t a lot of low-level options to modify the connections either. Hence, this is mainly designed concentrating the beginners.

    In case of coverage, TunnelBear provides servers in over 20 countries across the globe thus giving up to 5 immediate connections. This VPN service provider is robust on the privacy basis, thereby crisply and precisely explaining the policies making sure there are no jargons used (more of a legal kind than that of the technical).

    This best VPN service provides a free service with a limit of up to 500MB per month and a special offer going up to an effective 5GB. Paid plans give an unlimited data and this can be accessed for an easy $4.16 per month.

    • 12 months for $59.88, i.e. $4.99 per month
    • 1 month for $9.99

     Best VPN For Android

    Android has been the most preferred OS, may it be on mobile devices or the tablet PCs. So, you can easily conclude that VPN apps would surely support Android. To be specific, the mobile devices are the ones which are more connected to VPN services. There are some of the best VPN providers having Android apps; however a few enable in setting up VPN service through manual configuration, though there are certain services which do not have mobile support at all.

    Choosing the Best VPN For Android

    There are abundant VPNs having a great support for Android. As a result, the one you choose might contain smaller details or certain customized preferences. When you evaluate the best VPN for Android , there are certain factors to be considered:

    It is quite clear that a reserved Android app enables to make things as flexible as possible. Secondly, it should be user-friendly, moreover provide adequate options to let some fine-tuning, especially for the experienced users.

    Read Also : Android: Prevent apps from running at startup(Stop/Disable Apps)

    Read Also : Backup Android Device to PC or Google

    Other factors include- firm security, and obviously the privacy policy and service terms which can be easily understandable, thus bringing more clarity about the logs and the details being kept by the service provider. Supported immediate connections and the resultant speeds that could be achieved with VPN are also important. However, it is not so important in some cases.

    Following are the best VPN services for Android

    • ExpressVPN
    • IPVanish
    • VyprVPN
    • NordVPN
    1. ExpressVPN : This is the best VPN for Android so far
    • Number of servers: 1800
    • Server locations: 148
    • Over 30,000 IP addresses
    • Up to 3 devices supported

    There are some really good reasons for liking ExpressVPN-Android duo. The app is quite user-friendly and genuine; however, it provides certain advanced options too. In case of security, it claims AES 256bit encryption, as the speeds witnessed using the best VPN were remarkably fast.

    ExpressVPN offers apps of good quality for a great set of devices and it surely includes Android. This is because Android gives access to high-speed servers across 94 countries and is suitable for phones, tablets, Kindles and Android TV boxes.

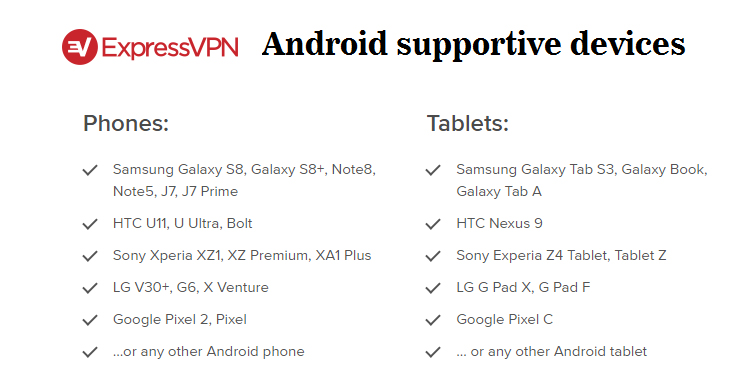
    Once you sign-up for ExpressVPN subscription, the website gives instructions related to app installation on your device through the Google Playstore or an APK file. Additionally, there are some good set of readily available content and video guides about the app usage, also 24/7 customer support through Live chat when you have issues.

    For all these, it obvious that ExpressVPN is not the cheapest VPN, but it is worth buying for the actual price if you really want to enjoy the Android experience. There is also the 20-day money back guarantee that enables you to check the service as you reassure the quality. ExpressVPN provides the following plans, with a 12-month plan providing the greatest saving as expected. Following are the packages:

    • Exclusive deal for $6.67 per month, saving 49 %; 15 months for $99.95
    • 6months for $59.95, i.e. $9.99 per month
    • 1 month for $12.95
    2. IPVanish

    Considered the fastest Android VPN, comprising over 850 servers, more than 60 server locations, over 40000 IP addresses and up to 5 devices supported.

    The overall review is good for this VPN service. However, it lacks a kill switch, which is a regular feature that shuts the internet connection down right away as the VPN drops. Yet, it does not draw away from the attractive download speed achieved by the best VPN during testing. Moreover, there are no logs of user activities, and you receive 256 bit AES encryption with OpenVPN policy with 24/7 customer support.

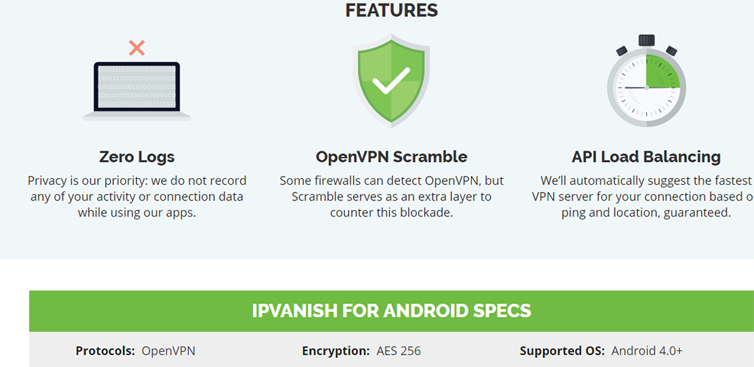
    Price is the main factor which would push away the users. Because there is no free-trial though having three ready plans with a 7-day money back guarantee. The best option is the 1-year subscription and is the most suitable choice. The three available plans available are:

    • 1-year plan for $58.49, i.e.$4.89 per month
    • 3 months for $20.24, i.e. $6.74 per month
    • 1 month for $7.50
    3. NordVPN

    It is the safest Android VPN.

    Features include:

    • 1731 servers
    • Servers located in 61 countries
    • No IP addresses associated with this VPN
    • Up to 6 devices supported

    The greatest strength of this VPN is the presence of ‘Double VPN’ technology, that passes the connection through two distinct VPN servers, as being against having just one, an extra layer for security. this is because there are only some Double VPN servers available.

    Since the focus is more on security and privacy, this VPN does not limit itself in other areas either. Android apps are easily usable with NordVPN; however being the standard version there is an absence of certain configuration options while the desktop app has a better interface.  Its performance is good, but not so marvelous. There is a Live chat feature for 24/7 customer support.

    This VPN for Android can be bought at a reasonable price with a 7-day free trial. You can choose from 3 available plans, all including a 30-day money back guarantee. The most suitable out of all is the 1-year plan. Other available packages are:

    • 1 month for $11.95
    • 6 months for $42, i.e. $7 per month
    • 1 year for $69, i.e. $5.75 per month
    • 2 years for $79, i.e. $3.29 per month


    4. VyprVPN

    The best VPN for Android with a good mix of speed and security.

    • Over 700 servers.
    • More than 70 server locations
    • Over 200,000 IP Addresses
    • Up to 3 devices supported

    So we a have taken a detailed look at the best VPN for Android .

    Read Also : Perfect Guide to Know All About Web server

    Read Also : Web Servers A detailed overview – Popular Webservers

    Best VPN For Torrenting

    In these days of hacking and scamming, it has become essential that we use a reliable service to protect our data. Hence, it is strongly recommended to get ourselves the best VPN. A VPN is important for protecting the privacy of the data being shared across the networks. File sharing via a known P2P protocol is a suitable way to get various types of digital content for free. However, certain filesharing could put you into trouble with the digital owners.

    A few out of the best VPNs are considered the vital tool for torrent users willing to maintain privacy while downloading. This is because VPN offers ideal privacy by hiding the data received from the ISP and also hiding the real identity from the file sharers. There are certain vital features you need to look at while choosing the best VPN for torrenting, which are –

    -Speed: to make the downloads faster

    and the kill switch, for safety in case the VPN drops down.

    Here are the top VPNs for torrenting 

    • BUFFERED: starting from $6.60 per month
    • CyberGhostVPN: starting from $3.50 per month
    • ExpressVPN: starting from $6.67 per month
    • NordVPN: starting from $2.75 per month
    • PrivateVPN: starting from $3.60 per month

    What is Torrent VPN ?

    VPN is defined as a technology, largely increasing security and privacy while browsing the web or downloading torrents. VPN enables to connect a device to a server ruled by VPN provider. Many VPN providers use servers in different locations around the world.

    A VPN server plays the role of a proxy. It is placed between the computer or a device and the internet in such a way that a person watching from the Internet, for instance, monitoring downloads, find the IP address of the VPN server but not the actual internet address. This also means that the Internet Service Provider (ISP) is connected to the VPN server, however, it cannot find where you visited over the internet thereafter. The privacy you get from the ISP is still improved by the fact that the connection set between the device and the VPN server is safely encrypted.

    Why the need of VPN for torrenting ?

    There is a hint related to this question, in the analog of torrenting- the P2P (peer-to-peer) and file-sharing. In spite of keeping on a centralized server from where the files are downloaded, the torrented files are shared with most of the torrent users. Hence, when downloading using BitTorrent rules, you are actually sharing every bit of it with others who are presently downloading the same file. A file is said to be downloaded once all the required pieces are reassembled.

    In certain ways, this setup is impressive because it offers a dispersed way of sharing content. However, a drawback with torrenting is that sharing files with other downloaders over the internet is not so private as we expect.

    With the right software, including certain top BitTorrent clients it would be easier to see the IP addresses of other people who share the same file.


    1. ExpressVPN

    This is considered the best VPN for torrenting and P2P traffic.

    • Over 1500 servers
    • 148 server locations
    • 30,000 IP addresses
    • Up to 3 devices supported

    This VPN service provider based in the British Virgin Islands is remarkable in the case of performance with great speed across a good set of server locations. This definitely is a vital advantage for those downloading large files. In the case of security, ExpressVPN checks most of the boxes with strong encryption as well as a support for a set of VPN protocols. However, the privacy policy very well expresses that there are no activity logs and connection logs kept.

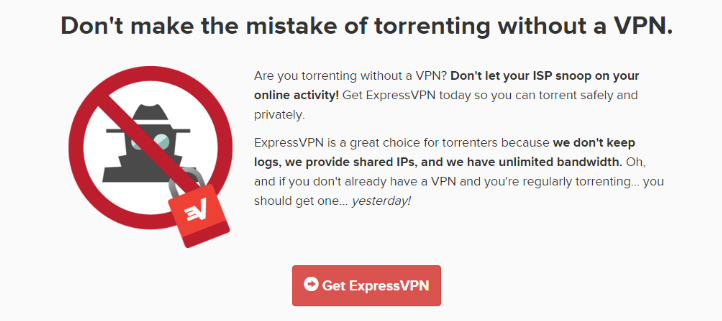
    The unique split tunneling feature of the software for Mac and the Windows users is worth mentioning because it enables users to choose in order to protect the client torrent. In case you get into trouble with the VPN service, there is 24/7 customer support available through Live chat or email. ExpressVPN’s different administration in the BVI (Bridged Virtual Interface) is an important advantage when it comes to protecting the anonymity.

    Considering the price, this VPN costs a little more than other providers but it is worth for people wanting to experience the best while torrenting.

    ExpressVPN does not provide a free plan or a trial version. However, all the plans include a 30-day money back guarantee. Out of these, the annual plan is worth buying as it gives a grace period of three months free by the bargain. Following are the normal packages:

    • Exclusive offer for $6.67 a month, saving 49%; 15months for $99.95
    • 6 months for $59.95, i.e. $9.99 per month
    • 1 month for $12.95

    2. IPVanish

    This VPN for torrenting is termed to be a great balance of power and performance.

    • Has over 1000 servers
    • more than 60 server locations
    • Over 40000 IP addresses
    • Supports up to 5 devices

    This VPN emerges as one of the top VPN providers and definitely holds a good reason. It provides intense download speeds, vast coverage across the globe, boundless P2P traffic and great torrent clients working well across various platforms. The no logs approach and robust encryption through OpenVPN, PPTP (Point-to-Point Tunneling Protocol) or L2TP (Layer2 Tunneling Protocol)/IP sec protocols, accompanied by an automatic kill switch for an absolutely private and safe experience.

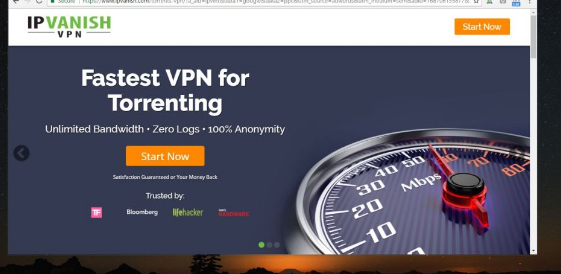
    However, the price would be a small drawback, as this VPN service does not include the advantages of a free trial. But, you can still avail a 7-day money back guarantee. The 1-year subscription is the most liked choice. The available packages are:

    • 1 year for $58.49, i.e. $4.87 a month
    • 3 months for $20.24, i.e. $6.74 a month
    • 1 month for $7.50 a month

    3. NordVPN

    This is the most secure VPN for torrenting.

    • Has 2981 servers
    • 59 server locations
    • No associated IP addresses
    • supports up to 6 devices

    When it comes to security by the best VPN, NordVPN is one name that pops into mind. It provides an extremely secure connection with support to IKEv2/IPsec, OpenVPN, PPTP and L2TP protocols. Also, there are a certain number of ‘Double VPN’ servers passing data through two different VPN servers for a better security.

    The VPN service provides adequate server coverage, automatic kill switch, good torrent client and tremendous performance levels and reliable download speeds. There are no log policies; however, a minus point is that the session logging policy is not precise.

    NordVPN prices are quite reasonable; a good save for a monthly plan, which is a bit more expensive offering and a free 3-day trial. The packages come with a 30-day money back guarantee. It shows that the best option is the 2-year plan based on the pure value of money.

    • 1 month for $11.95
    • 1 year for $69, i.e. $5.75 a month
    • 2 years for $79, i.e. $3.29 a month

    4. Hide.me

    This is the fastest VPN for torrenting:

    • No associated servers
    • About 35 server locations
    • No associated IP addresses
    • supports 1-5 devices

    Being called the fastest VPN, Hide.me is not an idle one as this VPN provides splendid performance levels, with minor improvements on the usual download speeds. The client is quite accomplished and easier to use, thereby choosing the fastest server available. There is also a rigid ‘no logging ever’ policy with the service, claiming OpenVPN, PPTP, L2TP, IPsec, SoftEther and SSTP (Secure Socket Tunneling Protocol).

    Another major advantage of this VPN for torrenting is the 2GB per month FREE plan, providing a good screening of the service. This is required since the Premium plan with the unlimited data is costlier and hence can choose the freebie before you accomplish. The most suitable one is the Plus plan if the restrictions are acceptable- 75GB data transfer limit, no port forwarding). The packages are:

    • FREE
    • Plus, which charges $4.99 a month
    • Premium, charging $9.99 a month


     Best VPN for Family

    It is equally important to choose the best VPN for family as well, because surfing certain websites may not be safe. If you have kids at home, it is obvious that they browse websites to either watch favorite kid’s program or download games through some unreliable websites. Here, VPN could be quite useful. Let’s look into the top VPN.

    1. Ivacy VPN

    This VPN service enables total online protection without letting your browsing slow down.


    With Ivacy, you can enjoy P2P filesharing with full anonymity as well as great speed.This well-analyzed service includes a lifetime subscription, which lets you unblock and take advantage of bufferless HD streaming of your favorite shows and movies. That surely is a great deal. Overcome the geo-restrictions and enjoy internet by connecting to over 450 servers in more than 100 locations across the world. Having an official partnership with National Cyber Security Alliance, Ivacy VPN builds up cybersecurity as well as education on privacy and awareness.

    As quoted by TrustPilot, Ivacy VPN is a “great VPN app with splendid features at the modest price” and has rated 8.5/10.

    Let’s look at the benefits in general:

    • Enjoy fast and constant P2P filesharing with total anonymity
    • Faster connectivity to more than 450 servers in 100+ locations across over 50 countries
    • Protection against hackers, spyware, and government’s close observation
    • Be anonymous during online activities against spammers and likely thieves
    • Knock over the ISP speed restraining and port blocking
    • Access to the region-blocked content from anywhere in the world
    • Entertain yourself with the splendid features of Ivacy on a different compatible devices
    • Log instantly into 5 devices at a time

    2. Avira Phantom VPN

    This VPN for family enables to browse safely, be from trackers, Logs, and geo-restrictions.

    Do you want to be an Internet illusion? Phantom VPN helps you to surf securely and anonymously by hiding your IP and penetrating traffic via one of the 20 safe servers across the globe. Whether it is the connection from home or to any of the shop’s public WiFi, your identity will be protected as you browse.

    VPN Mentor has rated 4/5, while the VPN Lab rated a 9.5/10 for Phantom VPN.

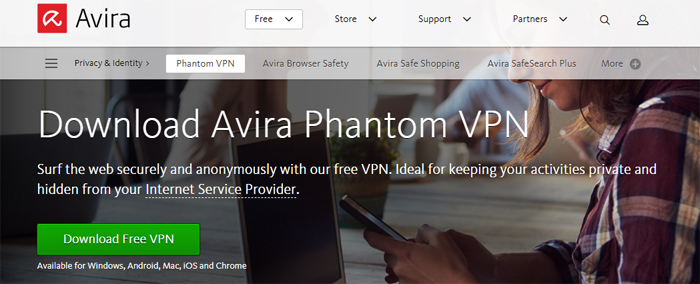
    Let’s look at some key features:

    • Connects to all the devices so you will be protected well
    • Has support for IPv4 & v6 protocols
    • Does not record any logs of your activities
    • Gives access to favorite streaming sites, being free from geo-restrictions via 20 servers across the world
    • Protection from close observations by hiding the IP address
    • Encrypts the communications while shopping or banking through a secure tunnel
    • Features leak prevention of DNS and a kill switch on Mac

    3. Pure VPN

    This is the most reliable VPN for the family.

    PureVPN can be used by three categories of people: Couple, Small Family and Big Family.

    Pure VPN for Couples ensure complete privacy, security, and anonymity over the Internet. They can connect all their devices simultaneously and browse the web safely. An ideal plan for a couple to subscribe for Pure VPN is of 1-year, costing $5.95 per month saving 46% and has a 7-days money back guarantee.

    In case of a Small family comprising 4 members, this VPN service allows connecting with the network through a single family account. Each member can remain anonymous and thus keep their online activities private and safe. The ideal plan for such small family is the 1-year subscription costing $6.95 per month, saving 42% and includes a 7-days money back guarantee.

    For a Big family, with around 8 members, this VPN service lets them connect with the allotted VPN servers. It also helps the family protect the family against all the cyber attacks happening on the internet. The ideal plan for a big family is a 1-year subscription costing $7.95 per month accompanied by a 7-day money back guarantee.

    Compatibility, Server Location, and Features:
    1. Ultra- Private & Secure: Pure VPN plays the role of a bullet-proof carriage, enabling to surf the internet easily, comfortably and safely.
    2. P2P enabled: Break out the restrictions on the internet and get your favorite content with full freedom.
    3. Ultra High speed: Lumps or obstructions in the speed can make the online entertainment into annoying drags. Pure VPN lets you cross all the speed limits easily and comfortably.
    4. Talk to human 24/7: Don’t you hate obstacles in the chats too? With Pure VPN, there are support teams who are pro-active working with full of energy and enthusiasm 24/7 to answer all the complaints and solve the demands.

    Best VPN for Streaming

    It is often irritating to find obstructions while you stream a video you have been waiting to watch, buffering. Isn’t that so? This is due to geo-restrictions. There are some streaming services that help you watch your favorite TV show or a movie online. However, these services will not be accessible by people all over the world. These geo-blocks deny the access from users to use certain content on the website. Hence, the only solution to this is through the best VPN for streaming.

    The main reason for such restrictions is because of the content license agreements. Copyright owners don’t let their media accessed in all parts of the world. So, if someone is trying to watch his/her favorite show or movie they will not be able to stream it. Hence, being a streaming enthusiast, you must have seen these geo-block error messages:


    The only safe way to come out of this problem is the VPN. But why the word ‘safe’? Because many readers wonder if a proxy would help them solve the problem. Of course, it can, but if you are ready to face the consequences of security. Having the best VPN for streaming, you can not only ignore the geo-restrictions but also protect your privacy.

    Top VPN for Streaming

    These are some of the best VPN for streaming. These services provide PPTP, L2TP/IPSec, Open VPN and SSL protocols to enable unlimited streaming. These can be used to access Netflix, Hulu, Pandora, and BBC iPlayer from anywhere.

    • The most preferred and rated one is Pure VPN, costing $2.87 per month with a 74% discount for 2 years.
    • Next comes NordVPN, pricing $3.29 per month saving 72% and is a 2 years plan.
    • IP Vanish VPN costs $4.87 per month saving 46%.
    • PrivateVPN costs $2.55 per month saving 67%.
    • Ivacy VPN is a great deal of 2+1 years saving 83% and costs $2.04 per month

    Need of VPN for Streaming

    People who love to stream would sometimes be frustrated by restrictions applied to the content. Restriction policies and guidelines used by certain countries across the globe are increasing. Moreover, geo-restrictions sometimes bother people who wish to use the diversified content.

    The concepts mentioned above are one of the most critical ones experienced by the streamers till date. However, there are more chances that the future concepts would be more critical than the present ones. If you did not know, these forbidding policies and guidelines can stop you from accessing a specific platform, website or a category of content noticed unworthy of access. Meanwhile, geo-restrictions limit the content to a specific area or region, thus leaving the streamers with limited options.

    Top VPN For Streaming This year

    There are many VPN service providers being dealt in the industry. Analyzing and choosing the best out of these is not an easy task. Hence, to enable getting the decision from the readers, there has been a list comprising 5 best VPN for streaming. The suggested VPN service providers have a robust server network and this means you can surf and stream various networks from different localities.

    Here are the top VPN for streaming with the key features:

    1. PureVPN for streaming

    Having over 500 geographically distributed servers in more than 140 countries, you can stream any video of your like. PureVPN is one of the top VPN service providers with affordable prices. It supports various protocols like PPTP, L2TP/IPSec, and OpenVPN so as to enhance the security and to enable anonymity. This VPN service provider is also adaptable to various devices. This shows that it lets you enjoy your favorite shows and movies on PC, Mac, Linux, iOS and Android devices. With its boundless bandwidth, you could unblock the access to your favorite channels and websites.

    2. NordVPN for Online Video Streaming

    This VPN provides a wide range of servers so as to ensure the access to all blocked websites in a specific region. With NordVPN, you can use Netflix and Hulu by restoring the IP address with another. NordVPN provides boundless bandwidth for faster online streaming, thus supporting different protocols like PPTP, L2TP, OpenVPN and SSTP to channel the data for safety. There are packages which are affordable when compared to other service providers. It has a pro-active 24/7 customer support. Additionally, it also offers a 30-day money back guarantee.

    3. IPVanish for Unblocking VoD (Video on Demand) Streaming Services

    IPVanish is yet another prominent VPN for streaming. IPVanish has one of the firm server networks with over 600 servers set up in more than 60 countries. This means the content can be streamed from over 60 locations via different streaming networks. This VPN service provider assures indestructible security, as it supports PPTP, L2TP,/IPSec and Open VPN protocols. Being priced quite low and with a boundless bandwidth feature, IPVanish plays the role of the finest backup for streaming.

    IPVanish is adaptable with various devices. Hence, you could enjoy the favorite shows on Netflix, Hulu, HBO Go, The CW and the BBC iPlayervia tablets, smartTV, smartphone or similar gadgets.

    4. Private VPN Streams Anything to Everything

    Doubtlessly, Private VPN is considered the best VPN for streaming. This is because it is quite safe, fast and protected. Free copyright materials can be streamed with absolute anonymity along with high-speed.

    During PrivateVPN subscription, it provides a robust 256bit encryption, protecting personal data and information from the hackers. Moreover, the original IP address is hidden, hence making it impossible for ISPs to trace the identity of the user.

    5. Ivacy for Streaming Geo-Restricted Channels

    This VPN service provider gives about 200 servers that are geographically distributed in more than 100 countries so as to allow the access to the content. Ivacy provides support to PPTP, L2TP/IPSec, OpenVPN and SSL protocols for better security.

    Having Ivacy as the VPN for streaming, you can enjoy access to Netflix, Hulu, HBO, Pandora, and BBCiPlayer with a greater speed. With Ivacy’s adaptability to various devices, streaming experience is enhanced. There is no bandwidth limit, hence allowing to stream content as you wish, using Ivacy.

    6. ExpressVPN- To stream your favorite videos online

    This VPN service provider having servers across 87 countries is strongly recommended in case of streaming. As you connect ExpressVPN on the device, you can avoid all the geo-restrictions thus managing with ban issues in respective countries. ExpressVPN has been the best VPN in diverse platforms like Mac, Windows, Linux accompanied by Android and iOS.

    This VPN provides unlimited streaming with the help of boundless bandwidth, thus protecting the data through difficult levels of encryption. Having a choice of distinct packages, ExpressVPN has been the best VPN for streaming to all the streaming fans across the world.

     Best VPN for PC

    Here we take look at the best VPN for Mac and the best VPN for windows .

    VPN Master has been the most preferred VPN service provider for PC or laptops. You can download it for free on Windows 7/8/8.1/10 as well as Mac. VPN Master is a reliable Android app that could be installed on Android smartphones, enabling access to certain restricted websites. You would find it difficult to access Vimeo in your country. With VPN Master app, you can easily solve this issue as the app can crack the restrictions.

    Not having an Android smartphone?No problem. VPN Master can be downloaded for your PC too.

    Features

    Using VPN Master is quite handy, providing relevant features you look for in other service providers. Let us look at each of them:

    • One does not need a username or password to use this service provider
    • Any blocked websites in the country can easily be unblocked using VPN Master, such as streaming website, sensitive website etc.
    • With VPN Master, browsing is safe as it supports anonymity and privacy.

    Having VPN Master, you do not have to worry about the speed for browsing the internet. Besides, the app is compatible with all types of network such as Edge, 3G, LTE, and WiFi.

    Downloading & Installing VPN Master for PC Windows & Mac

    Don’t have an Android device to install VPN Master? No problem. You can still have it installed it on your PC- Windows as wells as Mac. But, for this, you will need an opponent or a competitor for Android so as to install it on the PC. Here are some steps to be followed for the installation:

    Step 1: Download the Android contender or select Memu contender or Bluestack. You can find it on Google search and then download from the official website.

    Step 2: Install Memu on PC so as to install Android on it. Now, you can install VPN Master for the PC.

    Step 3: Download VPN Master from Google or get the APK file called “VPN Master APK” and save this APK Android app to the hard-drive.

    Step 4: Install VPN Master app on the PC by yourself from Memu contender and wait for sometime. You can then see VPN Master app displayed on the on the contender.

    It is not difficult to get this VPN for PC as you could get various Android contenders compatible with your device. If you plan to get VPN from Google Playstore, you should sign in to Google account to download the app.

    Read Also : Create Virtual Desktop without Upgrading to Latest Windows OS

    Read Also : Enable / Disable Windows File Protection & Fix Windows File errors

    Read Also : Enable / Disable Internet Explorer Extensions and Add-ons

    Read Also : uBlock Origin Replaces Adblock plus(Best Adblock Plus Alternative)

    Best VPN for Windows

    In this session, we will look at the top VPN services for Windows.

    1. PureVPN

    This VPN is known to be the fastest VPN service and is quite compatible with all the platforms including most of the Windows versions. It comprises an easy-to-use app for all the devices as the servers are found in more than 140 countries. Having more than a million happy customers, PureVPN assures better safety to all the online activities compared to other VPN service providers. One of the best VPN for Windows .

    Here are some advantages and drawbacks:

    Advantages:
    • Consistent fastness for the internet.
    • Split Tunneling
    • More than 750 servers
    • Boundless data transfer
    • 99% operable time
    • Extensive online security
    Drawbacks:
    • Ad-block would be accessible only on Chrome

    2. ExpressVPN

    This has been the best VPN for Windows. It is a dependable captain in the VPN production as a whole. In case of getting the right VPN for Windows, no other service can match with ExpressVPN. You could easily access any kind of content on the web, in Windows; may it be torrents, Live TV across the country or just browsing Netflix. ExpressVPN is an ideal VPN service for all these activities.

    Let’s look at its advantages and drawbacks.

    Advantages:
    • Zero-Knowledge DNS (Domain Naming Server/System)
    • All the VPN protocols are supported
    • Encoding traffic
    • Web sites can be unblocked
    • Universal privacy protection
    Drawbacks:

    Only 3 devices can be connected by a user.

    Read Also : The ultimate guide to make Windows run faster (Boost Computer Speed)

    3. VyprVPN

    GoldenFrog VyprVPN is founded in Switzerland which focuses mainly on privacy oriented atmosphere. It heads the Windows VPN sector since it provides over 700 servers holding a total of more than 200,000 IPs. When the ISP has suppressed the Internet speed, this VPN service provider beats ISP throttling.

    We will now look at the benefits and drawbacks of this VPN for Windows.

    Advantages:
    • Encodes the internet traffic twice
    • Protects from upsetting advertisements
    • Rigid ‘No logs’ plan
    • Protection for IP address
    • Protection from the leakage of DNS
    Drawbacks:
    • Expensive
    • Variation in Internet speed

    4. IPVanish

    If you are trying to get rid of cyber attacks taking place widely on the internet, IPVanish provides an easier solution for the internet privacy. Having a robust encryption with more than 1000 VPN servers, you could do all your favorite activities on the internet easily.

    Here are some advantages and drawbacks of this VPN service provider.

    Advantages:
    • Torrenting can be done with anonymity
    • Ability to access restricted websites and apps
    • Can login to 5 servers at a time
    • Avail 7-day money back guarantee
    • 256bit AES encryption
    Drawbacks:
    • Is US based.

     5. Ivacy

    This VPN service provider is created to be the best VPN for Windows providing an easy solution for different requirements, which would be- streaming content from anywhere, protection from 3rd party observation, safety to personal data and anonymous torrenting.

    Let us look at the merits and demerits of this VPN:

    Merits:
    • Has no privacy logs involved
    • Boundless downloads and bandwidth
    • 24/7 Customer support
    • Robust 256bit encoding
    • Support for Kodi devices
    Demerits:
    • Unhappy customers because of poor refund plan
    • Cannot avail free trial

    6. Hotspot Shield

    This is one of the top VPN apps, providing both free and paid subscription, thus making it widely accepted by Windows users. Once you are convinced with the service, speed availed, its servers, or even the ability to avoid geo-restrictions, it lets you decide to take up the paid subscription.

    We shall look at the advantages and disadvantages:

    Advantages:
    • Has a user-friendly interface
    • Strong encoding
    • Can log in to 5 devices at a time
    • Web browser access extended for Chrome and Firefox
    • Can avail a 30-day money back guarantee
    Disadvantages:
    • Is mainly based in the U.S
    • Log policy is not legible
    • Does not accept Bitcoin

    7. VPN Area

    This VPN service provider is robust when it comes to privacy, with a rigid ‘No privacy’ policy. This is of Switzerland base, it makes the user more comfortable because Switzerland focuses on online privacy. With Private Internet Access and Hide.me, VPN Area has been a suitable choice as the best VPN for Windows.

    Here are some merits and demerits of the VPN service provider.

    Merits:
    • Includes OpenVPN with 256bit encoding
    • can log in up to 6 devices at a time
    • No log policy involved
    • Bitcoins are accepted
    • Great speed for internet
    Demerits:
    • Sophisticated instructions for download
    • A leak in DNS has been detected

    8. Buffered

    If you are looking for the best VPN for Windows, Buffered is the most suitable.

    This VPN service provider is also located in a country having a great support for privacy data maintenance laws, i.e.Hungary. There may not be a greater number of VPN servers setting to 37, yet, the Windows users cope up with all the available activities using this VPN provider., which is avoiding geo-restrictions, strong encoding, and online security.

    Here are some of the advantages and disadvantages:

    Advantages:
    • Netflix streaming can be done
    • Attractive User interface.
    • OpenVPN with AES 256bit encoding
    • P2P torrenting
    • 24/7 customer support
    Disadvantages:
    • Monthly charges are too high
    • Does not accept Bitcoins
    • Certain connection logs are maintained- Time and duration

    Read Also : Streaming Services – Netflix Vs Prime Vs Hulu Vs Sling Vs Directv Now etc

    Best VPN for Kodi

    In this session, we find some of the best VPN for Kodi, assuring the protection of privacy as well as the safety without putting off the speed and dropping off the streaming experience.

    These VPNs enable you to enjoy Kodi with more safety ensuring that the ISP or hackers don’t poke around your activities. Most Kodi users take up a VPN to hide their activities from the ISP in case of viewing faked content. However, there are some genuine reasons to have a VPN service.

    A VPN encodes most of the internet traffic on Kodi device and transmits through a mediator server in a location of the user’s choice. This enables in unblocking geo-restricted content like BBC iPlayer from countries outside the UK. It guards the users against attacks and weaknesses commonly found in the mediator supplements, simultaneously keeping the internet activities private.

    Read Also : Kodi Vs Plex Vs Emby Vs Popcorn Time Comparison on Depth

    Choosing the Best VPN for Kodi

    There are certain criteria to be followed to choose the right VPN for Kodi. they are as follows:

    • Adaptability to a set of Kodi devices
    • Pace and consistency
    • Safety and logging policy
    • Easy to set up and use

    1. IPVanish

    This has been the best VPN for Kodi. In case the users have no access to Google Play, IPVanish lets them download the APK file from the website and then install it onto the device without visiting the app store. Now, the VPN shows up the app Fire TV app store via Amazon. Linux users have to manually configure VPN.

    There are more than 1000 servers you could choose from, with better speed and reliability in the service to most of the locations across the globe. With the 256bit encoding and no logs plan, there is complete security assured to the users.

    Read Also : Best Kodi Alternatives for Every Streaming Device

    2. ExpressVP

    ExpressVPN has been the most preferred choice for Kodi users, assuring more speed and trusted service. An important drawback for users having Android-based Kodi devices is that these APK files cannot be downloaded from the website without the user’s account being authorized. This means the devices that do not have Google Play and a normal web browser will have to install the corresponding app on another Android device. ExpressVPN provides a tutorial to get set up with Nvidia Shield on the website.

    ExpressVPN is a trustworthy unblocker of geo-restricted services which includes BBC iPlayer, Netflix, Hulu, HBO Now and HBO Go. It claims to have the best-in-class safety ethics, 256-bit AES encoding, and the right updated privacy. In case the Kodi device does not support VPNs, ExpressVPN’s blazed WiFi router with customized software would be what you have been looking for.

    Read Also : Best Streaming Devices – All Top Media Streaming Box on Market

    3. Private Internet Access

    This is a great choice for Android as well as Linux-based Kodi devices. The Linux version has been tested and proven to be working on OpenELEC (Embedded Linux Entertainment Center), a well-known Linux open source for low-power Kodi devices such as Raspberry Pi. These apps are easy to use and are affordable and so is an ideal choice for Kodi users. The APK file can be directly downloaded from the Private Internet Access website, in case the Android device does not have Google playstore.

    4. CyberGhost

    This VPN service provider classifies the servers not only by the location but also by the video streaming services that a user wishes to access. It is more useful for Kodi users so they could stream from sources like BBC iPlayer. However, no Linux version is available, and only Android version can be downloaded from the Google Play. So, the devices running on OpenELEC or an Android version without Google Play would have to manually align the CyberGhost servers.

    One of the advantages of CyberGhost is the ability to unblock the streaming channels and has an additional batch of servers to its expanding network. It also has a great speed and a robust security.

    We have gone through the best VPNs for every category. Each VPN service is ideal for one or other purpose. However, I conclude here by saying that ExpressVPN is the best VPN service provider recommended in the years to come.

  • Best Facebook Ad management tool – Facebook Advertising

    Best Facebook Ad management tool – Facebook Advertising

    Facebook advertising is now the biggest trend so if you are planning for doing a Facebook advertisement then you must read this . Because here we are going to discuss about some of the Best Facebook Ad management tool

    Best Facebook Ad management tool

    Facebook Advertising is a new era of promoting the business. There has been a big difference in sales, may it be a new business, or expanding an existing one. Ever since Facebook Advertising started, companies have been investing a huge amount in creating ads. There are lot of time-saving Facebook ad tools as well as Free Facebook Ad Management Tools that would help you take the business to new heights.

    In this article, we will look into Facebook Ad management tool in detail.

    Facebook Ad Management Tool

    Are you a true fan of Facebook Advertising? Are you in search of the perfect technique to control the promotions on your website?

    Here we present the Facebook Ad management tool , which would surely bring in a lot of differences, as it helps in saving time and money. There are some time-saving Facebook Ad tools which can also increase your Return On Investments (ROI).

    Let us look at some tools for Facebook Advertisement.

    Read Also : View Facebook Full site – Facebook Desktop Version on Android

    Best Facebook Ad Manager App 

    Ads Manager has been in use since 2014, mainly for mobile and similar devices. Recently, an independent iOS Ad Manager app was launched comprising some really important features for advertisers. With the Facebook Ad management tool , we can record the ad performance, modify existing ads, improve Ad budgets and schedules, get push notifications and make Facebook advertisements using the app.

    It is quite exciting as you control Facebook advertisement with the initial repetition of Ads manager on mobile; however, this independent app is more convenient and robust. This Facebook Ad management tool is created for small to medium-sized advertisers letting you create Facebook Advertisement from existing page posts or from certain images and pictures present on your device.

    Facebook Ads Exclusion Targeting

    There are better-defined targeting options to be included on Facebook Advertising platform, thus enabling to trade with lumpy groups, directly to particular individuals. However, it is ideal to exclude some sections so as to present it before eyes of your audience.


    In the Facebook Ad management Tool , enter Facebook’s exclusion targeting, which is a tool to avoid targeting a person twice. For instance, a set of existing customers can be excluded from a promotion related to lead generation, or you could target those who regularly visit your website (as the custom audience) however excluding those who already converted.

    Facebook assures that target exclusion enables to reduce the cost per action or Pay Per Click (PPC), reduce the cost incurred on wasted clicks and to reach the people who would buy or convert. This works with the usual Facebook Advertising as well as the newer roundabout ad format on both mobile and desktop.

    Read Also : Facebook Small Business Advertisement Working and Results

    Best Facebook Ad management tool – Facebook Advertising

    Here is the Best Facebook Ad management tool – Facebook Advertising.

    Qwaya

    Tests on Facebook Advertisement can be performed separately as you like. However, if your attempt is to extract certain intuitions, you would need a tool to process it automatically.

    Qwaya is a paid mechanism comprising a lot of features including scheduling the ad, setting rules based on the performance, automatic rotation of the Facebook Advertisement and an organizer for campaigns. However, the best feature that Qwaya has is that it can automate split testing – A/B testing of both creatives and audiences.

    If the Power Editor is already enabled, you would definitely be aware of the lack of Split testing ability in the image shown. Qwaya enables to evaluate which combination of images, test and targeting result to the best performance of Facebook Advertisement along with the split-testing feature.

    AdEspresso’s Facebook Advertisement Compass Report

    This resembles a report card for the Facebook Advertisement account. If you are an agent, do not worry, because it allows you to choose the account and the campaigns you would like to analyze so that you don’t get messed up with information from all the accounts at once.

    If this ad management tool is already in use to analyze the performance of the Facebook advertisement, the Compass report would seem irrelevant. However, this report could be quite useful for a small business and there has been a huge amount of Facebook Advertising maximization based on the analysis done manually.

    This ad management tool of Facebook has evaluated over $300 million on Facebook advertisements expenses to create organization standards on which the promotions are compared in the Compass report of Facebook Ad management tool.

    Read Also : uBlock Origin Replaces Adblock plus(Best Adblock Plus Alternative)

    Hootsuite Ads

    This is yet another ad management tool which had announced its partnership with Facebook to provide a new way of automatically Facebook advertisements, on the basis of existing basic posts on the Page.

    This management tool for Facebook Advertisement checks Facebook Page so as to find the best ads for the campaign, applying automated targeting and proposing a set of rules to introduce them as the Facebook advertisement.

    Best Facebook Ad Management Software

    Facebook has not only been the largest social media website on the planet, but also one of the most preferred ways chosen by the marketers to promote their Ads to different types of people.

    As we already know that Facebook provides some of the best Ads management tools to maximize the promotion, there are also some Ad Management software catalogs that let you utilize the Facebook Advertisements.


    Adspringr

    This Ad management tool can be of great help if there are so many promotions being run, as it enables you to have a control over whom is it directed to. Other features of this Facebook Ad management tool are:

    • It lets you have different and more meaningful record tracking system than those provided by Facebook.
    • Maximize those reports letting you discontinue the unsuccessful Ad promotions
    • Create reports enabling you to give feedback to the clients

    Facebook Ad Management Tool-Wishpond

    This free ad Management tool by Wishpond is an ideal method of personalizing Facebook Advertisement catalog. This Facebook Ad management tool comprises the following options:

    • Aim at the Facebook contact list to get through a particular population or audience.
    • Easy Ad making tools, allowing the beginners to make a captivating Ad
    • Offers immediate reporting of Ad traffic

    Accomplice.IO

    This Facebook Ad management tool has both free and paid version. The free version lets you maximize the returns in the best way possible. The provision to advertise on most social media websites like Facebook and Twitter makes this Ad tool very effective.

    Catvertiser

    This is another alternative to Facebook’s conventional Ad podium. This Ad tool has the following merits:

    • CPA (Cost Per Action) tender enables to implement the payment for specific pre-determined actions
    • Split Tests allow you to correlate multiple target groups to maximize Ad promotion.


    Facebook Ad Creator Software

    Have you been ‘pulling your hair out’ thinking of ways to create innovative and unique Facebook Advertisements ? Well, here is the solution to free you from the stress. We shall provide a step-by-step guide to create free Facebook Ad designs in a snap.

    Canva

    Using Canva free software you can easily create your own Facebook Ad graphic .

    Step 1: Open the Canva site and create an account

    If you are planning to create more Ad designs and pictures, you need to create an account with Canva. Canva allows saving the images on its site so that the work will not be lost, or to make changes to existing picture.

    Once the account is created you will enter the Home Page where all the design patterns are found on Canva.

    Step 2: Select the Facebook Ad Template

    Here, you choose the desired Ad template by scrolling down to the end of horizontal scrollbar and clicking on Facebook Ad.

    Before starting with the actual process it is important to know that the images in your Ad should not have more than 20% text as declared in Facebook’s Advertising Guidelines. However, there will not be a problem because there is a lot of space for the text in the Header, body and description fields in the final stages of designing the Facebook advertisement.

    Step 3: Deciding on the layout of Facebook Ad Design

    You begin with the Layouts section of the left tab and these layouts primarily used in greeting cards and invitations. However, if you wish to have more than one image in a wide choice of layouts along with multiple frames, you can scroll across the first column to reach the empty layout pattern.

    As you finish choosing the layout, click and move an image into the chosen layout frames from your files or the ones saved for Canva. An important point to be aware of is that the image you choose cannot be cut out, that means you cannot have a transparent background. It has to be a full image to be fit in the whole frame.

    Read Also : Exciting free Photoshop Alternatives for high quality photo edits

    Are you feeling lost without any images in your collection? That will not be a problem because this Ad creator tool has a great collection of images which are absolutely FREE of cost. If you are not contented with these images, there are another set of high-quality images you can have by paying a fee of $1. You could get a variety of images by checking the search tab, starting from Business executives in offices to brutal murdering clowns.

    Step 4: Creating Ads Headline/Slogan

    A heading, subtitle, and body can be added to the text tab or you could choose from a large set of text templates. You need to remember that only 20% of the text can be included in the Ad and hence the text should be of medium size with a slogan or the name of the product or business in the heading. The image should be captivating and bright; with no irrelevant and clumsy text to spoil the effectiveness.

    Yet, if you are using a cut-out image, then you can have a convenient background tab if a simple white background does not attract your eyes. For this, there are another free background templates used with patterns and essences. You can also find high-quality background images for a $1 fee.

    Step 5: Uploading Own Images

    By clicking on Uploads tab you can add your own pictures for use in the Ad. You need not worry about losing them even if you close the site for a while. You can see it later. All you need to do is click Upload your own images bar or pull them from the desktop and drop it into the site.

    Step 6: Finalizing Free Facebook Ad Design

    If you are happy with the final design of the Ad, go to the top right on the page and click on Link and Publish.

    If you want an image for the web, click Image for the web and once it is done it is automatically downloaded from the browser to the desktop. Now you are ready with the new design for the Facebook Advertisement, all using Canva software absolutely FREE.

    Read Also : Safeguard Facebook Pictures-Prevent profile picture downloading

    Facebook Ad Management Services 

    Facebook Advertising lets the advertisers have the capability to show the most targeted advertisements to over a billion active users of Facebook worldwide. Facebook is the second most accessed social media website and the most widely used application with an average of over 125 million distinct users in the U.S. A sample of pursuing options accessible via Facebook Advertising comprises the following

    • Location
    • Age
    • Gender
    • Language
    • Education Level
    • Nationality
    • Income
    • Net worth
    • Homeownership
    • Life Events
    • Parental Status
    • Political Leaning
    • User interests
    • Purchase behavior
    • Device usage
    • Employer

    Facebook can provide advertisers with distinct targeting alternatives via the First-party data disclosed by Facebook users accompanied by Facebook activities, and Third-party data purchased by Facebook.

    Another feature of Facebook Advertising is the Custom Audiences. This feature enables the advertisers in creating custom groups of Facebook users for marketing via:

    • Customer lists: Matching emails, contact numbers, user IDs on Facebook or the mobile advertiser IDs for people on Facebook
    • Website traffic (Remarketing): Creating a list of people visiting the website or certain web pages
    • App activity: Creating a list of people who took certain actions in the app or game

    The Custom Audience feature of Facebook Advertising is a robust technique to reach the people who have already shown interest in your products or services. This is a cost-effective way of Facebook Advertising.

    Let’s now look at one of the Ad management services of Facebook- Marketing Mojo:

    What makes Marketing Mojo Stand Unique in Facebook Advertising Technique 

    Marketing Mojo believed that Pay-Per-Click (PPC) over Custom Audiences has been quite competitive when compared to normal targeting in Facebook, hence leading to lower cost in conversion and higher Return On Investment (ROI).

    As other Social Media advertising groups focus the most on engagements such as the Likes received by an Ad or a Page, Marketing mojo focuses on the results influencing company’s end result. Being a part of Facebook Ad management approach, Marketing Mojo develops –

    • Strategic Alignment & Goal Development

    Marketing Mojo discusses with the clients to make sure that the marketing strategies are understood by them and how Facebook Advertising plays a vital role in achieving these goals.

    • Reaching Your Target Audience

    Developing a buyer role to allow overcoming careless and targetless expenses on Facebook, thus allowing more targeted advertising to the right audience.

    • Conversion Focused

    The concept of Marketing Mojo focuses more on direct-response rather than engagement focused. This involves optimizing volume conversion or the ROI by simultaneously reducing the cost of conversion.

    • Daily Optimization

    Facebook Ad management is not a form of advertising that you create today and forget the next moment. It requires a regular check and controlling the promotion so as to make improvements as and when required.

    • Test, Test & Test

    Developing and testing the changes in landing page and Ad innovations to influence the creative components delivering the best results

    • Reporting

    -Monthly reports set in detail, exhibiting the developments occurred till date on the Ad promotion standards as well as the present tasks implemented to enhance the performance.

    -Logical judgment to make sure the traffic and the ROI are correct

    • Innovative Thought Leadership in Pay-Per-Click

    Marketing Mojo performs more than being up-to-date on the latest changes as well as the available possibilities on Facebook Advertising. Marketing Mojo is in the limelight in developing totally new and unique techniques which could completely remodel the marketing performance of the clients.

    CyberMark

    This is another management service related to Facebook Advertising, whose Social Media Marketing based in Phoenix use Pay-Per-Click promotions for advertising so as to take the small business internet marketing to higher levels. Management services by CyberMark include the following:

    • Creating Landing Page
    • Call Tracking
    • Audience targeting
    • Facebook Advertising copy and pictures
    • Installing multiple advertising campaigns
    • Weekly scanning and support for the best ROI
    • Performance reports create on monthly basis

    Free Marketing Tools

    Ad promotions on Facebook and other Social media websites have turned smart in selling products and services and get more audiences quickly and through short steps. It’s more convenient with MailChimp, as it gives clarity on what Ads would get your money sack full and pull more customers to your website.

    The great advantage with MailChimp is that they do not charge you extra for posting Ads. In fact, it would be the same as you directly perform Facebook Advertising.

    Ad creation is Easier now

    With processes of Facebook Advertisement, the platform is the same to create the Ad. You can easily and quickly make Single image or roundabout Ads with certain photo-editing kit included within the app along with robust targeting preferences.

    Smart Targeting Supported by Your Contacts

    As you have email lists, subscription activity, customer purchase data, you could make them more useful. Focus on familiar details and make new customers. Make full use of Facebook’s existing users and audiences get more customers, people who have liked your products or services but haven’t subscribed to your email.

    Look what you get for the money

    Besides the standards such as reach, impact, clicks, and commitments, the returns on the Ads can be tracked so as to get guidance in spending. Users related to e-commerce can have an easily understandable report, showing the details about the items sold and the customers achieved.

    HootSuite Ads

    New advertising mechanism from Hootsuite enables businesses to easily and quickly benefit high performing contents on Facebook.

    In May 2015, Hootsuite, which is the most immensely used social relationship podium, launched Hootsuite Ads.

    Hootsuite Ads offers an easy method of broadening social influence. Social media consultants and content marketers realize that social media is a robust approach, however, making Ads and the process of managing is quite tough as well as time-consuming. Here, the real importance of Hootsuite Ads is revealed. HootSuite is the first tool ever to have provided mechanization to ease the advertising process.

    Let’s look at how HootSuite Ads prove to be helpful to its users.

    • Grow the business
    • Create high performing Ads
    • Find right audience
    • Simplify Ad management
    • Control Ad Spend

    Users of HootSuite can easily access HootSuite Ads for Free via a console to create Facebook campaign posts.

    Qwaya vs Adespresso

    In this section, we compare these Facebook ad management tools. As most people wanted we are here comparing between Qwaya Vs AdEspresso

    • Qwaya is the solution to create Ads in a short span of time.

    WHEREAS

    AdEspresso is used for performing detailed analysis and maximization on the basis of days and weeks.

    • In case of Qwaya, more focus is on the program along with the prospect to create a certain amount.

    WHEREAS

    AdEspresso focuses more on amateurs and bonuses.

    • When it comes to price plans, Qwaya has two plan packages. There is a Premium deal costing $149 for the user. If you choose a Business plan, $249 offers five distinct licenses. If you need to have a personalized package custom requests are also accepted.

    WHEREAS

    AdEspresso comes with three packages – Base, Premium, and Elite. With $49, $149, and $299 the required package depends on your budget. For instance, a budget between $10,000 and $50,000 need the Elite package. However, if you spend more than the present budget, there is a fourth plan called ‘Enterprise’. This package has no limits or restrictions and the cost is not above $500.

    This article has covered topics like Facebook Advertisement management tool, Facebook Ads manager apps, Free Marketing tool, Facebook Ad management services, the comparison between Qwaya and AdEspresso.

    Hope the article was informative and interesting. Have a great time advertising.

  • Roku Tricks-Must Try for streaming success (Roku user manual FAQ)

    Roku Tricks-Must Try for streaming success (Roku user manual FAQ)

    Roku Tricks 

    Roku has been introduced as the fastest and the most powerful streaming player available. It has been loved by most youngsters to watch movies and their favorite TV series and also to play games on HD TV. If the space in the Roku player is insufficient, we can use an external memory card to store their most loved programs or games and can insert into the slot. Roku streaming stick avails 1500+ streaming channels, which can access more than 200,000 movies, games, sports and much more of entertainment.But there are so many things you don’t know about this streaming device so here is all the amazing Roku tricks.

    Roku is easy to connect to any system having HDMI port.

    Roku TV Setup: 

    To set up the Roku TV, at first, we need a Roku Set-top box and HDMI cable to which the device has to be connected.

    Step 1As the Roku box gets connected, we get to see the following display on the TV screen:

    There is a small button behind the Roku remote. When it is pressed, it gets connected as well.

    Step 2: Make the Internet connection Settings. There are two options: Wireless(Wi-Fi) or Wired Connection;           which is Ethernet. 

    Step 3: Set the Time Zone

    Step 4: Activate Roku by linking to its website


    This step is very important and necessary as it enables in importing the favorite channels on one page or  screen. One needs to create a new account if they have no existing accounts and to make payments.

    The code is entered to link to the Roku account. Once the code is entered Submit button is clicked, it shows a page where we need to register, in case of a New User of Roku.

    PIN has a vital role in verification of authenticate installation of Roku channels.

    Step 5: Once the linking is complete, the Roku box setup procedure on TV is complete.

    There is another way, exclusively for the Developers, to enable Developers Mode, by pressing Home 3x,           Up 2x, Right, Left, Right, Left, RightThe whole set should be processed in 10 seconds.


    The link further opens, from the Web browser, to install the channels into Roku, however it does not download    from the store. The link is based on the IP address generated as we connect to the Internet, and it changes from  time to time. A password has to be setup so as to make the Roku frame work through IDE.

    Step 6: In the final step, a pop-up appears, as a the web browser is opened with the link; wherein the username,     by default being rokudev is entered.


    How Roku Works:

    Roku is a digital player, usually placed near the television. It receives the digital transmission from the broadband internet via Wi-Fi signal or Ethernet cable. The signal is processed and displayed onto the TV screen. A remote control is used to select the program and to control the signal.This is how roku works.

    To set up Roku, the device is plugged into the electrical socket . The device is then connected to the home data network, either with a wired connection or using the built-in WiFi receiver. Finally, it is connected to the television using different cable types. One can choose from the type of HDMI, composite, or in the top of the line model, component video. An audio can also be sent to the receiver using standard RCA stereo cords in all models, or      using an optical digital cable with their top of the line unit.


    Types of Roku Digital Video Players:

    Roku provides three different Roku types/models:

    1. Roku HD: This model being the base model costs $59.99, streaming the content to the television at 720p,   the lower of the two high-definition television standards.
    2. Roku XD: This Roku version falls in the middle of the line,selling at the price of $79.99 including free shipping. It has a better remote, with enhanced WiFi capability, and 1080p output. This model also facilitates instant replay.
    3. Roku XDS. The top of the line model costs $99.99 including free shipping; supporting component video     and optical digital audio outputs. With this model, USB port can also be used in playing back media from    memory sticks and other devices.


    Before buying this streaming stick one must be pretty clear about the Pros and Cons of Roku .


    Roku Tricks- A Few Top Chosen:

    If one has been using Roku for quite some time, but still have not known much about this amazing player, then you got to know that it can do more Roku Tricks that you ever would imagine! So, let’s get to know about the real magical things Roku could do.

    Roku could be just a streaming stick or a set-top box, it delivers incomparable video quality on your TV set, for instance, Netflix, HBO, Hulu etc. May it be the on-screen keyboard… or the default interface theme…. all these could be improved.

    There are ways to have a great experience with Roku as a media player, rather than just using the default   provisions. Here are a few Roku Tricks:

    Using Phone as Roku Keyboard

    Nothing is more annoying, than using remote to operate the on-screen  keyboard. For instance, to sign in to Netflix account, could be distressing as it would take time; in searching the movie or the actor’s name.

    Good news is that there is an easier way to fix this; using your phone as an alternative. Roku apps, either in    Android or iOS platform takes the role of Roku remote, and even providing a keyboard to make data entry in a   faster and easier way.This is the method to use mobile as Roku keyboard.

    Using phone for roku voice search 

    Did you know there is a faster way than than typing on the keyboard? Yes, it is our voice. If you have a Roku 3($79.85 at Amazon) or Roku 4, it gives us the joy of voice search on roku , which can be operated through Roku remote.

    If you don’t have these latest versions, don’t you worry; the Roku app avails its own voice-search capabilities. So,    for instance, you could rather choose to say, “Leonardo DiCaprio” than typing over the keyboard and wasting time, and find his available movies.

    Streaming media from phone or tablet

    If you wish to show the collection photos and videos taken at the recent wedding, graduation, soccer game or zombie escape room stored in the phone or tablet, show it BIG,on the  TV screen. The Roku app also enables to cast photos, videos and music from your mobile device to the Roku device. Just start the app and tap Play On Roku. One can choose the type of media to be streamed, then the specific media. BINGO! Watch it BIG from a Smaller device.

    If you want to advance the way of enjoying the media, have a copy or a Reflection of the phone or tablet onto the Roku device.

    Turning the Roku Remote into Universal Remote

    If you are a true fan of Roku, you would definitely love the design of the remote this device has, especially the shortcut buttons for Netflix & Amazon likes. However, the lagging point of the Roku remote is that it cannot control the TV.

    However, there is an option to program a Sideclick. Provisioned for the different streamers such as Apple TV      and Amazon Fire TV, this clever add-on, as described in the best possible way, puts itself beside your Roku    remote,  thus adding a row of readily available programmable buttons: power, volume up/down, channel up/down, input and A/B  last available for whatever functions you want.

    The Sideclick starter kit for this streaming media player is sold at $29.99  comprising four adapter clips to accommodate the majority of Roku remotes. It’s a quite an option for those tired of use-and-throw remotes.

    Read Also : Connect dual displays / monitors to one computer on Windows & MAC

    Organizing Channels

    As the channels added to the Roku library gets more, there will more confusion in finding the favorite ones. Here is when one need to find some way to reorganize their library.

    The Know-how:  Find a roku channel to be relocated, e.g, HBO Now  and highlight it with the remote. Don’t select it completely; just move the cursor over it and it gets highlighted. Next, press the Option button on the remote-  looking like an Asterisk, then choose Move Channel. Now use the direction pad to move the icon accordingly, and observe as how others move out of the way.

    Once the location is set press OK to complete the procedure. Repeat when required.

    Reorganizing Channels in Roku App

    There has been an update of the Roku app with a great feature; it is the Channels screen, just like the one seen on TV, making a much faster access to the favorite channels.

    However, it cannot be easily understood as to how the channels are organised. This is because the app cannot be used to directly organize. One has to hit up the real Roku on TV. Then just follow the steps shown in Organize  your roku channels. Or, if you go through in detail, check out How to organize your channels in the new               Roku 4.0 app.

    Choosing A New Theme

    Not finding the default interface theme that attractive? No problem, everyone need not like the color Purple  If you venture into the Settings menu and choose Themes, you’ll see a handful of other options.                                                                                                  

    To be even better, as you select Get more themes option, Roku Channel Store’s Themes collection is displayed.    Themes can be browsed online too. Here they have a huge collection ranging from Golf to Garfield to Star Trek.   The bad news is that, these extra-features are not for free. Their costs range from 99 cents to $2.99.

    Installing a Screensaver

    Are you really irritated by the boring logo of Roku playing over the idle screen?  Well, we shall have some interesting screensaver instead. When it comes to selecting the theme, get into the Settings menu and choose Screensaver, enabling a lot of options. When choosing a different theme on roku , there would be other screensaver options too. For instance, When Nebula theme is selected, it displays a Digital clock in place of the Roku logo.

    Renaming Roku

    There could be that a person owns more than one Roku device. In such a case, it would be more sensible in naming each of them differently. To make Roku being identified easily, based on where it is kept, it could be named as “Bedroom Roku” and “Living Room Roku”  rather than the simple Roku 1 & Roku 2.


    There is a lagging point renaming the roku device. You cannot rename using the app. You have to sign in to my.roku.com, then go to MyAccount page.  Scroll down to see the list of connected devices; click Rename                  next to the one to be changed. If confused with the name, refer to the app regarding this,

    • tap Setting>Switch Device, to see the set of connected Roku
    • look for the serial number
    • match it with the one shown in the portal. 

    Read Also : The ultimate guide to make Windows run faster (Boost Computer Speed)

    Installing Private Channels

    Besides the usual mainstream channels such as Netflix and Hulu, Roku supports private channels too.Now, you would surely ask if it is coded as “Adult”. Answer could be Yes and No. Besides these private channels, there are a variety of family-friendly options at Roku-Channels.com, RokuGuide.com, StreamFree.tv and RokuChannels.tv. One great option is The Silent Movie Channel, enabling selections from the likes of Charlie Chaplin, Buster Keaton and Rudolph Valentino. To add a Silent    movie channel, head to Roku’s My Account page in your browser and click Add a Channel, then enter the code ROLLEM.

    The channel should be added automatically to the Roku device within 24 hours,; however you should force on it      by going to the Channel Store on your Roku, then exiting back out to the main menu.

    Read Also : Unavoidable Parental Control Apps ,Tools to monitor children

    Finding a Lost Roku Remote

    Although the design of the Roku remote is quite attractive, it could be easily  lost because of its size. If you are lucky to have a Roku 4 ($96.95 at BuyDig.com) or Roku Ultra, it is more easier  to find the lost remote. Both models have a button on top; when pressing it, the remote makes a sound.

    If you wish to know about the ways to choose the type of sound it makes, Check this: Quickly find a lost Roku remote with this trick.

    Here we have learnt a few amazing Roku tricks on how Roku device can be used.


    Roku Hacks- Top 10 :

    Roku has been the most popular and the demanded brand among all the set-top boxes, dongles and the        streaming sticks used. Imagine those stunning 4K and HDR picture quality with advanced remote control,                    fully loaded with movies, videos and television series episodes, 3,500+ channels, private listening system                and so on. If these could make you go ‘On the toes’ with excitement, we assure you, these Roku Hacks could make Home entertainment even more enjoyable.

    Let us explore a few interesting ways of enjoying Roku:

    Finding Hidden Roku  Channels

     There are a few “Deep Secrets” stored in Roku streaming player, which should be screened carefully with high privacy. Such channels are normally not shown in the Channel Store which is displayed by default. To view, go to Add Channel , which would connect to Account page. You need to log in using Roku username and password, add the access code for the private channel. Bingo! It gives a link to the updated private channel’s access code.

    Plex roku

    As Plex put off its sign-up rates,having a stand-alone server to the Roku device makes a great impact. Plex enables customization all your streaming content completely, along with summary and extracts for better understanding. It allows to arrange all contents, to watch them from the portable devices.You can share Plex with family and friends. To do so, download the app by going to Preferences > Connect Plex Account > verify PIN code. Here we go! It also avails a whole lot of skins and themes to choose from.

    Smart Control Roku

    Have you got enough of the same old remote? Feeling cozy hanging on to smartphone? It is time you catch hold onto the downloadable apps iOS,Android,Windows or Linux. It enables screen mirroring in most of the Roku models.

    Instant Notification

    Doesn’t this get you on nerves when an episode of your favorite program keeps you  waiting? Don’t lose your hair pulling them out with anger by checking the manuals every time.  Roku can be set to “notify” on a new available show, video or episode . Just go to the main menu, select My Feed, and search movies, shows, actors, singers, and directors you wish to follow. Roku would automatically inform on anything new coming up.

    Cloud Music

    Not interesting in listening to Pandora or Spotify? Get your own music media like MP3 and video files. MP3Tunes are easily installed into Roku Channel Store under MUSIC. It enables to stream directly from the MP3Tunes servers straight to television. Now enjoy 10GB for free— Time to party! So, when you want Full on entertainment at home, this channel could be set to link in the music straight from your TV set along with videos  or themes.

    Share Memories

    Have you gifted a Roku to your parents, girlfriend or your kid living elsewhere. Did you know that this streaming device lets you share memories with your loved ones? Your dear ones could be updated with new family photos and videos by simply downloading the Roksbox channel on Roku and Dropbox app on their PC or tablet. Folder can be shared through Dropbox and lets them instantly get to have a look at your photos, videos,  and other downloads which they can play directly to their Roku.

    Roku Live Feeds

    Now, you can directly watch the World Cup to UFC Fight Night, NFL, and other entertainment showcases LIVE!Directly from the stadium or arena somewhere, from your cozy couch in living room.These LIVE channels could be accessed by installing Ustream Channel (access code: IN4DN) and access the most watched    sports events, news updates, live concerts, gala and other live streams.

    Keep Track on Roku

    It is observed that the channels are arranged in the way they have been added. However, with Roku,      these most watched or frequently checked channels can be tracked. Choose Options on the Home screen and rearrange in a way that all the favorite channels would be on the top in the channel list.

    Roku Screensaver

    Have you ever imagined have the huge flatscreen as a Wall-art? Well, make this imagination come into life!There are a hundreds of channels to choose from, for those amazing screensavers- Christmas Winter, Weather4us, Aquarium, Cities At Night, Landscapes, Kittens and other animals, Beaches, Fantasy, and so on.  Just check the Screensavers and apps to get the ones you want.

    Read Also : Hard and Soft Reset Roku Manual – Fix Frozen Roku Streaming Stick

    Hope you have got the Best of Hacks. There have been many hacks launched everyday to make your Roku  experience far better than how it is for now. You can always update yourself with the latest of Roku Tricks & Hacks. 

    Enjoy Roku with more Tricks and get Hacked”. 

  • Facebook Small Business Advertisement Working and Results

    Facebook Small Business Advertisement Working and Results

    Everything on earth has a need but to arise a need we need to advertise . For a small business advertisement expenditure is too high but a great method to attract customers . Here Facebook Small Business Advertisement makes it effective and budget friendly .So let’s look into detail about FB Advertisement for small and medium business owners.

    Facebook Small Business Advertisement- Working &

    Results

    Internet and Social Media has been on the trend to promote small businesses. Surprisingly, they have shown great results. Among all the Social media websites, the most successful one is Facebook. Facebook Small Business Advertisement has helped youngsters to bring themselves up as an Entrepreneur. No matter what business it is, you can always advertise your small business on Facebook.

    Let us learn more about Facebook Small Business Advertisement.

    If you are avoiding this chance by choosing paid Facebook ads, then it is a loss to you guys .

    Read Also  : Safeguard Facebook Pictures-Prevent profile picture downloading

    Facebook Small Business Advertisement

    Ever since people started Advertising Small business on Social Media, a majority of the marketers say that Facebook has given them the best returns when compared to other social platforms.

    Are you new to creating a Facebook ad for a small business? We are here to help you out. Let’s begin :

    Have you tried boosting a post on Facebook? If Yes, you are already on the track of advertising. However, if you are completely new, you could activate the advertising tool to get accustomed.

    You can see a dashboard, wherein ad campaigns can be created and monitored, called the Ads Manager. There is a Power Editor tool, browser plugin giving access to certain advanced features thus making it easier to edit bulk ads.

    In case of beginners, we will consider the standard interface. Facebook has a three-level structure, comprising Campaign, Ad Sets, and Ads. As you go to the advanced level of advertising on Facebook, the structure gets more importance. In Power Editor, it is more built-in, to advertise your small business on Facebook.

    Read Also : View Facebook Full site – Facebook Desktop Version on Android

    Defining Ad’s Objectives ( Advertisement objective on Facebook ) 

    Facebook Ads are different types, and goals should be set based on these types. Wish to drive traffic to the website? Enable apps to be installed? Wanna increase the number of Likes on the page to have a larger community on Facebook? You need to understand that, there would be certain objectives as a part of the total marketing plan, and as a result, there will be advertisers on Facebook who would run more than one ad type.

    The ads mentioned here can be easily explained. Website conversion ads such as tracking actions taken by people after seeing the ad, other tasks like buying a product, registering for an event or just viewing some Pages. For all these, you have to create a conversion-tracking pixel through Facebook, which is put on specific pages on Facebook.

    When you choose ‘Clicks to a website’, you can add Call to Action button to the ad like “Shop Now”, “Learn More” or “Download”.

    Read Also : Google Maps List Create, Share and Edit on Desktop & Mobile Now

    Placement of Facebook Advertisement 

    These ads appear in the News Feed section on Facebook, both – within the Feed as well as on the right sidebar. These News Feed ads receive more engagement are will be effective for the beginners in posting Facebook ads for small business .


    No matter what type of ad is chosen, to have the ads shown up in the News Feed, it is very important that you link it to specific Facebook Page. On the other hand, if you do not have a Facebook Page, the ads can only be placed on the right-hand side of the News Feed.

    It is ideal to test on different versions of the ads, like changing the images and the copy to check how they work, These tests would surely bring a huge impact to the success of an ad.

    Targeting the Right Demographics for Fb Ad 

    After creating the ad, you can find different ways to target the audience. You must always be focused about the way to target the right demographics for Facebook Advertisement . Choosing a wrong customer makes you to loss the chance of spreading the ad to the right customer .

    • By Geographic Area and Adding Filters for Age and Gender

    You can see a “More demographics” drop-down list, allowing you to target by additional descriptors, like Number of children in a family, Marital Status or even industry in which person works. 


    • ‘Interests’

    An ad can be targeted on Facebook users based on the Likes and interests of the audience, including the options from which they can choose categories like “Health”, “Music”, “Technology”, “Home Decor” and so on.

    It is really effective to target specific Interests sharing people on Facebook advertisement to get more result .

    • User interaction with other Pages

    This option can be related to the above strategy. For instance, if the target is on people interested in Arts & Culture in London, you could select the location Tate Modern or the SouthBank Center. For this, all you need to do this, enter the name of the company or brand, and if there is a related Facebook Page, it has to be enabled as one of the options in the list. Other options to find specific Facebook Pages are

    • Custom Audiences
    • Look-alike audiences

    Custom Audiences option enables in targeting the existing customers from people, generally on Facebook. You can find different ways to create Custom Audiences. For instance, You can create via email Newsletter list, or place a tracking pixel on the website so as to advertise to people already visiting the site.

    Look-alike Audiences are a set of Facebook users, suggested by Facebook, making it similar to one of the Custom Audiences. According to the words of Facebook, Look-alike audiences “let you get in touch with new people who would be interested in your business, since they are similar to Customer audience.

    • Set Budget Limitations

    Once the ad is created the target audience is selected, you now have to specify the budget. There is no such budget which fits all the ads. It is ideal to find out the value of the desired action; i.e.the value of each new Facebook fan in the business, the money you wish to spend so as to increase visits to sites or conversions.


    If you plan to start funding, the ideal way is to set a small budget and test different tricks. Once it proves effective you feel confident in the response, you can gradually increase the budget. With most of Facebook Small Business Advertisement, there is an option of Pay Per Click (PPC). There are advanced options, but finally, the decision is yours. Thinking about which one to choose ? Well, it is the right time to think about the objective in total. It is recommended that you provide the link to your website so that they visit the site, the Pay Per Click would make more sense rather than just an impression.

    But if the cost per click you going to receive is less than the pay per click then the profit from Facebook ad is reversed to loss .

    so you must be always having a knowledge about ideal Facebook advertisement budget

    Setting up Facebook Ads 

    As you specified the budget and set the Start-End dates, or let it run till you manually stop, your Facebook Ad for Small Business is ready to work its magic. The performance of the ad could be monitored using Ads Manager dashboard. Besides, if you want to bring in more visitors to the website, you need to track the links using Campaign Tracking in Google Analytics to gain more understanding.

    Read Also : Google Datally App to Control Mobile Data & WiFi Finder

    Free Small Business Advertisement on Facebook

    Over the past couple of years, Facebook has helped to advertise small businesses for free. And, to the surprise, it has been a huge success. Free Facebook ads on small business have been a great help to the new entries in the marketing field.

    Facebook marketing truly is a powerful instrument to promote small businesses. It is found that after setting up, most of the owners are not too keen on promoting the business via the Facebook page. This is because they have no clue of what news to post or feel that spending time on Facebook Ads is not worth it.

    Are you among these people with similar thoughts?

    If yes, think it on the other side. Advertise your small business on Facebook and make yourself feel that it is fun, connecting with current as well as potential customers, and stop thinking it as a nuisance or a waste of time.

    When you take the first step into the Facebook Small Business Advertisement, you need to make sure that making optimum use of Facebook by organizing all the social media profiles into one program.

    For those who feel that Facebook Small Business Advertisement is not worth, we shall let them know the important advantages of using Facebook advertisement for small business and medium business :

    • It is FREE: No cost involved in setting a Facebook Business page; besides it is free to post and share content . If you have been looking for ways to get Free advertisement on Facebook then you must utilize this .
    • Products and services can also be promoted: As you get a fan group, your products can be sold to them without any cost of marketing. Your fans could be updated with some upcoming events or deals in your business
    • Interact and stay connected with your customers: Facebook is an effective platform to interact with your customers, get to know their views and opinions and respond accordingly. Post pictures and status messages to inform people about the business updates. This way, you can stay connected with your existing as well as potential customers, and you can keep a hope that your customers will always rely on you for their next purchase, and not think about the competitor.

    Read Also : Identify Spy Apps on Mobile that Hacks Bank Account

    Facebook Small Business Advertisement – How to Enhance Facebook Page

    The first step you would take before you advertise your small business on Facebook is creating a business profile page in the most impressive way possible. This not only helps you get people to like the page but also have an extra benefit, thus enhancing chances of getting higher rank in Google Search’s results.

    In Facebook Small Business Advertisement, your page should be set in a way that when people visit your Business page, they should get the relevant information such as the upcoming events, new stalls opening up, sales coming up in town and so on.

    When considering Facebook Ads for Small business, there are some steps to set a strong business profile. Let us look at them.

    • Use keywords in the “About” section : Keywords let people about your business with more clarity. For instance, if the Facebook ad for Small business is a Pizza Restaurant, then the apt keyword will be “pizza” and “Italian food”. Describe in detail and use maximum characters as allowed by Facebook. Completion of the section not only allows the visitors know more about the business but also informs certain search engines like Google. Let us look at an example of a Facebook Ad for Small Business. This is an important method to increase your Facebook page views and reach .

    • Claim a Vanity URL : When a business page is created, a web address is chosen, like www.facebook.com/yourbusiness , which gives a professional and branded feel to the page and the URL can be easily recognized by customers. Unless it is changed, this URL remains as a set of numbers which creates confusion and the customers will not able to identify your business page. You may be reminded of this important fact that the URL can be changed only once, so make it impressive and easy to identify.

    Say our brand facebook page is named as https://www.facebook.com/maccablo/ . Like this you can create facebook page for your brand .

    • Choose the right category : When you begin to advertise your small business on Facebook, you need to make sure that the category mentioned, represents your business. In case of local businesses, there should be a category as “local business” and then be more specific about the business type by selecting 3 categories. For instance, a Beauty Salon can have 3 subcategories like Ladies Salon & Spa, Men’s Salon and Unisex Salon.

    Read Also : Bothie feature on any Smartphone – Best Bothie apps

    • Get Reviews : As you advertise a small business on Facebook , getting more positive reviews is an ideal method to get more visitors to your business page. You could ask the regular and loyal customers to drop in a review, you could provide discounts to people who regularly write reviews on your page. You may note having reviews posted could take your page into Google or similar search engine result pages.


    Read Also : Samsung Pay Guide with Exclusive Samsung Pay FAQ

    • Choose appealing pictures : In Facebook Small Business Advertisement , setting a cover photo and a profile picture will be the first things that would catch the eye of the visitor. Hence, it is very important to have uniqueness in choosing the images. You can also change the pictures according to the present context to make the customers feel that your business is creative. Change the profile picture based on the upcoming events or the recent milestone crossed. For instance, if your business is an online bakery, you can have a cover page like something that is related to a variety cake or pastries in your bakery .

    How Facebook Small Business Advertisement Works ?

    Advertising a small business on Facebook helps you reach any audience. Social Media is not a mere thing that you can easily ignore. Hence, Social Media is on trend for promoting small businesses, and the most popular one is the Facebook Small Business Advertisement. Here we will see how Facebook small business advertisement works .

    If you have been avoiding an opportunity to free small business advertisement by choosing paid ads, it shows you have been out-smarted before. This is one common problem faced by entry-level advertisers with a false belief that getting to know the basics of Facebook ads for small business is an easy task. Well, the truth is that it is not quite easy.

    Facebook’s introductory Ad products have created a trouble due to its ease and directness, that any motivated Social Media Business owner can enter Facebook and get to know about boosting a post. However, there will not be any improvement in the sales if you use a default or a normal feature of “Boost post“. The result is that of an unprofessional Facebook advertiser having a feeling of overreaching $5 and a $10 here and there. This would leave others to drop their jaws asking- How did this happen?

    Facebook Ad For Small Business : How the Magic works

    When it comes to advertising a small business on Facebook, boosting the post more reactions, shares and comments are accepted. However, if your goal is to get the sales with the efforts on Facebook ads, then you will have to offer something which is free, or something priced well in a way that is sold easily to the target market.

    • Setting up an audience

    This is performed within Power Editor option in Facebook, wherein audience can be customized by including or excluding the users on the basis of Age, Location, Relationship Status, Job Title, Page Empathy (user “likes” pages similar to yours) and so on. You may note that Power Editor is an area where the real advertising takes place. On the other hand, Boost post would only increase the reach among the people who Liked your page. Power Editor can do much more- Create a custom audience, Advertising on Instagram and also test many versions of the same ad.

    • Creating a free offer for the audience

    This would easily earn the customer’s trust. It could be a free eBook, a course, membership for a free trial, or even a physical product. The goal of the Facebook ad for small business is to bring the user to your page and get their email address so as to avail them a free offer.

    • Offering small boost ups

    As the user responds to the free offer, you can show a boost-up product. The profit margin on this boost-up should be priced in a way that it covers the actual cost of the Facebook ad. With an assumption of having the right conversion rate, the result would be acquiring a free lead.

    • Selling through Email, Re-targeting , etc

    As you earn the lead’s trust, it is time to sell the actual product. This could be done through email, phone or similar direct methods available from free offer. you could also use Facebook Pixel to retarget the user with ads. With the usage of Facebook Pixel, when a user visits a page, for instance, the completion page from the free offer, they can be tracked, thus enabling to serve the ads mainly set for them.

    Read Also : View Twitter Full Site – Check Twitter Desktop Version on Android

    Facebook Small Business Advertisement : Results of Advertising Small Business on Facebook

    If you are thinking whether Facebook ads really work or not . Then here we are detailing about the result of Facebook Ad .Here you can know whether the free Facebook advertisement for small business really work or no .

    Also how to get good result from free advertisement from Facebook .

    Setting Proper Goals

    Before spending money on Facebook ads for Small business , you need to think about the objectives of the ad promotion. Once the goals are set, you can evaluate a better budget.

    The main goals of a Facebook Ad promotions are:

    • Building a targeted fan-base
    • Promoting owned content
    • Setting conversions
    • Promoting a local business

    Building a Targeted Base

    As you begin with the Facebook ads for small business, your initial step is to grow the audience for your Facebook Page. Your fans would read the content and would buy from you than the non-fans. In order to get the best out of a small budget, you need to concentrate on pulling those people whom you know really well.

    Targeting Email List

    If a Custom audience has to be created based on Customer Email list, go to Audiences in Facebook Ads Manager. From the top right-hand corner of the page, click on Create Audience and select Custom Audience from the drop-down menu.


    Now, click Customer List from Create a Custom Audience dialog box. when creating a custom audience, you need to upload a CSV file along with the customers’ email addresses. Later, Facebook fills the audience and prepares to target with the Facebook Ads for small business.

    Target Interests

    If you are a beginner in Facebook Small Business Advertisement, with a small customer list and a limited website traffic, you might question as to how the Facebook ads are targeted. This is because when a page or an interest is targeted, Facebook provides an audience, including those expressing their interest or liked the page related to the audience.


    Split-Testing the Audiences

    After setting up the audiences , it is ideal to test each, for about three days or a period of 72 hours. The right way to advertise a small business on Facebook is spending some dollars a day experimenting each test ad. However, the number could vary according to the size of the audience and corresponding results from them.

    Let’s look at an example cost breakdown for Facebook Small Business Advertisement.


    • Interests: $1.18 per Like
    • Lookalike: $0.7 per Like
    • Custom Audience: $0.61 per Like

    Read Also : 25 Best Selfie Apps for every Selfie Lovers – Perfect Click

    Promoting Owned Content:

    There is an expression which says “Promote your best content“. Pulling people to your website and having shared the best content with them help them know more about you, like you and trust you. Knowing about you and the content will result in buying the product or service from you.

    There are opportunities to go deeper into specific topics, thus letting the audience know about your blog.


    There are 3 types of website content promoted only to fans are:

    • Testimonial pages
    • Blog content
    • Sales messages or special offers

    Facebook ads for small business can be used to promote a video every week, thus helping the audience to know you well.

    Facebook Small Business Advertisement does not happen in one day. It definitely takes times to connect with people. You need to have a lot of patience and not to give up on the first video. If you frequently post videos to advertise the small business on Facebook, people will surely get attracted to your Facebook Page.

    Let’s look at the example of advantages of the video advertisement.


    For best results, you need to test promotion activities on different content types. You will be surprised to see the response:

    Video Ad Tips

    • Make the content short and sweet.
    • Within three seconds, make the viewers feel convinced visiting your website regularly
    • Use a strong call to action.
    • Be genuine, fun, educational or informative.


    Increasing Conversions & Sales:

    There are some businesses or brands, who avoid some important steps in advertising and directly hop into conversions being their main goal in Facebook ads for Small business. This is quite obvious in the case of small budget ads. As mentioned in the examples, it is ideal to concentrate on the audiences which are more probable to convert.

    Leads Generation is a strong concept in Facebook Small Business advertisement, provided you target the right audience.

    Before you begin to test the ad types, you will have to check your News Feed for the lead generation shown up. Note the ad copy, Call-to-action buttons as well as visuals on other ads so as to improve your conversions.

    Let’s look at some examples.

    The example here is a Page describing an addictive app. If you are a fan of this page or have visited the website.

    Read Also : Bixby Vs Google assistant Vs Siri Vs Cortana – Popular AI Assistant

    The example here is a page where you can download a report if you are a fan of this page.

    However, if the budget set for the Ad is limited, you could make full use of the conversions at the best price. As Facebook knows its users really well, you bet the results will top.

    For instance, the test Ad here cost $11.3 per day and the lead generated was 42. The target was a Custom Audience for a website.


    Promoting a Local Business

    Facebook Ads for Small Business is used to promote a local business, with small budgets comprising some challenges. If you own a local business, chances are that the promotions will be limited to one for every week. Perhaps, it is quite a good idea when it comes to promoting regular contents so as to let people know of the new products and services. This would definitely be a great added advantage to your fans, even without directly selling to them. So with this you can promote local business on Facebook .

    When you advertise a small business on Facebook with a small budget, it will surely produce great results. It is equally important that you survive the expectations of the promotion.

    Review of Facebook Small Business Advertisement

    This article has covered all the relevant topics related to Facebook Small Business Advertisement. We also came across how Facebook Ads for Small Business work and the results yielded from the tests done on each ad. How to set a small budget for a new business.

    Hope this article has been helpful to people who are beginners in Facebook Small Business Advertisement.

  • Samsung Pay Guide with Exclusive Samsung Pay FAQ

    Samsung Pay Guide with Exclusive Samsung Pay FAQ

    This is all about Samsung Pay , here is the exclusive guide on Samsung pay with all FAQ related to Samsung Pay .

    Samsung Pay Guide with Exclusive Samsung Pay FAQ

    We are presently living in a ‘Digital Era’ where everything is done online. This has been one of the tremendous transformations of technology seen in recent years. We have got online shopping through sites like Amazon, Flipkart, eBay and so on. The transformation begins here. They have options to pay online through Credit or Debit Cards. Digital payment is involved here.

    And now? Technology has made it more convenient and ‘Cash free’. Even in supermarkets and malls, they accept cash free payments such as Paytm, wherein a QR Code is scanned to do this task. There you go. The payment is done in a second. In other countries, PayPal is in use.

    Did you know? The latest trend in the digital payment is the Samsung Pay. 

    Here is the Exclusive Samsung Pay Guide with Exclusive Samsung Pay FAQ that explains a lot about everything related to Samsung pay service.

    Let’s begin the Samsung Pay Guide by knowing about what exactly is this novel way of making payment “Samsung Pay “.

    What is Samsung Pay ?

    Samsung Pay is a payment via mobile, as well as a digital wallet service designed by Samsung Electronics, enabling the users to make payments using compatible smartphones and other Samsung devices. This service has a good support for contactless payments; i.e. payments through debit or credit cards or other devices via Near-Field Communication (NFC); along with Magnetic Secure Transmission which also enables Contactless payments via magnetic stripe and usual contactless cards.

    This payment service was designed from the creative asset of LoopPay, group funded startup company bought by Samsung.

    Samsung Pay Compatibility

    Here is the list of devices that supports Samsung Pay .

    Top-listed smartphones that supports Samsung pay

    Galaxy S

    # Samsung Galaxy S6 (includes S6 Edge, Active & Edge+)

    # Samsung Galaxy S7 (includes S7 Edge & Active)

    # Samsung Galaxy S8 (S8+ & Active)

    Galaxy Note

    # Samsung Galaxy Note 5

    # Samsung Galaxy Note 7 (*discontinued*)

    # Samsung Galaxy Note FE

    #Samsung Galaxy Note 8

    Other Smartphones supporting Samsung Pay

    # Samsung Galaxy A5 (2016)

    # Samsung Galaxy A7 (2016)

    # Samsung Galaxy A8 (2016) -accessible to Samsung Pay users in South Korea

    # Samsung Galaxy A9 (2016) -Samsung Pay users in Brazil & China

    # Samsung Galaxy A9 Pro (2016) -Samsung Pay users in Brazil, China, India & South East Asia

    # Samsung Galaxy A3 (2017) -accessible to most of the countries except Europe

    # Samsung Galaxy A5 (2017)

    # Samsung Galaxy A7 (2017)

    Smartwatches supporting Samsung Pay

    # Samsung Gear S2 (NFC access only)

    # Samsung Gear S3 (MFS & NFC)

    Here is the devices and smartwatches & smartphones supporting Samsung Pay.

    How Samsung Pay Works ?

    As you know that Samsung Pay is already in great demand and in use in India, it is high time you get to know how it really works. Samsung Pay can be accessed only by those having the latest version of Samsung smartphones; the Samsung A series, and a few versions of Galaxy S6 & Galaxy S7.

    Here we will discuss on the working of Samsung Pay app , i mean how Samsung Pay works.

    At first, look out for the Samsung Pay app on your phone. Set up the app for payments. To let the app that you are using it, it is important that you either user the fingerprint or a PIN. Obviously, it is the fingerprint that would be the fastest to access, once the app is setup. However, if your phone or device does not respond well, it would be ideal to choose the PIN version for recognition.

    Secondly, you have to connect Samsung pay app to credit card or the mobile wallet. Remember that this app does not support credit cards of all Banks, and also not all the mobile wallets. In such cases, it is ideal to use Paytm. It is quite easy to use if you link the Credit Card or the Debit card or even a particular Bank is supported.  You could save an image of the credit card or enter the details manually.

    Thirdly, connect the Paytm through an OTP (One Time Password), which you can get as SMS. Now, you are all set. Go shopping with your phone and you can make payments. Samsung Pay can be used anywhere, as it uses NFC and MST (Magnetic Secure Transmission); this means that he does not have to use the latest gadget to accept payments through Samsung Pay.

    Hence, to make payments easier, you just have to get the Samsung Pay app and hold the phone closer to the top or side of the swiping machine. However, with the difference in each device, there might be some issues initially. Don’t get panic.

    Samsung Pay Guide : How to Use Samsung Pay

    Samsung Pay is the most innovative way to make cashless as well as cardless and most importantly, the ‘walletless’ payments. If you are worried that you haven’t got your credit in you wallet, don’t get panic. If you have linked your Credit card to Samsung Pay, consider your work done. All you need to do is open up the pay app, keep it close to the swipe machine; there you are , the payment is complete.

    Now, let us get to know this latest app through Samsung Pay Guide. 

    Get Setup- Fast

    Samsung Pay’s setup is a task done in a snap.

    Here is the steps to setup Samsung Pay and add your card on Samsung Pay –

    # Just add Debit and the Credit Cards through a few simple steps.

    # You start by clicking the Samsung Pay icon on your phone or device.

    # As it prompts, open the camera app to scan the credit card information and save the account with fingerprint or PIN.

    Read Also : PayPal Vs Venmo : Best Online Money Transfer System Compared

    Easy like NFC or simple Swipe

    Here  is the simple steps on how to use Samsung Pay app to make payments –

    # As the credit card and debit card information are loaded, all you need to do is swipe the lock-screen up from the bottom of the screen display so as to start the Samsung Pay app.

    # If the terminal of the retailer has a support for NFC, just keep the phone near the NFC receiving area.

    # For a normal card swipe machine, keep the phone vertically over the slot until you get a vibration for the payment confirmation.

    Samsung Pay’s licensed technology has ensured the compatibility with both, magnetic stripe card readers or the MTS and the NFC depots; hence proving the virtual acceptance anywhere when swiped or the card being tapped.

    Read Also : Safe Online transactions Tips & top 12 safe online transactions methods

    • Safe & Secure

    Is it Samsung Pay really safe method to pay ?

    Approved by Samsung KNOX security program, Samsung Pay is a very safe technique of making payments. These  transactions would be approved only after the fingerprint or the PIN is configured to verify your identity, hence card is displayed for representation instead of showing the card number. The retailer does not have to verify your credit card number or any personal information since only a code is shared through this transaction process.

    Read Also :  Pros and cons of credit cards – All the Hidden Facts on Credit cards

    Samsung Pay FAQ

    Samsung Pay is all set to take a permanent space as the most innovative way in making payments and ‘swipe’ away the regular plastic cards from the wallet. This app works almost everywhere and even on the conventional magnetic POS machines.

    The Samsung Pay FAQs are here to answer your queries about all that you need to know about this latest app.

    Let’s begin:

    Where is Samsung Pay Available  ( Countries supporting Samsung Pay )

    Presently, this app is accessible in the U.S, the U.K, South Korea, China, Australia, Brazil, Canada, Singapore, Spain, India, HongKong, Malaysia, Puerto Rico, Russia, Sweden, Switzerland, Thailand and the UAE.

    What device/bank/card/Carrier do I have to use for Samsung Pay

    Devices supporting Samsung Pay : Samsung Pay app works with the Galaxy S8, S8 Plus, S7, S7 Edge, S6 Edge+, S6, S6 Edge, S6 Active, & Galaxy Note 5. You can also access on Gear S2 (to use only on NFC depot) & Gear S3.

    Carriers supporting Samsung Pay : Most carriers in the U.S has a great support for Samsung Pay- AT&T, MetroPCS, Sprint, Verizon & US Cellular.

    Cards supporting Samsung pay : The most compatible cards for Samsung Pay are Visa, MasterCard, Discover or American Express.

    Where can I use Samsung Pay

    Samsung is content about the fact that its app Samsung Pay works in almost all the POS (Point Of Sale) machines- NFC, MTS or the Magnetic Secure Transmission and the EMV (Europay, Mastercard & Visa) depot for the chip-based cards. However, this app does not work on those traditional card readers that we see at gas stations and ATMs.

    One of the POS system where the Samsung Pay app does not work is the iPad based payment depot named Shopkeep. Though it finds that you were to make a payment, yet, it would show that Samsung Pay is not a valid credit card.

    Read Also :  Venmo User Guide for Safe Transactions – Venmo payment

    Read Also : Credit Card Debt Pay Off- 5 Things to Consider About Debt Pay Off

    Read Also : Pros and cons of credit cards – All the Hidden Facts on Credit cards

    What does the Samsung Pay setup process involve

    After the installation of Samsung Pay app, you have to register your fingerprint if not done already. The camera app will be open to scan the debit or credit card. It is important to double check if the number, name on the card and expiry date are all correct. And finally, the app verifies the card by sending SMS from the corresponding bank.

    How many cards Samsung Pay supports 

    Samsung Pay app can hold upto 10 cards.

    How does Samsung Pay work

    Samsung pay uses NFC (Near Field Communication) technique to process the payments at certain ‘tap and pay’ depots. The app works in all the conventional magnetic stripe depots too. These older versions are used in most of the retail stores in the U.S. Samsung Pay uses MST as the phone is kept near these machines. This is how Samsung pay works .

    How to make payments with Samsung Pay

    Follow these simple steps to pay using Samsung Pay app –

    @ Swipe up the lock screen from the Samsung Pay bar above the Home button.

    @ Select the card to make the payment, keep  the finger on Home button to verify the fingerprint.

    @ Back side of the phone should be placed against the terminal for payment.

    Read Also : How to secure bank account from hackers

    How Samsung Pay is different from Android Pay & Apple Pay

    The important factor that makes Samsung Pay differ from Apple Pay is that Samsung Pay can be used at almost all the retail stores accepting debit and credit cards, besides the tap-to-pay NFC depots. This chart depicts how Samsung Pay is unique when compared to Android Pay as well as Apple Pay.

    So here is the comparison between Samsung Pay Vs Apple Pay Vs Android Pay .

    Samsung PayApple PayAndroid Pay
    Devices supporting Samsung Pay app includes- Samsung Galaxy S8, S8 Plus,
    S7, S7 Edge,
    S6 Edge+,
    Galaxy Note 5,
    Galaxy S6 and S6 Edge, Gear S2 and S3
    Devices supporting Apple Pay app includes –
    Apple iPhone 7/7Plus, 6/6 Plus,
    6S/6S Plus, SE,
    Apple Watch,
    MacBook Pro with TouchID,
    iPad 5th generation,
    iPad Air 2,
    iPad Pro and
    iPad Mini 3 and 4
    Devices supporting Android Pay app includes –
    Android phones with NFC and HCE support running KitKat (4.4) or higher
    Countries
    using
    Samsung
    Pay app –
    US, UK, Australia,
    South Korea,
    China,
    Brazil,
    Singapore,
    India,
    Hong Kong, Malaysia,
    Puerto Rico, Russia,
    Spain,
    Sweden,
    Switzerland,
    Thailand,
    UAE
    Countries using Apple Pay app US, UK, Australia,
    Canada, China,
    France,
    Hong Kong, Ireland,
    Isle of Man, Italy,
    Japan,
    New Zealand,
    Russia,
    Singapore,
    Spain,
    Switzerland,
    Taiwan
    Countries using Android Pay app
    US, UK, Australia,
    Canada,
    New Zealand,
    Ireland, Poland,
    Singapore, Hong Kong, Taiwan, Belgium,
    Japan, Russia
    Fingerprint or PIN authenticationFingerprint (TouchID) authenticationFingerprint authentication on supported phones, otherwise PIN
    Works with NFC, magnetic stripe or EMV terminals, in-app purchasesWorks with NFC terminals, in-app purchases and web purchases in SafariWorks with NFC terminals and in-app purchases
    Credit, debit, loyalty and gift cardsCredit, debit, loyalty cardsCredit, debit, loyalty and gift cards
    Wide variety of banksWide variety of banksWide variety of banks

    Is it Samsung Pay Secure

    The account details or the credit card number is not stored on the device by Samsung Pay. Transactions are processed through tokens. Whenever you make a purchase, the device having Samsung Pay send two sets of data to the payment device. First set of data holds a digit token depicting the credit or debit card number and the latter represents one-time code or the code generated by the phone’s symbolic key.

    What do I do if I lose my phone when it has Samsung Pay app

    You cannot make any payments from the phone unless the PIN or fingerprint is authorized during the setup process. In case you have registered on Samsung’s Find My Mobile service, relevant information related to cards stored in Samsung Pay can be erased remotely.

    So if you lose your phone or mobile gets stolen , don’t worry about phone lost with Samsung pay app . It is safe than your thoughts.

    Can I use Samsung Pay even without a WiFi/cellular connection

    Yes, It is possible, though only 10 payments can be done through Samsung Pay without connecting to WiFi or mobile data. There should be an active internet connection so as to add a card and access the transaction history.

    Can Samsung Pay be used overseas

    Taking into account the U.S customers, if a card can be used overseas, it is obvious that Samsung Pay can also be accessed. The limitation is that if you wish to add a card while traveling outside the country, you will need to contact the respective bank.

    Does Samsung Pay also work for returns

    Yes. In such situations, the retailers or merchants would ask you to keep the phone against the payment device, just the way you do when making a payment, so as to avail the return. Besides, you need to match the payment information on the receipt that has the last 4 digits of the ‘virtual’ card number. This can be done using Samsung Pay app.

    Review

    Samsung Pay will be completely taking over the physical wallet completely and make the pockets free.

    In this article, we have come across what is Samsung Pay. The setup process, how it works and how to use Samsung Pay is explained through Samsung Pay Guide. We have also covered a topic – Samsung Pay FAQ, where all the queries related to this app hasd been answered. Hope this article has been helpful to you.

    GO CASHLESS…. CARDLESS….. WALLETLESS!!! Enjoy Samsung Pay TENSION ‘LESS’ to make your payments!!

  • Turn On Flashlight Instantly on your phone

    Turn On Flashlight Instantly on your phone

    Flashlight are really an essential must have on all mobile . So here is the guide on how to Turn On Flashlight Instantly on your phone.

    Turn on Flashlight on Instantly On Your Phone

    Let’s first begin with how to turn on flashlight on Droid Turbo .

    What is Droid Turbo ?

    Droid Turbo is a classy smartphone designed by Motorola. It comes from the Verizon Droid family, introduced in October 2014 on Verizon Droid Does website. This smartphone keeps a design and shape, similar to its predecessor- Droid Maxx, with an added feature of lasting airborne nylon or metal coated glass fibre.

    Droid 2 is the latest in the series of Motorola droid.

    Read Also : Backup Android Device to PC or Google

    How to turn On Flashlight on Droid Turbo / Droid 2

    Ever wondered about how to turn on flashlight in case of Droid Turbo? There are two ways: one is from the Menu; other is through gestures. We shall look at the steps:

    1. Via Moto Action :

    Hold the phone as one holds an axe, pretend to chop, twice downward. You could also “cut” it on your palm or pretend to shake a hand with permission. 

    2. Quick Settings :

    • Pull down the Top bar visible at the top of the screen with your fingers.
    • Tap on “Flashlight” to switch it On & Off

    Read Also : Best Lifestyle Apps for Android and iPhone

    How to Turn On MotoX Flashlight

    For most of the Motorola smartphones, the process to turn on flashlight is the same. It is the “chopping”. However, there are some tips you can follow as you turn on MotoX flashlight:

    • Place your hand 6-15cms away from phone
    • Make sure the IR (InfraRed) Gesture Sensors on the bottom right & left corners are not covered

    This is the way to turn on Flashlight on MotoX .

    Read Also : Android Vs iOS – Pros & Cons of Buying Android Vs iOS

    How to Turn On Flashlight on Android

    Starting an application to turn On flashlight on Android is quite easy. However, there are some tips to turn flashlight ON and OFF –

    • Press Power button

    When the device is locked, the fastest and the easiest way to turn On flashlight is with the Power button Flashlight/Torch app. With this app installed in your phone, you just have to press the Power button thrice continuously to turn On flashlight.

    You must always know to turn on flashlight when device is locked because in case of a sudden power failure switching your device by unlocking it is difficult and secondary .

    Read Also :  What’s my phone number – Find Phone Number on Android

    • Use Volume keys

    In case you find that the Power button is not convenient to you, you could always go for the alternative solution of using Volume buttons to turn On flashlight on Android phone . With an app called Torchie, press both the volume keys together so as to turn On flashlight.

    As this app gets installed, you will have to manually turn it on via the Accessibility services. If you want to use this app with the display off, make sure it is enabled by checking the App’s settings menu.

    • Shake your phone

    For those who do not like adding extra features for the buttons, here is the solution for you. Get the Shake Flashlight app which enables you easily turn on flashlight on Android.

    The app says it all. Just shake your phone; whether your phone is On or Off. The light is turned on. If the app does not respond well, check the settings and adjust the required preferences.

    Read Also : iOS 11 Vs Android Oreo – Who wins gadget lover’s Heart

    • Tap widget 

    So far, you have seen the most convenient and the fastest way to turn On flashlight on Android. However, these apps could get activated automatically and there are chances of battery drain. Another way to turn On flashlight is using a widget. This widget would be more helpful for those devices which do not have the built-in flashlight.

    To enable this, place the widget on the home screen of the device and tap on it when you wish to turn on flashlight.

    • Let the darkness Activate

    If you are someone who always use the flashlight, here is the perfect app for you. Get your device the Ambient LED Flashlight app. Once the app is activated, it automatically turns the flashlight on & off via light sensor in the device. So, being in a dark room the flashlight is automatically turned on and vice-versa. For this, the app should be open, else it automatically goes off.

    Read Also : Update to Latest Android OS : Oreo -Stay with Nougat / Marshmallow

    • Add a quick setting toggle

     There are certain devices with flashlight Quick Settings button. If your device has not got it, just add by using the Custom Quick Settings app in devices running Android 6.0 or higher version.

    Moto G Flashlight App

    If you ever came across the droid flashlight app, and find it too bright,we have a solution for this. The droid flashlight could be opened from the Drop-down menu. The dimmer can be controlled on Android phones but should be rooted.

    Read Also : Connect Android to Projector via USB and Wireless

    How to Turn off Flashlight on Android

    To turn off flashlight on Android, follow these steps:

    Step 1: Launch Camera on Android

    On your Android phone, locate and tap Camera icon on the home screen and open it.

    Step 2: Check Flashlight on Android

    Try to take a photo and check if the flashlight is On or Off. If it is not ON, proceed to the next step.

    Step 3: Go to Settings

    In this step, gently touch the Gear icon to open the Settings menu.


    Step 4: Turn on Camera Flash

    In Settings menu, when you find the option Flash, tap it and check if the flash is On or Off.

    As the flashlight turns On, try to shoot any object to check the flashlight.


    Review

    In this article, we have learnt how to turn on flashlight on different devices like Droid turbo, Android, Moto X & Moto G. We have also seen how to turn off flashlight on your phone. Hope this article has been helpful.

  • Google Maps List Create, Share and Edit on Desktop & Mobile Now

    Google Maps List Create, Share and Edit on Desktop & Mobile Now

    Now Google Maps List is available for both desktop and mobile . Now you can create , share and edit Google Maps List on Desktop also .

    Google Maps List Create, Share and Edit on Desktop &

    Mobile Now

    Google Maps has been a great help as a navigator for people finding difficult to get the right route to their destinations. Imagine being lost in a new city! Having Google Maps with you? Do not panic. This navigator will direct you perfectly.

    Google Maps List feature was launched exclusively for mobiles, has now been made available in desktop paltform.

    It was only Android & iOS who could create Google Map list and users who were more based could just view them.

    And now, Google has extended the feature of creating Google maps list on desktop as well.

    After adding the interesting places to the Google maps list you will get a confirmation popup at the bottom of the map, and also a check mark to the list to which you added.

    Create Google Maps list on desktop

    Just as in Android devices like the smartphones or the tablet PCs, we can create Google maps list on desktop through the following steps:

     How to Create Google Maps list desktop :

    Here is the steps to create Google Maps list on desktop –

    1.  On the Android phone or tablet, open the Google Maps app.
    2. Click Menu > Your places >saved
    3. In the bottom right, click Add +
    4. Enter name & description
    5. Tap Save.

    Read Also : Google Traffic : How to check traffic to work or home

     How to Save a place to Google Maps list on Desktop :

    Here is the steps to save places to Google Maps list on desktop –

    1. Open Google Maps
    2. Search for the place or click it on map
    3. At the bottom, tap place’s name & address 
    4. Tap Save 
    5. Choose list. To create another list, click New list +

     How to Share Google Maps list on desktop :

    Here is the steps to share places to Google Maps list on desktop –

    1. Open Google Maps app
    2. Click Menu > Your Places >Saved
    3. Beside the list you wish to share, tap More > choose from the options
      • Hide/Show on map
      • Share list
      • Sharing options: List could be set as Public/Private/Shared.If a person having the link wants to view the list, click Shared. To let people find and follow the list, select Public.

    How to Edit Google Maps List on desktop :

    Here is the steps to edit places to Google Maps list on desktop –

    1. On the desktop, open Google Maps app
    2. Click Menu > Your places > Saved
    3. Beside the list to be edited, click More > Choose Edit list or Delete list

    Read Also : How to Use Google Assistant on Android Devices (Without Root)


    Create, Share & Edit Google Maps List on Mobile 

    Now, let us see how do we create,share and edit Google Maps list on mobile:

    Create Google Maps List on mobile

    1. Open the side menu > Your places > open Saved > click on + sign in blue circle at bottom right corner of the screen
    2. Open the location where you wish add a new list > click Save and select Create a New List


    Share Google Maps List on mobile

    1. Open the list and click on Share button on the top right hand corner 
    2. A link can be shared to the list through any app on the phone on both Android as well as iOS platforms- it could be Hangouts, SMS and even on Facebook or Twitter
    3. Once the link is shared to friends or family, they can just click “Follow” to see the list from Your Places as and when they need


    Edit Google Maps List on mobile

    1. Go to Your Places and click on “Saved” tab

    2. Click on the 3 dot menu on the right side of the list and select “Edit”. Places can be directly added to or removed from the list, from the place sheet of location by clicking “Saved” icon.


    Through these steps we find that it is quite easy to use Google Maps List on mobiles now.

    In this session we came across the latest technology from Google- Google Maps List. How dynamic was the transformation of Google Maps from viewing and accessing only on Mobiles to the Desktop view. We also read about how to create,share and edit Google Maps list on Desktop.

    This surely will be a great advantage for people who are not a fan of Android phones and yet, can access Google maps list on desktop.

    Hope you had a good read on Google’s latest technology Shift- From Mobile To Desktop Now. 

    Enjoy Visiting place through Google Maps list.

  • Bixby Vs Google assistant Vs Siri Vs Cortana – Popular AI Assistant

    Bixby Vs Google assistant Vs Siri Vs Cortana – Popular AI Assistant

    If you are looking for a comparison between Popular AI Assistants then here is the detailed comparison on Bixby Vs Google assistant Vs Siri Vs Cortana .

    Bixby Vs Google assistant Vs Siri Vs Cortana – Popular

    AI Assistant

    We know that today there are so many popular Virtual Assistant that help us to get connected to use technology much easier than before . Here we will focus on bringing out the cross comparison between popular virtual assistant apps ( AI assistant ) that is Bixby Vs Google assistant Vs Siri Vs Cortana .

    There are so many popular and trending AI Assistants . Here we have hand picked some of the favourite and most used Virtual Assistants for comparison –Bixby Vs Google assistant Vs Siri Vs Cortana

    Bixby

    Bixby is the virtual assistant by Samsung electronics. It is the intelligent personal assistant for Samsung users . Bixby by Samsung is a pocket assistant combined with machine learning , voice assistance .

    By using Bixby you will be able to read your Facebook notifications,listen to your favorite songs through its voice assistant while driving . Bixby will read the notifications , messenger messages etc so it is very useful while you are  on long drive.

    The important feature that Bixby has is that it goes automatically to Do Not Disturb mode when you say good night.

    Bixby also understands the words as we say; this means, if you click a picture and say “Send” it goes to Send option automatically and sends the messages to the sender.

    Since the first part of our topic ” Bixby Vs Google assistant Vs Siri Vs Cortana ” is about Bixby here we will understand more about Bixby .

    Likely about what is Bixby and how to use Bixby and top Bixby tips and tricks .

    When we say about Bixby Vs Google assistant Vs Siri Vs Cortana , using of each AI assistant is really different . So let’s understand about it .

    Read Also : Create Virtual Desktop without Upgrading to Latest Windows OS

    How to use Bixby 

    Bixby is one of the important features of Samsung S8 and Samsung S8 plus . Bixby button is found on right side below the volume rocker in Samsung S8 plus.When you select Bixby option you will be taken to the setup screen.

    Setting Up Bixby

    Once the apps on Galaxy Apps queue have been updated, click on Hello Bixby panel to begin the prompt for Bixby Voice setup. Presently you can get access Bixby only on American English and Korean languages for the virtual assistant.

    Bixby takes you through different levels of setup process. In order to carry out Bixby updating just agree to Bixby terms and conditions. The entire inserting process is quite simple, as it begins with Bixby directing the process. In case of English-speaking version, Bixby has the voice of your female fairy; however in the Korean version you can choose either male or female voice. 

    As Bixby Voice is all set, it enables to give command from any screen by holding Bixby button. 

    You will be granted access to the Bixby to activate Bixby say ” HEY BIXBY  “or holding down Bixby button while talking over phone. Bixby feature also extends like sending messages via Samsung S8 messages app ,Weather , Upcoming meeting , Movie showtimes , sports scores , Contact , camera app etc are also availed by Bixby.

    Once Bixby is activated you can find a B symbol on your home screen and vision  eye and reminder bell icon also appears in the  symbol is replaced by gear icon.

    Read Also : Best Lifestyle Apps for Android and iPhone

    Top Bixby Hacks ,Tips and Tricks

    Bixby Voice serves as a Pocket assistant to whom you could talk to, for getting your work done. However, if you are not getting things done by Bixby, then the assistant would turn to be a burden rather than a boon. Following tips ensures that Bixby listens to your commands through Bixby Voice:

    • Ask Bixby to open apps

    As you make Bixby Voice to do a task, the primary thing you need to do is to ask Bixby to open an app. For instance, if you say “Hey Bixby, Open my Calendar”, it opens the Calendar on your Phone. Once the app is opened, it is important that you don’t create confusions when asking Bixby to complete your tasks. If you take more time in asking Bixby to open a specific app before giving commands, She would know which app it is. This way, you get things done soon as the app is open. 

    • Check compatible apps

    As Bixby works with multiple apps and Samsung adds more to its catalog; it does not include everything. If you wish to assure that Bixby can do every task you give it, then you can double-click  the app to verify whether Bixby is compatible with that app. There is a complete list of compatible apps you could access. Moreover, in case of Bixby Labs, these are the apps currently being tested with Bixby. 

    Read Also : Best Augmented Reality Apps for different uses Exclusive

    • Be specific

    When you ask Bixby to finish a task for you, you need to be sure of being specific. If you are not clear about the task  to be done, it cannot do any help. For example, if you say “Bixby, do I have anything on the Calendar  for November 9 2017?” it would be easier for Bixby to complete the request at once rather than saying “Bixby what’s going on next week?”

    • Take time to teach Bixby

    When you have Bixby to complete task or answer a question, you will be able be teach Bixby and give a feedback. Sometimes, Bixby gets the picture easily, but in some cases the app would get your words wrongly, then you will have to correct it. Bixby learns as you interact with it; thereby understanding you and what you ask for. 

    • Use Quick commands

     If you are using Bixby Voice, Quick Commands let you customize your experience with this Virtual Assistant. As you set your own Quick Command, you can launch particular actions with a phrase of your choice. 

    Bixby takes your picture by just focusing on your voice and and your vision by clicking eye symbol.  Bixby also helps you to change your settings by your voice commands .Bixby also allows to schedule your day , set alarm for you.

    Now before moving to the comparison of Bixby Vs Google assistant Vs Siri Vs Cortana , we will see next about Google Assistant exclusively .

    We have seen about Bixby , Bixby features , tips and tricks to use bixby and how to set up Bixby . Now likewise we will take a look on Google assistant , Features of Google Assistant , How to set up Google Assistant and top tips and tricks of Google assistant next to complete half knowledge on our topic “Bixby Vs Google assistant Vs Siri Vs Cortana” .

    Read Also : Android Vs iOS – Pros & Cons of Buying Android Vs iOS

    Google assistant

    Google has overtaken Amazon AlexaApple Siri and Microsoft Cortana through its own voice assistant: Google Assistant

    Google assistant is a voice converted assistant created by google to do the actions on behalf of the user.Google assistant is now available in all android devices.Google assistant answers all types of questions , only for the starters google assistant will be bit difficult but when you start using it you will be able to go through the instructions and guidelines you will be granted the access.

    Google introduced Assistant at Google I/O , launched it on the Google Pixel and Pixel XL phones, then took it to Google Home, later into Android Wear 2.0 even before showing it in other phones running on Android Nougat. And, now, after a year, Google has brought out a new hardware, which has the Assistant built-in.

    Now on to the second part of our topic ” Bixby Vs Google assistant Vs Siri Vs Cortana ” is about Google Assistant here we will understand more about Google Assistant .

    Likely about what is Google Assistant and how to use Google Assistant and top Google Assistant tips and tricks . Now this can give you idea to cross compare how to utilize between Bixby Vs Google Assistant and further sections will make the detailed comparison on Bixby Vs Google assistant Vs Siri Vs Cortana .

     How Google Assistant works

    For those who have been using Android devices for quite some time, would know that the Google Now feature shows off the important information for the users. It knows where the person works, as well as the meeting locations and travel plans, the favorite sports teams, and other interests of the user. This information would be shown in cards or certain reminders on Android device. 

    Google Assistant is created to be conversational. You can ask one or more questions and this virtual Assistant would keep track of the conversation, evaluate the situation and clearly respond with the correct information. 

    Read Also : How to Use Google Assistant on Android Devices (Without Root)

    How to use Google assistant

    Google Assistant is activated by holding on the Home button for long time. As you hold this button, Google Assistant would ask you to say what you want. It then starts the process of searching.

    When the Google Assistant gets activated you get a notification telling that you have a new friend.You can complete the process by OK GOOGLE voice command or HOLDING AND PRESSING THE HOME BUTTON.

    Google also helps you to get answers to your questions by tracking your location.Google assistant also allows you play games through your commands.

    Read Also : Fix “Voice search has been turned off” error for google now

    Top Google assistant Hacks ,Tips and Tricks

    Initially, as you get the Google Assistant on your smartphone, you will be instructed to use Google Assistant and “OK Google” always to detect voice. To do so, the phone needs to have a unique “OK Google” voice replica so that the phone recognizes your voice at any moment; as well as Google Assistant to complete your needs-play music, check the weather forecast etc. 

    Here are some useful tips for Google Assistant . These feature can also throw a light on comparison of Bixby Vs Google assistant Vs Siri Vs Cortana .

    Read Also : Convert 3G Phone to 4G Phone to support 4G Sim in 3G Mobile

    • Pick the right Google Account for Assistant

     Google Assistant uses the Google Account in the same way as done by Google Now. You have ensure that the Assistant is setup using the same Google account from which this virtual Assistant the retrieve information from, particularly from the photos. If one Account is used for Assistant and another account is used for Google Photos, it cannot be accessed. 

    • Adjust settings

     There is a Settings menu for Google Assistant. This menu gives access to anything task; right from adjusting “OK Google” voice model to seeing the summary of the activity created by Assistant. To use the Settings menu of Assistant, open the Settings app, go to Google > Search  & Now >Settings (in Google Assistant). Here, you find sub menus with settings option. 

    • Enable/Disable Assistant

     In the Settings menu of Assistant, go to “Adjust settings for this (Pixel) device. Below this, there will be button next to Assistant. When this button is pressed, Assistant is given the permission to answer the questions and complete the tasks. 

    • Customize news list

    Select “News” under Settings menu of Assistant, below Pixel category. Click on it to make changes in News list. On the next screen, click on the customize link, from which you can choose a set of news sources like NPR, PBS, CBS etc. Once you select the preferred the news source, you can make Assistant to read the news for you. However, this feature is presently unavailable in the UK. 

    • Customize “My day” summary

    This feature can be found under Settings menu by going to “My Day” below Pixel category. Select this modify the daily updates. There is a set of options to be chosen from; like Weather, Work, Travel, Reminders, or even summarize the day with news reports. You can then ask Assistant to read the Summary for the day and receive interesting responses. In the UK,you can get updates only on Time & Weather.

    • Enable/Disable Screen Context

    To do this, go to “Adjust settings for the Pixel device” under Assistant’s Settings.  Below this, there is a button next to “Use screen context” which is Now on Tap 2.0. Clicking on the button enables Assistant to show information about what is on the screen. It shows certain links in, relevant sites like YouTube or IMDB.

    • Change Assistant Language

    Under Settings, go to “Adjust settings for this device”. Below this, there will be an option “Assistant Language”. As you click on it, you would find Language Preferences, wherein a default language can be selected and a language can be added. 

    • Enable/Disable always on ‘OK Google’

    Below the “Adjust settings for this device” option, you will find “‘OK Google’ detection”. Click on it. Turn on the switch for “Say ‘OK Google’ any time” to allow Assistant recognize your voice every time you say ‘OK Google’ even when the screen is off or when using an app. 

    • Use ‘OK Google’ to unlock device 

    Below the “Adjust settings for this device” option, you will find “‘OK Google’ detection”.Click the button for “Trusted Voice” to let Assistant unlock the device when hearing ‘OK Google’ in your voice. 

    • Retrain ‘OK Google’ voice model

     Below the “Adjust settings for this device” option, you will find “‘OK Google’ detection”.Click the button for “Retrain Voice Model”. You need to say “OK Google” a few times to enable Assistant remember and recognize your voice when you say the phrase next time. This voice model can be used as alarm or to unlock device. 

    • Delete ‘OK Google’ voice model

    Below the “Adjust settings for this device” option, you will find “‘OK Google’ detection”.Click the button for “Delete Voice Model” in a way that Assistant does not remember and recognize your voice when you say the phrase. Remember that once this voice model is deleted, it cannot be reused. 

    • Set home & work locations

    Under the Settings menu, go to “Google Account Settings”. Below, you will find “Personal Info”. Click here. There is an option to add home and work locations. Click on it and manually add the addresses. If you have used Google Now before, it will be easier to retrieve this information. 

    • Set nickname

     Under the Settings menu, go to “Google Account Settings”. Below, you will find “Personal Info”. Click and find the option to add nicknames, thereby manually entering nicknames. You can verify if Google says your name correctly.

    • Change Weather units

     Under the Settings menu, go to “Google Account Settings”. Below, you will find “Personal Info”. As you click, you can see the option to change the unit of weather. Here, you can select from Fahrenheit to Celsius.

    When compared to Bixby features with Google Assistant feature you would have gained half the topic subject -Bixby Vs Google assistant Vs Siri Vs Cortana .

    Siri

    If you are a great fan of Apple products, you will surely know that there is a personal assistant for your lovely device. This virtual assistant is named Siri. 

    Siri is a virtual assistant allowing the user to turn on the flashlight and turn it off  , know the weather , get the sports news updates etc through your voice command. Siri is released by the Apple. Siri is a virtual application that helps the user to get his job done by the voice command when you say the command for first time you can save your voice as well as your command and question for the future purpose.

    Siri has the ability to schedule events, setting reminders, maintaining a timer and also to reserve seats at restaurants. Siri is an extension of functionality of iPad to voice along with making the keyboard free and use your voice instead for giving instructions. 

    Since the third part of our topic ” Bixby Vs Google assistant Vs Siri Vs Cortana ” is about Siri here we will understand more about Bixby .

    Likely about what is Siri and how to use Siri and top Siri tips and tricks .

    How to use Siri

    Siri can be activated by holding the Home button on iPad. As you press this button for a while, iPad gives a beep you can see the screen changing to Siri interface. At the bottom of this interface, there will be multi-colored  lines showing that Siri is actively listening. 

    Siri is one of the easiest to use virtual assistants because it can be used or started easily.

    You can follow these steps while using Siri:

    • Press and hold “Home” button on iPhone. 
    • Hear two beeps indicating that Siri is awake and is waiting for you to speak. 
    • As Siri opens, ask a question or make it perform a task like mailing or send instant messages. Siri automatically checks when you do not speak; you can hence click on the microphone icon indicating that you stopped speaking. 
    • When you ask Siri to send an email or an instant message, it shows out a draft before being sent. To send this message, you can either say ‘Send’ or just click on Send button. 

    Top Siri Hacks ,Tips and Tricks

    To those who have shown the least interest in Siri and have disabled the feature, it is high time you really get to know this amazing virtual assistant from Apple. Siri has got its popularity on the higher side and is being used by almost everyone who has a smartphone. 

    Well, here are some great tips on using Siri. 

    • Siri checks Twitter quickly

    If you wish to see a comment passed by a person or a community on Twitter, you could, either browse and find a particular Twitter account or save time and just ask Siri– “What is (<Twitter name>) saying?” In a second, Siri would get back with the requested Twitter name’s recent tweets. 

    The exciting news is that, Siri can not only understand Twitter controls, but also the Twitter names. For instance, LeBron James’ Twitter control is @KingJames. If you are not sure about his Twitter name, just ask Siri “What is Lebron James saying?”

    Read Also : Get Celebrities Notice Maximum on Twitter – Popular Tweeter Hacks

    • Tell Siri to “Take a Selfie”

    Selfie has been the most annoying term ever used in English. For the last few years people have been taking photos of themselves and newly named it as Selfie, as if it was the latest technique used in photography. If you wish to use the camera app on your iPhone, just tell Siri to “Take a selfie” and there you go! the camera lights up. As the camera app starts, the display would be what was left off the last time it was used. 

    Read Also : 25 Best Selfie Apps for every Selfie Lovers – Perfect Click

    • Get directions in a snap

    It is confessed that it is quite easier to get directions when we use Apple Maps or Google Maps. However, if you are using Siri for the navigation purposes, it could be more effective. Siri is quite impressive as it understand the common language and simple words, has a talent of saying an address quicker and louder, rather than typing it by hand. To enable this feature, just tell Siri to “Get directions to (address)”. It will be directed to Apple Maps and the result will be shown on your screen right away!

    Read Also : Google Traffic : How to check traffic to work or home

    Read Also : Google Maps List Create, Share and Edit on Desktop & Mobile Now

    • Find which song is played

     An app named Shazam has been impressive; however, recently, it turned out to be annoying. One of the users of Shazam app had once ranked this as “Most Helpful” on the App store and said it is worthy. Shazam app was very easy to use. If you liked a song from a movie you were watching, you could instantly install this app and it could tell you the song and the artist at the very moment. 

    Read Also : Fast Forward , Rewind , Scrub Music in iPhone & iPad Music Player

    Read Also : Best iTunes Cleanup Software for better iTunes experience

    Now likewise we have taken a look on Siri , Features of Siri , How to set up Siri and top tips and tricks of Siri next to complete three by fourth of knowledge on our topic “Bixby Vs Google assistant Vs Siri Vs Cortana” , we will see more on Cortana and features of Cortana as well tips and tricks to use Cortana.

    Now before moving to the comparison of Bixby Vs Google assistant Vs Siri Vs Cortana  , we will see next about Cortana exclusively

    Cortana

    Cortana is an intelligent personal assistant designed by Microsoft .Cortana can recognize natural voice, set reminders for you.

    Cortana is your truly personal digital assistant. It is designed to get your work done in a short time. From the very first day, it gets all set to answer your queries and perform given tasks. Cortana learns to be more useful day by day. You could always count on Cortana to be on top of the reminders and be compatible over multiple devices. 

    Since the third part of our topic ” Bixby Vs Google assistant Vs Siri Vs Cortana ” is about Cortana here we will understand more about Cortana .

    Likely about what is Cortana and how to use Cortana and top Cortana tips and tricks .

    How to use Cortana

    Follow these steps to start Cortana :

    • Launch Cortana: Select the corresponding search box on the taskbar to start Cortana


    • Sign in: To get a personalized experience, use your Microsoft account to sign in by choosing “Cortana can do much more”. 


    • Set a reminder: Type “Remind me to…” or just say “Hey Cortana, remind me…” to start a task. 


    Top Cortana Hacks ,Tips and Tricks

    Cortana is one of the best virual audio assistants by Microsoft especially for windows 10 . It enables to:

    1. Increase screen size
    2. Get your shortcut easily
    3. cleanup your startup menu

    We shall now look into the top useful tips of Cortana for Windows 10.

    • Set Reminders for Time, Places & People

    There is a powerful built-in reminder feature for Cortana. These reminders can do one step ahead than a normal reminder which gives you an alarm at a specific point of time. You could either use Reminders icon or just say “Remind me”. You can manually set a reminder and ask Cortana to remind you to do something when you are at some place, or even when you talk to someone. You could just say “Remind me about the meeting at 10 am”. 

    • Use Natural Language Search

    There is a strong support for natural language search of files in your computer. For instance, you could instruct Cortana to “find pictures from October” or “find documents about Microsoft”, to retrieve pictures from the month of October or get the documents on Microsoft. It is the built-in search feature of Windows; however it has more natural language facilities and is much easier than the older version of search operators. 

    • Identify a song

     As in Siri, Google Now and certain apps like Shazam, Cortana too can listen to a song played near you and identify it easily. To do so, you just say “What is this song?” and you can see Cortana using the microphone to listen to the music and match it with the song. This really works well with recorded music; however need not necessarily work with LIVE music. 

    • Browse the web with Google instead of Bing

    Bing “controls” Cortana. When you ask Cortana to do a task or ask something which it cannot answer, Cortana opens the default browser to perform a search through Bing for an answer. Cortana can be made to use Google instead of Bing via the Chrometana extension to Google Chrome. When Cortana instructs Google Chrome to use Bing search’s result page, Chrometana automatically redirects the search to Google or any preferred search engine, thus commanding Cortana to search using Google. It works only when using Chrome.

    • Perform Calculations and conversions

     Cortana performs quick calculations too. These calculations can be entered in Cortana search box also and this means  you need not say long numbers. You either ask Cortana to calculate 4321*4321 or type a unit to convert, e.g. “150 Euro to AED”. Conversion can be done on other units too. 

    • Tracking Flights & Packages

     You can also track the flught number and packages through Cortana by using the tracking numbers. All you need to do is to enter the flight number or the package tracking number in the Cortana search box, or just do the copy-and-paste activity to get the current status.

    • Finding Facts

     Bing is used by Cortana to give direct answers the common questions. It is same as Google’s Knowledge Graph. For instance, ask a question- “What is the tallest building in the world?” or anything you like and you get the answer quickly. 

    • Check the weather

     You can check the weather of different locations using Cortana. Typing “Weather” displays the weather of the place you are currently located; however, when entering “weather in [location]” would show the weather in another city. 

    • Launch Programs

    You can commence a program using Cortana, and for this you have to say “Launch [program name]”. In case you have a voice assistant “Hey Cortana” set on your desktop, you just have to say “Hey Cortana, launch Firefox” to the PC and the app is automatically open. 

    • Send Email

     Using a built-in mail app and the accounts configured, Cortana will be able to send emails; just need to say “Send email to Max” if the person’s details are stored in Contacts. 

    • Create Calendar events

     Calendar events can also be set by Cortana. You just need to say, for example “Add a luncheon with team on Friday at 1:30pm” and you can see that Cortana fills the provided information. When you say “Add meeting” Cortana would ask for details.

    • Just Chat

    As seen in Siri, chat is enabled in Cortana as well. You can “chat” with Cortana and it responds with quick answers. Ask differently like “Who’s Chirpy?” or give some instructions such as “Sing a Song”, “Play with me” etc

    At last after a long long information covered now we are heading towards the nutshell section of our topic “Bixby Vs Google assistant Vs Siri Vs Cortana” .

    Bixby Vs Google assistant Vs Siri Vs Cortana: The Best One!

    In this session, the comparison will be of Samsung Bixby with other Virtual Assistants. To be precise its all about Bixby Vs Google assistant Vs Siri Vs Cortana .

    The most important update we wish to give, regarding Samsung’s Bixby is that it is presently available only in beta version and that the full version is being delayed because of limited resources.  However,the Beta version is strong enough to be compared to other Virtual Assistants or its competitors. 

    • Bixby is activated by a button and not a Phrase

     You just need to say ‘OK Google’ or ‘Hey Siri’ to activate these virtual assistants. -WHEREAS- In the case of Bixby, you need to press the Bixby button which is on the side of phone. Once the button is pressed, you could ask this assistant to do anything from rotating a photo to setting reminders. Samsung had stated that its virtual assistant can do your 15000 tasks, but emailing is not included in the list. Assistant composes the mail but does not input the address automatically. The good side of Bixby is that, if it cannot do a task it does not say “I cannot help you with this”, as found in Siri. Bixby would more pleasingly say “Is this how you want?” This is an important thing to notice on comparison between Bixby Vs Google assistant Vs Siri Vs Cortana .

    • Bixby has enhanced reality features in store 

    You can have different ways to communicate with Bixby on Samsung Galaxy S8 with one of them being Vision. This feature makes use of the camera on the smartphone and a few advanced technology so as to identify some real time objects and search online. For instance, if you took a photo of a book at a store, Bixby looks at the price, reviews and suggestions or recommendations. This is again an important positive feature to notice on comparison between Bixby Vs Google assistant Vs Siri Vs Cortana .

    • Bixby has its own “Social Stream”

     Samsung has used Bixby Home to overtake the news update feature of Flipboard; hence you can find all the latest news at one place. Bixby Home plays the role of a network of uniform card; such as the reminders, reports on social media and the latest news. Imagine the lockscreen of iPhone with the widgets; and Bixby would be much more impressive and effective. Bixby can update you with latest news based on your daily tasks on the phone, or what is on high priority on your calendar. 

    • Learns from To-do-list and sends reminder

    This virtual assistant can give effective reminders directly from Bixby Home, so as to record the tasks to be done in a day. These reminders would be based on the importance, such as paying a telephone bill, to watch a movie bookmarked on Youtube. Unlike Siri, Bixby’s reminder feature is more stronger as it stays within the apps and hence learns from the words you feed onto the phone. 

    That’s all abut the Bixby Vs Google assistant Vs Siri Vs Cortana detailed look .

    Review

    From this comparison of Bixby to other virtual assistant like Siri, Google Assistant and Cortana, I hereby conclude that Bixby is the most preferrable Virtual Assistant, it has smarter features, to be specific, the reminders and the Social media connectivity with faster updates covering all the latest news. 

    Now we have discussed the comparison features between Bixby Vs Google assistant Vs Siri Vs Cortana .

    Hope this will help you to choose the ideal and best Virtual Assistant from Bixby Vs Google assistant Vs Siri Vs Cortana .

  • Roku Remote Control Doesn’t Work-Fix Roku Remote

    Roku Remote Control Doesn’t Work-Fix Roku Remote

    Roku remote control doesn’t work-Fix Roku Remote

    Roku devices have been getting more popular among youngsters. You could browse through your favourite channels via WiFi and these could be accessed through Roku Remote. You could watch movies or even play games. What would you do if your Roku Remote control doesn’t work?

    There are two types of remote, based on the Roku player or Roku TV owned.

    • Standard IR remote
    • Enhanced “point-anywhere” remote

    Standard IR Remote uses the Infra-Red(IR) light so as to transfer the remote key pushes. For the reliable operation of IR remotes, they must be directly pointed to the Roku device and make sure there are no obstacles blocking the signal

    The Enhanced “point anywhere” remote enables connection via wireless network and they need not be pointed directly to the Roku device If the Roku Streaming Stick or a remote supports voice search or private listening  through a headphone jack on the remote, then it is an enhanced “point-anywhere” remote. There are other Roku devices that have “point anywhere” remotes.

    We shall now see how to resolve when Roku remote control doesn’t work with these remote types.

    Read Also : Hard and Soft Reset Roku Manual – Fix Frozen Roku Streaming Stick

    Roku devices with standard IR Remote

    These remote types must be pointed directly in front of Roku player or Roku TV. The most common factor for the missed key pushes is that the Roku device would be placed in a location where the signal from the remote would be fully or partially blocked. Another significant issue is the low or dead battery.

    There are ways to solve this issue. Let us see each of them:

    1. Make sure the front side of the Roku device can be seen from where you are seated, and that there are no obstructions between the Roku device and the IR remote.
      • Hold the remote up higher so it directly points to the Roku device so the signal is not blocked from the remote. Once the remote works, remove any obstruction blocking the signal. You could also move the device so there is a reliable communication from the IR remote.
    2. Re seat the batteries
      • If the remote is still not working, you could remove the remote batteries and re insert them
    3. Replace the batteries
      • If the Roku remote control doesn’t work, replace the batteries.
    4. Try a new remote
      • If the remote is broken, it is time you try a new one.

    Read Also : Roku Tricks-Must Try for streaming success (Roku user manual FAQ)

    Roku devices with Enhanced “point anywhere” remote

    These types connect via wireless network and need not be directly pointed to the Roku device. During the initial setup, the “point anywhere” remote sets a wireless connection with the Roku device and the process is called Pairing. As the Roku remote pairs, following message is shown on the Roku device.

    Read Also : Roku Pros & Cons -Reasons to Choose Roku Streaming Stick

    Not sure if yours is the Enhanced Roku remote? You could find it by opening up the battery compartment to check if there is a pairing button.

    Following are the ways to solve the “point anywhere” remote issues:

    1. Try restarting the Roku device and remote:
      • Open the battery slot and remove the batteries.
      • Remove the power cable from the Roku device, wait for 5 seconds and re-connect the power cable.
      • As the Roku device displays the home screen, reinsert the batteries.
      • Wait for 30 seconds as the remote establishes a connection with the Roku device.
    2. Try re-pairing the remote:
      • Open the battery compartment and remove the batteries of the remote.
      • Remove the power cable from the Roku device, wait for 5 seconds and re-connect the power cable.
      • Press and hold the pairing button inside the remote for 3 seconds or until pairing light begins to flash.    If the light does not flash, try pairing it  again. If the light still does not flash, then you need to replace the batteries
      • Wait for 30 seconds while the remote establishes a connection with your Roku device.
      • The remote pairing dialog has to appear on TV screen.
    3. Replace the batteries:
      • Open the battery compartment and remove the old batteries from the remote.
      • Remove the power cable from the Roku device, wait for 5 seconds to re-connect the power cable.
      • When the Roku device displays the first screen, insert new batteries.
      • Wait for 30 seconds as the connection is established with your Roku device.
      • The remote pairing dialog appears on your TV screen.
    4. Try to replace the remote:
      • This step is followed when none of the above steps solve the problem.

    Read Also : Best Kodi Alternatives for Every Streaming Device

    However, you could be mislead with the following steps. Do NOT follow them:

    • Perform a factory reset on the Roku box.
    • Swap out your remote and buy a new one.

    A factory reset of the Roku box will not make a difference. The extreme step is to buy a new remote.

    You do not have to panic if Roku remote control doesn’t work. The remote control with a purple tag has a ‘panic’ button. As you pull the plastic cover from the back of the remote, you can see this button. It is the ‘pairing’ button. The remote must be paired with the Roku device. Press this button and hold it for a few seconds. Make sure the Roku player is unplugged for 5 to 15 seconds and then plug it to the wall socket. The button is the pressed and held for 5 seconds. An Android, iPhone, iPad or an iPod effectively works as a remote for the Roku device and there is an app available.

    Read Also : Kodi Vs Plex Vs Emby Vs Popcorn Time Comparison on Depth

    Follow these steps if the Roku remote control doesn’t work:

    • Point the remote directly at your Roku player.
    • Move closer to the player
    • Make sure the batteries are new and are inserted in the right manner
    • Make sure the front side of the player is not obstructed
    • If the status light of the player flashes every time the remote button is pressed, then the problem is not with the remote. Do not worry.

    Read Also : Best Streaming Devices – All Top Media Streaming Box on Market

    Read Also : Netflix Vs Prime Vs Hulu Vs Sling Vs Directv Now Vs Youtube Vs Vudu Vs  Vue

    Solution

    • Unplug Roku player from wall outlet.
    •  Wait for 5 or 10 seconds. Plug Roku player back into wall outlet. Roku logo is seen bouncing on TV screen.
    • Remove plastic cover from back of Roku remote control. There is a latch to press.
    •  Insert batteries properly. Smooth bottom or battery negative goes against the big spring. Positive post touches a small coil.
    • Press and hold the pairing button for 3 to 5 seconds.
    • Wait for about 10 seconds till the remote LED stops flashing.
    •  Try Roku remote again. It works.

    Review:

    This article will surely help you solve the Remote control issues.

  • Connect Android to Projector via USB and Wireless

    Connect Android to Projector via USB and Wireless

    Connect Android to Projector via USB and Wireless

    Earlier, projectors were mainly used for PowerPoint presentations in organisations. It was also used to watch movies on big screens. Projectors could be could be connected to other devices via USB or through wireless media. Here we will tell you the ways to Connect Android to Projector.

    There are certain common ways to connect Android to projector.  This is a hard wired connection and is used when the wireless connectivity does not work. For this, the Android device has to support a type of wired connection. They are as follows:

    • MHL (Mobile High-definition Link) : If the Android device supports MHL, you can connect the HDMI adapter to the device and then connect the HDMI port to the projector.
    • HDMI (High-Definition Multimedia Interface) : A mini HDMI cable could be used to connect directly to the standard HDMI port on the projector.

    Assume you wish to connect Android smartphone to the projector but have no clue about how to do it. Regardless of the available options, we would have a look at how to connect Android device to the projector.  It would be rather easier to connect the Android smartphone to projector and more portable than to carry a laptop around.

    The options available depends on the projector used. Each projector has its own ports and features.

    • Wireless App

    At first, make sure there is an app associated with it. So far, this has been the most relieving solution possible.  Panasonic Projectors and other leading brand projectors have apps, which enables to connect via WiFi or Bluetooth network and get a screenshot of what is present in Android device.

    If the app is unavailable on the Google Play website, you could check the website of the company that made the projector, or the documentation.So you must make sure there is wireless app to connect android device to projector .

    • Chromecast

    This option works in most Android devices. You may wish to watch a movie or get a screenshot of Android device on the projector, Google Chromecast would be the perfect choice. Chromecast device links directly to the HDMI port on a projector where you could send from the Android device via WiFi.

    • Miracast

    You could connect Android device to projector using Miracast too. If the projector does not have Miracast support,you could use Miracast video adapter to directly connect to the HDMI port of the projector. Miracast enables in casting anything from the Android device to the projector.

    Read Also : Connect Google Pixel to TV Easily with these Exclusive Guide ( Screen Mirroring )

    We shall now have a deep look into each type of android devices and how to Connect Android to Projector based on their type.

    Connect Android Tablet to Projector

    Here we will explain the ways to Connect Android to Projector via wireless and ways to Connect Android to Projector via USB too .

    Read Also : Backup Android Device to PC or Google

    Connect Android to Projector Via USB

    When you choose for an ultra-lightweight portability of a tablet, you need not look for a powerful laptop for giving a business presentation.Connecting your tablet to projector enables to extend the tablet screen onto a big screen for clients and staff to have a clear view. Connecting these devices require an adapter cable; however this depends on your tablet and the projector. These are the steps to be followed to connect the Android (tablet) to the projector:

    1 . Turn off the tablet.

    1. Review the types of video ports available on the tablet: The USB ports would vary depending on the manufacturer and the model of the tablet. Compare the ports to the type of video input ports available on the projector to choose the type of video adapter required to connect the two devices. If the port types on your tablet are not compatible with the input ports on the projector, you require an adapter. For example, Apple’s VGA adapter can be used to connect an iPad to a VGA projector
    2. Obtain one end of the video cable to the input port on the projector and connect the other end of the cable to your tablet. If an adapter is used to make the connection, connect the video cable to the adapter and then connect the adapter to the video port on your tablet.
    3. Turn on the projector and wait till the warm-up process is completed.
    4. Turn on your tablet. The images from your tablet should be transmitted automatically. If they don’t, refer to the owner’s manual for information on how to adjust the video output settings specific to your tablet model.

    This way you can connect android tablet to projector via USB.

    Read Also : Battery Health : How to keep your phone or tablet battery healthy

    Connect Android to Projector Via Wireless

    There are two basic approaches to connect Android device to projector via wireless media.One is by Bluetooth technology; and the other is through an existing network. The tablet must have Bluetooth support, being a standard on tablets such as the Google Nexus and Samsung Galaxy but might be avoided on certain lower-cost models. Epson uses the network technique, manufacturing projectors with built-in Ethernet or wireless networking.

    Read Also : Google Pixel WiFi Calling Enable and Disable

    Connect Android Phone To Projector

    Before we saw the methods to connect android tablet to projector now will see how to connect android mobile to Projector .

    Connecting an Android phone to a projector depends on the type of projector used. Latest projectors have inbuilt apps and wireless technology that could be used to send the details from the phone to the projector. This form is a stress free; displaying any video or screenshots from the android phone.Turn on the projector and point the phone like a flashlight on the wall,and the content gets displayed on the wall with high quality. This technology enables in sharing any data on the mobile anywhere with friends or with business people. Movies too could be enjoyed.

    Read Also : Android boot Fix – Steps to Try When Your Android Won’t Boot

    A few years ago, projectors had VGA or HDMI port connection; most android phones did not support these port types. The best option to connect the android phone is to get it connected via a micro USB to HDMI port or micro-USB to VGA port.Carrying heavy laptops, CD or glass sheets have turned old fashioned and even old people started hating using them.

    The other method of connecting to projector is using the Droid@Screen app, wherein you connect your mobile phone to any computer and using this app you could screen-in your project from the computer to the projector. The projector could be connected to the computer via HDMI port or VGA port.

    Smart phones are also available with Miracast supporting the projectors. If the projector does not have Miracast  you could purchase a Miracast video adapter and connect it to the projector. This method enables to watch the content like movie or any content from the android phone. You don’t need any WiFi connections to project the movie or the presentation. If you wish to connect mobile to projector via WiFi connections then you can use Chromecast. This device is directly linked to the HDMI port of the projector and you could send movies or power point presentations or any content from your mobile to the projector through WiFi connection.

    So that’s the concluding of our write up on the different methods to connect Android to Projector .