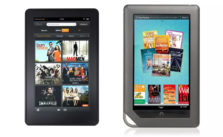
Kindle & Nook versions
Youngsters these days have their eBooks kept always accessible. These eBooks could be readable either from their tablets, or smartphones with larger screens. Smartphones would have apps into which eBooks could be downloaded and read anytime and anywhere.There have been certain digital devices in trend, such as the eReaders Kindle and Nook . We would now see the Kindle & Nook versions.
# Kindle
These are an array of e-Readers, created and marketed by Amazon. These devices allow the users to browse, buy, download, and read e-books, newspapers, magazines and other digital media through wireless networking, to the Kindle Store. Although the device is quite light-weight and easily portable, you could keep a large number of eBook in the Kindle. Most people use WiFi connection to download eBooks to the Kindle. However, the advanced models comprises 3G mobile phone technology, so as to enable the downloads, from wherever you are located.
How did the name ‘Kindle’ evolve ?
The hardware of Kindle was developed from the original Kindle launched in 2007 and the Kindle DX, having larger screen was announced in 2009. There were devices with a Kindle Keyboard, touch sensitive high resolution and contrast screens called Kindle Paperwhite, a tablet with the Kindle app called the Kindle Fire, and a low-priced model with a touch-sensitive screen called Kindle.
The software of Kindle device is designed for the use in multiple platforms like Microsoft Windows, iOS, Mac OS X (10.5 or later, Intel processor only), Android, web OS and Windows Phone. Kindle has a”cloud” reader, which allows to read, as well as buy Kindle books at read.amazon.com.
Kindle contents are bought online; also downloaded via wireless networks in certain countries-either standard WiFi or Amazon’s 3G “Whispernet” network. Whispernet is easily usable without any monthly fee or wireless subscription, although fees are drawn for the delivery of journals and other content when travelling beyond the customer’s home country. A service called “Whispersync” enables customers to synchronize reading progress, bookmarks, and other information across Kindle hardware and other mobile devices.
Read Also : Download free eBooks For My Nooks or Kindle -Read eBooks
Kindle Devices
Here is the different versions of Kindle device.
- E-link versions
- LCD Versions
Now we will see he different Kindle E-link versions
First Generation Kindle :
The first e-reader of Amazon, Kindle, was developed which costed about $400. The pieces of this amazing device were sold in just five and a half hours. Unfortunately, they had run out-of-stock.
The device sized to a 6 inches (diagonal) 4-level gray-scale E Ink display, internal storage to 250 MB , enabling to have approximately 200 non-illustrated titles.
This device also comprised a speaker and a headphone jack,allowing the user to listen to audio files on Kindle. It has been the only Kindle which could have expandable storage, with an SD card slot.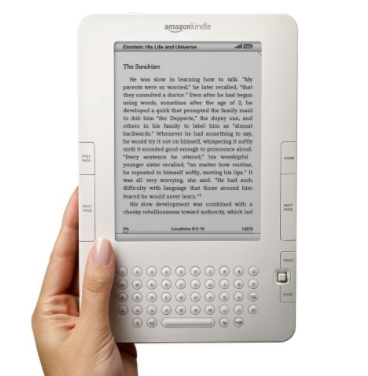
The Whispernet feature was co-designed with Qualcomm and Kindle being the first device with free 3G data throughout the U.S enabling browsing and to download free eBooks from Amazon’s Kindle Store.
These First generation Kindle devices were not sold outside U.S.
Read Also : Use Kindle Fire as Second PC Screen / Display Ultimate Guide
Second Generation Kindle :
The Kindle 2 had features such as text-to-speech option; wherein the text would be read aloud, and 2 GB of internal memory,out of which 1.4 GB was allowed to be used by the user. According to the evaluation by Amazon, the Kindle 2 could hold up to 1,500 non-illustrated books. However,the limitation of the second generation devices was that they did not have an external memory card slot. It was slimmer than the original Kindle. The Kindle 2 had Freescale 532 MHz, ARM-11 90 nm processor, 32 MB main memory, 2 GB flash memory and a 3.7 V 1,530 mAh lithium polymer battery.
Amazon then reduced the price of the Kindle 2 from $359 to $299.The price was further reduced to $259. The Kindle 2 had priced manufacturing materials to an estimate of $186 by iSuppli . Amazon had stopped selling the initial model of Kindle 2 and sold the Kindle 2 international version worldwide. Later, Amazon claimed a software update for the device with enhanced battery life to 85% and hosted the original PDF file support.
Kindle 2 International
Amazon released Kindle 2 International, where users could download free eBooks wirelessly in over 100 countries. The looks of International Kindle 2 was the same as the U.S.-only Kindle 2, however, it had used a regular mobile network .
The primary model of Kindle 2 had CDMA2000 on the Sprint network. Meanwhile, its international version used standard GSM and 3G GSM, allowing to be used on AT&T‘s U.S. mobile network, as well as internationally in 100 other countries. The Kindle 2 International was considered, having a higher variation in its display,but it was not advertised by Amazon.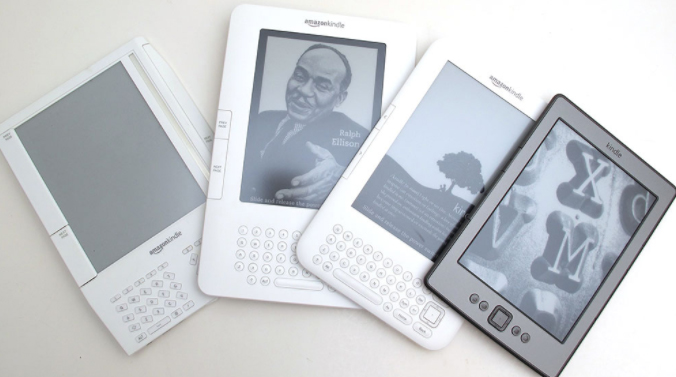
Kindle DX
Kindle DX was featured with a larger screen than the standard Kindle and supports PDF files. It comprised an Accelerometer allowing the user to consistently turn pages between landscape and portrait orientations as and when the Kindle DX is turned around. It was marketed with the ability to display newspaper, as well as contents of textbooks. The drawback was that it could be connected only by Whispernet, in the U.S
Kindle DX International
This version of Kindle DX was launched in 100 countries. The features of Kindle DX international is ‘ditto’ as that of Kindle DX, except for its support for international 3G data.
Kindle DX Graphite
The display on this device is of E Ink, having 50% better contrast ratio as E Ink Pearl technology has been used, which has only a graphite case color. It was figured out that, the change of color was to improve comparative ratio approach further,since certain users observed the prior white casing highlighted the E Ink background with light gray and not white. As in the Kindle DX, DXG too does not have a WiFi connection.
The DXG is a combination of third-generation hardware second-generation software. The CPU works with the same speed as Kindle Keyboard; but the DXG having only half the system memory being 128 MB. These differences would cause the DXG running the same software as that of Kindle 2. Hence, DXG has not been able to display writings in international fonts, like the Cyrillic, Chinese, or any other non-Latin font; also that PDF support and the web browser are limited to matching the features of Kindle 2.
The Kindle DX was taken off from sale; yet, was accessible again for another few months. 3G data usage has been made free with the access of Kindle Store and Wikipedia.Downloading personal documents via 3G data would be priced to $1 per megabyte. The Kindle battery life would last up to a week’s time along with 3G set ON and two weeks with 3G being OFF. Text-to-Speech and MP3 playback are supported too.
Read Also : Gadget for e-book and book readers
Third Generation Kindle :
Kindle Keyboard
The third generation Kindle released by Amazon had been renamed as “Kindle Keyboard”. The prior order of Kindle Keyboard was accepted soon after its launch, hence started shipping the devices. Amazon declared Kindle Keyboard as the fastest-selling Kindle ever. Since Amazon does not actually add numbers at the final stage of each Kindle by its generation; reviewers, customers and press companies often considered this Kindle as the “K3” or the “Kindle 3“.
The size of Kindle Keyboard is 0.5 inches shorter and 0.5 inches narrower when compared to the Kindle 2. It holds up additional fonts and international Unicode characters along with a Voice Guide feature with spoken menu navigation. Experimental features comprise a browser working on the popular WebKit delivering engine (browser would be limited to 50 MB of 3G per month to websites excluding Amazon and Wikipedia in outside the United States), Text-to-Speech which reads the texts aloud from books and other content, and also holding an MP3 player. Extended internal memory would be to 4 GB, with almost 3 GB of content accessible for user. Battery life has been declared to be two months,provided the user would read about half an hour a day turning off the wireless, that would extend the battery life to roughly 30 hours.
Fourth Generation :
The fourth-generation Kindle and the Kindle Touch possess the 6-inch, 167-ppi e-ink display, similar to the 2010 Kindle model, having the additional feature of an infrared touch-screen control on the Touch. These also have Amazon’s trial version of web-browsing capability accompanied by WiFi.
Kindle 4
Kindle in the fourth generation was quite less expensive ($79 with ad support, $109 excluding ads) and comprising a slight reduction in weight and size, though with a lesser battery life and storage capacity, unlike the Kindle 3. It has a silver-grey holder, with nine hard keys, a cursor pad, an on-screen keyboard, a zipped storage capacity of 2 GB, with battery life up to almost one month under optimal settings in reading.
Kindle Touch
There have been two versions of touchscreen Kindles, the Kindle Touch, having Wi-Fi ($99 ad-support, $139 without ads) and the Kindle Touch 3G, comprising Wi-Fi/3G connectivity ($149 ad support, $189 excluding ads). The latter version enables to connect via 3G to the Kindle Store, download free eBooks and journals, as well as access Wikipedia. Temporary web browsing (outside Wikipedia) using Kindle Touch 3G is available only via WiFi connection.(Kindle Keyboard has no restriction). The 3G data could be used only up to 50 MB per month. Just as in Kindle 3, the Kindle Touch has a capacity of 4 GB with two months of battery life under optimal reading circumstances, yet larger than the Kindle 4. The Kindle Touch started shipping out only in the U.S. It was declared that the device would be available in the UK, Germany, France, Spain and Italy. This Kindle version was the first Kindle that supported X-Ray, listing out the frequently used character names, locations, themes, or ideas in a book. Amazon launched the 5.2.0 version of software, wherein operating system was updated so as to match the interface of Paperwhite with that of the Touch’s MP3/audiobook features.
Fifth Generation :
Kindle 5
Amazon released the Kindle 5 ($70 ad-supported,$90 no ads). The Kindle has a black ring holder, distinct from the Kindle 4 with silver-grey, accompanied by a better display contrast. It has also been declared that Kindle 5 had 15% faster page loads. It had a 167 PPI display and was the lightest Kindle at 5.98 oz until the release of Kindle Oasis.
Kindle PaperWhite (First Generation)
This version of Kindle was launched with a 6″, 212 PPI E Ink Pearl display (758×1024 resolution) and four built-in LEDs for screen illumination, Paperwhite 1st generation was accessible via WiFi and WiFi + 3G models; with ad-supported versions available only in the U.S. One of the main features of PaperWhite is the light, wherein there is a manually adjustable light level. The access restrictions of 3G data usage are the same as in the Kindle Touch, and usage limit is set to 50 MB per month and only on Amazon and Wikipedia’s websites; and additional data ought to be purchased.
Battery life could be set up to eight weeks of reading with half an hour per day without Wi-Fi and consistent usage of light totalling to 28 hours. The authentic leather cover for the Paperwhite enables the hall effect sensor,wherein device detects when the cover was closed/opened, turning the screen off/on respectively. This device was the first Kindle version to record reading speed thereby calculating finishing point of a chapter or book; this feature was later added as per the Kindle updates as well as in Kindle Fire tablets.
Unfortunately, Kindle Paperwhite does not have physical buttons to turn on the pages and does not carry-out auto-hyphenation. Excluding the feature of lock screen/power button at its bottom, it mainly depends on the touchscreen interface. During November 2012, Amazon launched the 5.3.0 updated version enabling users to turn off certain content on the home screen in Grid View (can view two rows of content) and included common error fixes. The 5.4.4 updated version was launched later, wherein Goodreads integration was added , Kindle FreeTime which had limited child’s usage, Cloud Collections for association and Page Flip to scan the content without losing the location, that almost matched the features of Paperwhite 2’s software features. The Kindle Paperwhite was introduced in most of important international markets with a version from Japan comprising 4 GB storage capacity, also in China followed by non-Japan versions with 2 GB of storage (1.25 GB accessible to users).
Read Also : How to reset iPod Nano or steps to unfreeze iPod Nano
Sixth Generation :
Kindle PaperWhite (2nd Generation)
The Second generation of Kindle Paperwhite was brought out being named as the “All-New Kindle Paperwhite” and literally called as the Paperwhite 2, with the WiFi version launched in the US on ($120 ad-supported, $140 no ads), as well as the 3G/WiFi version in the US ($190 ad-supported, $210 no ads). The Paperwhite 2 comprises a higher contrast display technology – E Ink Carta with improved LED illumination, 25% faster processor (1 GHz) enabling faster page turns, and improved response to touch-input when compared to the standard Paperwhite. Paperwhite 2 also holds the 6″ screen with 212 PPI, ring holder and 28-hour battery life as in the initial version. The software has dictionary/Wikipedia/X-Ray look-up, Page Flip, enabling the user to skip ahead or back in the text in a pop-up window and go back to the previous page, and the Goodreads social integration.
In Paperwhite 2 ,a trial version of web browser has been used with the 3G data usage restrictions as in previous Kindles; however there are restrictions in the usage of WiFi. The customary leather cover for the Paperwhite 2 is the one as used for the initial Paperwhite. It would turn the screen on or off while been opened or closed. The Paperwhite 2 model of Kindle was launched covering up major international markets by the mid 2014 and this model included 4 GB of storage.Meanwhile, the US version of the Paperwhite 2 had included 4 GB of storage with the previous version of Paperwhite 2 had 2 GB.
Seventh Generation :
Kindle 7
An upgraded version of primary Kindle and the Kindle Voyage were released.The Kindle 7 was launched ($80 ad-supported, $100 no ads). It had been the first ever Kindle model using a touchscreen to sail through books and had a 1 GHz CPU. Additionally, it had been the first Kindle available in international markets like India, Japan and China. Amazon also declared that a single charge would extend to a month if used half an hour a day without WiFi.
Kindle Voyage
The Kindle Voyage was launched in the US, comprising features like 6-inch, 300 ppi E Ink Carta HD display, which had been the highest resolution and contrast found in e-readers having six LEDs with an changeable light sensor that could automatically brighten the screen according to the environmental change. It had been available in WiFi ($200 ad-supported, $220 no ads) as well as WiFi + 3G ($270 ad-supported, $290 no ads) models. Its design includes a tint glass screen on the front with the rear glass having angular, raised plastic edges holding the power button, as in the Fire HDX model. The Voyage has used “PagePress”, which is a navigation system with sensors on both sides of the screen which would turn the page when pressed. PagePress could be disabled, but the touchscreen would still be active. The user storage would hold up to 3 GB. Amazon had declared that the battery life would last to 6 weeks, if used for 30 minutes a day without WiFi and brightness being set to 10, which would be about 21 hours.
Kindle PaperWhite(3rd generation)
The Kindle Paperwhite (3rd generation), named as the “All-New Kindle Paperwhite” and literally referred to as the Paperwhite 3 and Paperwhite , was launched in the US. It has been accessible through WiFi ($120 ad-supported, $140 no ads) and WiFi + 3G ($190 ad-supported, $210 no ads) models. The device comprises a 6-inch, 1440×1080, 300 ppi E Ink Carta HD display, which was twice the pixels of the typical Paperwhite having the same touchscreen, four LEDs and size being the same as previous model of Paperwhite. It also had over 3 GB of user accessible storage. This device had improved display of PDF files, with the accessibility to select text enabling the use of certain processes, like translation on a PDF’s text. It was also declared that the device had a battery life of 6 weeks when used for 30 minutes a day with wireless off and brightness set to 10, which is about 21 hours.
The Paperwhite 3 has been the first e-reader to have added the Bookerly font, a new font designed by Amazon, including updated formatting operations like the hyphenation and better spacing. The Bookerly font had been included in most of conventional models through a software update. The Paperwhite 2, Paperwhite 3, Kindle 7 and Voyage had updated to 5.7.2, wherein a new home screen layout, called an OpenDyslexic font choice, had improved book references and a new quick actions set of choices.
On June 30, 2016, a white version of the Paperwhite 3 worldwide had been introduced; with the only distinct feature about this version being the color of the shell. During October 2016, Amazon launched the Paperwhite 3 “Manga Model” in Japan with 33% better pace in turning page along with storage capacity of 32 GB which could cover up to 700 Manga books. The Manga model had been launched at 16,280 Yen ($156) for the version with ad-supported WiFi or 12,280 Yen ($118) for Prime members.
Eighth Generation :
Kindle Oasis
Amazon introduced the Kindle Oasis and had been released worldwide. The Kindle Oasis was made available in WiFi ($290 ad-supported, $310 no ads) and WiFi + 3G ($360 ad-supported, $380 no ads) models. The Oasis comprised a 6-inch, 300 ppi E Ink Carta HD display with ten LEDs. Its lopsided design presented physical page having buttons on one side with an Accelerometer in a way that, the display would be rotated with either hands. It was thicker on one side and narrows towards an edge being 20% thinner than the Paperwhite. It comprised a removable leather battery cover for better protection and enhanced battery life available in either Black, Walnut (brown) or Merlot (red); the cover joining in the narrowed edge. The Oasis featured battery life of 28 hours provided it has been used with the battery cover without WiFi; however, without the cover, the Oasis battery would live up to seven hours. The user storage of 3 GB was another highlighted feature. The Oasis included the Bookerly (serif) font and it had been the first Kindle that included the Amazon Ember (sans-serif) font.
Kindle 8
Amazon’s upgrade of the basic Kindle was launched on the 22nd of June 2016 in both Black as well as in White ($80 ad-supported, $100 no ads). The Kindle 8 comprised a new rounded design which was 0.35 inches (9 mm) shorter, 0.16 inches (4 mm) narrower, 0.043 inches (1.1 mm) thinner, and 1.1 ounces (30 g) lighter than the Kindle 7, and also had double the RAM (512 MB) than that of the previous Kindle version. The Kindle 8 had been the first Kindle that used Bluetooth to support VoiceView screen reader software for the blind people. It comprises the same screen display as of the previous model; a 167 ppi E Ink Pearl touch-screen display. Amazon declared that the device had a four-week battery life which could get all charged in just four hours.
Kindle LCD Versions:
Here is the Kindle LCD versions in detailed list.
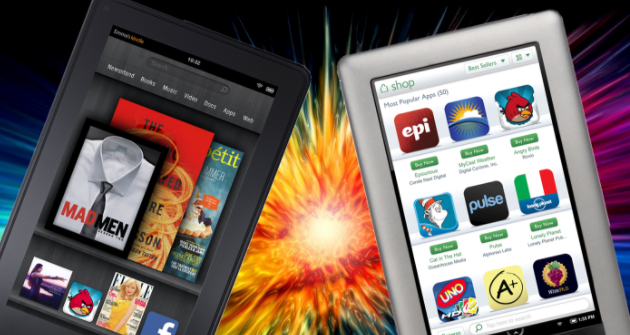
Kindle Fire
Kindle Fire is an Android-based tablet using a component of Android. During the release of this device it had costed $200 and had a 7-inch IPS color touchscreen display. This was the first Kindle without an E Ink display. However unlike former versions of Kindles, it had no 3G option, but only WiFi.
Kindle Fire HD
The Kindle Fire HD, was second generation of Amazon’s color touchscreen Kindle Fire tablet line. It was made accessible in three component types- 6 inch, 7 inch and 8.9 inch screen sizes. Amazon introduced its latest version of Fire HD tablets, formally withdrawing “Kindle” from the device’s name.
Kindle Fire HDX
The Kindle Fire HDX was the third generation of Amazon’s Kindle Fire tablet series which previously used Fire OS 3 with screen sizes 7 inch and 8.9 inch. During the update, it was renamed as Fire HDX thereby removing the name “Kindle” from that device’s name.
Read Also : Kindle Fire Silk Browser Alternatives
#Nook
Barnes & Noble Nook or stylishly named Nook is a brand of e-Readers, developed by American book retailer Barnes & Noble. with Android platform as the base. The original Nook version had 6 inch E-paper display and a separate, smaller color touchscreen serving as the primary input device and capable of WiFi and AT&T 3G wireless connectivity.
How did the e-Reader get its name-‘Nooks’?
This name was disregarded at first, by Barnes & Noble; however, gradually Nook became a common place for reading, thereby being convincing enough for the company executives to accept the name. The original Nook version had 6 inch epaper display.
Devices:
Nook Glowlight Plus(E Ink)
This version of Nook e-reader was launched, comprising a 6 inch 300 PPI Carta E Ink screen with front light and touchscreen, WiFi, aluminum shield at the back, six weeks battery life without Wireless connection, weighing 6 ounces and being water resistant up to maximum depth of 1 meter and dust-resistant. The software of Nook reader is Android 4.4 Kitkat with 2.8 GB of data available to user. With the software being Android 4.4, there could be third-party apps installed.
Read Also : Convert 3G Phone to 4G Phone to support 4G Sim in 3G Mobile
Samsung Galaxy Tab Nook
Barnes & Noble had declared that there could be a newer Nook version and hence they claimed to join with Samsung so as to develop a dual-branded tablets, thus naming it as Samsung Galaxy Tab 4 Nook. This device would be a combination of features of Galaxy’s 7 inch display and personalized software of Nook.
Samsung Galaxy Tab 4 Nook(7″ LCD)
This version of Nook was launched in the U.S concentrating on firmware and the idea; and Samsung concentrating on hardware. The device runs on Android 4.4.2 Kitkat 1.2 GHz Quad-core Snapdragon with 1.5 GB RAM, WiFi and Bluetooth ; comprising 1.2 MP front camera and 3.2 MP back camera, screen resolution of 1280 x 800; accompanied by SD card slot that would take cards with storage capacity up to 64 GB. This device was launched at the price of $199;eventually the price dropped to $149 during May 2015.
Samsung Galaxy Tab S2 Nook (8″ LCD)
This device was launched as Samsung Galaxy Tab S2 branded as Nook with 8 inch LCD, which comprised the software of both Samsung and B&N. This device runs on Android 5.0.2; comprising 8-core CPU (1.9 GHz Quad + 1.3 GHz Quad) accompanied by 3 GB RAM, 32 GB internal storage, a micro-SD card slot, dual-camera(2.1 MP front 8 MP back) and 4000 mAh battery, which would last up to 14 hours using video and costing up to U.S $399.99.
Samsung Galaxy Tab E Nook(9.6″ LCD)
This Nook version was launched which was Nook branded Samsung Galaxy Tab with 9.6″ LCD whose software was a combination of Samsung, B&N and Microsoft. This device operates with Android 5.1.1 on a 1.2 GHz Qualcomm Snapdragon 410 CPU with 16 GB of storage, micro SD card accessibility, weighing 547 grams, and dual camera (2 MP front and 5 MP rear); 9.6″ display having resolution of 1280 x 800 costing to $249.
Nook Tablet 7
B&N introduced Nook Tablet during November 2016, which was an exclusive Nook branded tablet with a 7″ screen and 600 x 1024 resolution costing up to $50. The operating system used in this device is Android 6.0 Marshmallow with Nook apps, accompanied by 1.3 GHz MediaTek CPU. It has 8 GB storage, a micro SD card slot, WiFi and Bluetooth; weighing 8.8 ounces and a battery life of 7 hours.
Read Also : Android Oreo Vs Android Nougat Vs Android Marshmallow Vs Lollipop
Conclusion
We have looked at the different Kindle & Nook versions from where you could download free eBooks for these devices. Hope this article has won your hearts and helped you find your right e Reader. Have a Good Read.


 Ingress is one of the best-augmented reality apps for game. This App allows users to experience a completely different world.This App from Google turns reality surrounding into capturable objectives in-game portals. Landmarks and points of interest are captured on your mobiles. It just uses GPS technology to access your location and gives you a view of augmented reality.
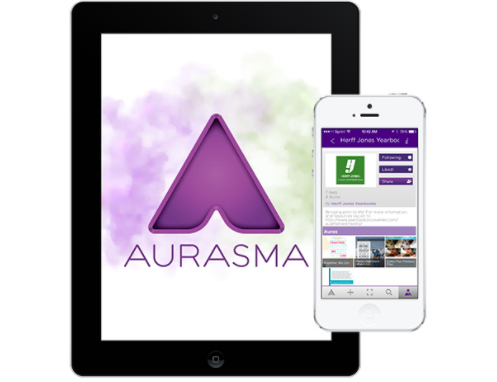 Aurasma is one of the best-augmented apps for education. It is Free and available for both Android and iPhone platforms. This app is very useful to complete project works. If you find the logo of an augmented app on newspapers, magazines, books and on any product there is a chance for you to discover Aura. It is the only app that allows users to create and share their own augmented reality. Users can also create their own Auras and can also share them with friends and other Aurasma users. It
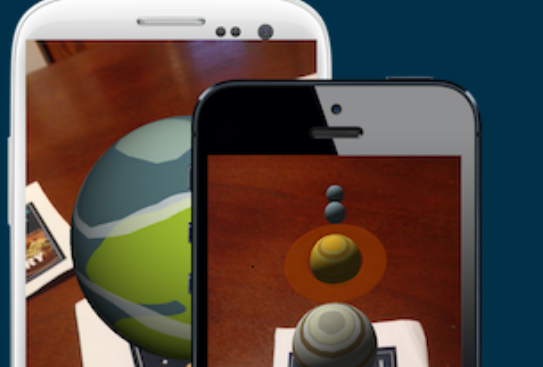 AR Flashcards Appone of the Best augmented Reality Apps in education sector it introduced a new way to learn.You can use this app even your ward is not going to school, they can start learning through this app. And as it is learning through technology your ward will definitely show extra interest.Learning through this app is fun. There are also 3D images available with the voice this attracts children more. The best app to help children learn.
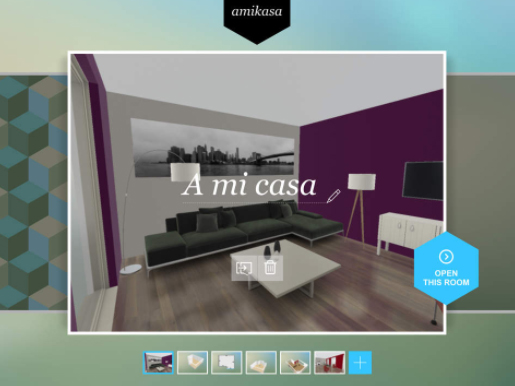 Amikasa app is available for iOS platform. It is an augmented reality app for lifestyle. If you want to buy new furniture for your home this app will surely help you to decide what to buy. This app offers help to users to style their home and find out the perfect layout before users buy furniture. Users by using their iPhone or iPad’s camera can easily walk around their home and can place 3D models of furniture to see how they look. Through this app, you can also take suggestions from your family and friends. It is thus a popular iOS Augmented reality app .
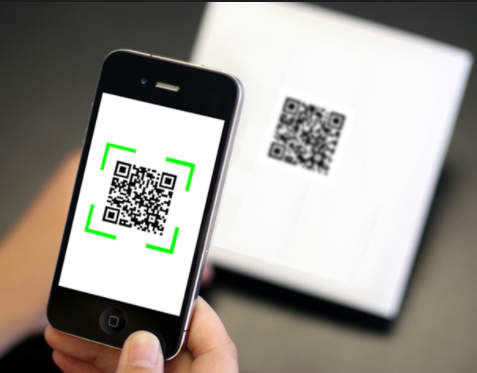 Users can download QR Scanner from GOOGLE PLAY. Barcode and QR scanners are the first AR apps.It works by using user’s camera to read various barcodes. It can handle barcodes and QR codes. This app also saves user’s scans that they have already made so they can recall them later. It is one of the most important AR apps available for android users.
 Strava’s Fitness is a Best augmented Reality Apps for fitness and easy lifestyle. It allows users to visualize their running and biking routes in 3D. Users can make an account on Strava’s fitness and can upload their routes and can even explore new routes this app will display a 3D map and also allow users to explore the map from different angles.
 Word Brush app is one of the Best augmented Reality Apps available for free for iOS users. It is an iOS augmented reality app that allows users to use virtual brushes to draw and paint over real-world. Once users complete their virtual painting it is saved according to its GPS location, and the app also allows other users to view virtual paintings of word brush users. And there are options available for like, dislike, and report.

 It offers Live TV, DVR and child lock options are also available. Like Kodi and Plex, Emby is also free. It can easily manage your content and you can also share it without any security issue. It’s apps also available for iPhone, iPad, Android, windows, Amazon fire TV, Roku, Chromecast, Android box and more. More details about Emby is provided in the downward section that is Kodi Vs Plex Vs Emby Vs Popcorn Time.
 After that, independent developers made two forks of it first is Popcorn time.io and other one is time4popcorn. Then after some time one of the forks that is popcorn time.io closed because of all these things butter project created which is 100% legal. More details about Popcorn Time is provided in the downward section that is Kodi Vs Plex Vs Emby Vs Popcorn Time.


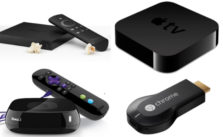

 More streaming devices like Apple tv, Philips, Roku, Virgin Media and Chromecast supports Netflix, whereas fewer streaming services such as Amazon Fire Tv and Apple Tv. Amazon Prime is good but Netflix is still the best as it offers content which is much better than content offered by Amazon Prime.
 It offers 30 days trial, whereas Hulu offers an only 1-week trial. Prime has 5.1 encoding, whereas Hulu offers only stereo sound. Amazon Prime’s attracting feature is that it gives shopping offers to online shoppers, whereas Hulu’s attracting feature is that it offers Tv shows.