Apple being one of the famous brand always upgrade Operating system for its devices . As you may be very well aware that the operating system Apple make use of is the iOS . Soon after the release of three new flagship iPhones here comes the most awaited latest iOS version . Here we will learn about How to update iPhone / iPad to the Latest iOS update .
Answering the most awaited question about iOS 12 release date , the new iOS got released for 2018 also on September . Those who wanted to upgrade iOS and update iPhone with Latest iOS . Then read this piece , because its just written for you.
The history of iOS versions begins from the release of iPhone OS 1 , iPhone OS 2 , iPhone OS 3 , iOS 4 , iOS 5 , iOS 6 , iOS 7 , iOS 8 , iOS 9 , iOS 10 , iOS 11 , iOS 12, the latest .
Read Also : Improve The World With Smartphone -Top 10 Hacks
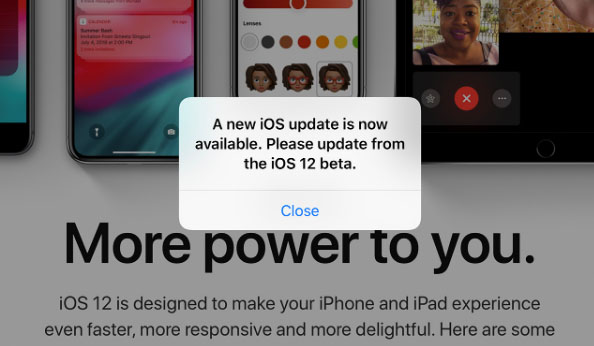
iOS 12 Released
Finally the most awaited latest Apple OS for iPhone and iPad is released. After iOS 12 beta now iOS is official . It is evident that most of the iOS 11 supported devices will support iOS 12 .
You can update iPhone to iOS 12 by checking out whether your iPhone OS can be upgraded .
iOS 12 Supported Device list
Given below is the devices that use iOS 12 and also list of devices where you can upgrade iOS .Here is the list of Apple devices capable to do iOS 12 download. We will also guide you about how to update iPhone with latest iOS .
iPod Touch
On the series of iPod touch devices the iPod Touch 6 (iPod 6th generation) is compatible for iOS update . You can download iOS 12 for iPod Touch 6 . The iPod touch 6 G that initially was iOS 8 which can be now updated. So you can update iOS 8 to iOS 12 .
Read Also : 38 Best iPhone games you should play
iOS 12 for iPod Touch – How to Install iOS 12 On iPod Touch
In order to update iPod touch with iOS 12 follow the given steps –
- First take a iTunes Backup / iCloud Backup of your iPod Toch device
- Install latest iOS (download iOS 12) either by wireless method or by iTunes
The steps to installation of iOS is same for iphone , ipad and iPod .So read the common section for understanding how to update iPod software .
iPad iOS update Supported Devices
Given is the list of iPad devices that can be upgraded to iOS 12 . So lets see how to update iOS on iPad .
- iPad Air – Initially used iOS 7 , now this can be updated from iOS 7 to iOS 12
- iPad Air 2 – Initially used iOS 8 , now this can be updated from iOS 8 to iOS 12
- iPad 2017 – Initially used iOS 10.2.1 can be upgraded to iOS 12
- iPad 2018 – Initially used iOS 11.3 can be updated from iOS 11 to iOS 12
- iPad Mini 2 -Initially used iOS 7.03 can be updated to iOS 12
- iPad Mini 3 -Initially used iOS 8.1 can be upgraded to iOS 12
- iPad Mini 4 -Initially used iOS 9 can be now updated from iOS 9 to iOS 12
- iPad Pro (9.7 inches) , iPad Pro (10.5 inches) , iPad Pro (12.9 inches ) Generation 1 and 2 – Initially used iOS 9.1 can now be upgraded with latest iOS 12 .

iPhone iOS 12 supported
Here is the list of iPhone that can be available for iPhone software update to the latest iOS 12 . These devices can be upgraded to iOS 12
- iPhone 5S – Initially run on iOS 7 can be now upgraded to iOS 12
- iPhone 6 – iOS 8 to iOS 12 can be updated for iPhone 6 users
- iPhone 6 Plus – This iPhone 6 Plus users using iOS 8 can update it to iOS 12
- iPhone 6S & iPhone 6S Plus -Initially run on iOS 9 can be upgraded to iOS 12
- iPhone SE – updating iOS for iPhone SE is available , here you can upgrade iOS 9.3 to iOS 12
- iPhone 7 – iOS 10 to iOS 12 software update is available for iPhone 7 series
- iPhone 7 Plus – iOS 10 to iOS 12 update is possible for even iPhone 7 Plus
- iPhone 8 – You can update the old iOS in iPhone 8 which was iOS 11 to iOS 12
- iPhone 8 Plus – iOS 11 is the OS running on iPhone 8 plus hich was available for iOS 11 update earlier . Now you can upgrade iPhone 8 Plus to iOS 12 .
- iPhone X – iOS 11 was the iPhone X OS , now those who are using iPhone X can update iPhone to iOS 12
- iPhone XS – iOS 12 is the OS for the new flagship Apple phone
- iPhone XS Max – This apple flagship phone uses iOS 12
- iPhone XR – Most modern apple phone , iPhone XR runs on iOS 12
Why iOS 12 – Best Features of iOS 12
The newly released iOS 12 has so many features to make you fall in love with iOS 12 . Let’s take a look at some of the most exciting and best iOS 12 features –
Navigation Apps is Not Limited Anymore
You may be aware that earlier versions of Apple OS has allowed its users to rely upon only the Apple Navigation app , that is the Apple Maps . Those who had voted more for Google Maps on a comparison between Google Maps Vs Apple Maps , can be happy now . Your iOS 12 allows you to use Google Maps and other third party navigation apps with the Apple CarPlay .
That’s quote a good news , isn’t . Don’t worry we will guide you on how to Google Maps with Apple CarPlay in our upcoming write up.
Group FaceTime Call is Latest in iMessage Group Chat
Now , this feature is not live but it will be rolled out soon in iOS 12 . Thus allowing the iPhone , iPad and Mac users to enjoy group Facetime Call with new iOS .
Read Also : Best Triple Camera Phones to Buy This Year
iOS with More App updates
Seriously not a major app updates but yes there are few excellent app updates with the iOS 12 .
- Apple News App with a scroll option in iPad.
- Stock Analysis , Performance and top stock related news updates throughout the day.
- iPad now gets Voice memo apps . Also there is iCloud support to sync your Voice memo with other Apple devices .
- iBooks turned to be Apple Books . It has got Book store feature and Reading now feature to make it much more easy to use .
Access Apple TV with Apple Control Center
Add Apple TV tile to your iOS 12 Control center , now just swipe and tap to access Apple TV
Managing Screen Time
Now iOS 12 lets the Apple iPhone and iPad user to understand the pattern of their device usage time , a clear and detailed summary of how much you have used your device . Also which app you spend more time etc.
App Limit Feature
Along with managing screen time , apple also introduced an efficient and smart feature that allows the users to limit their usage by setting time limit for each apple apps . So that’s how the App Limit feature adds more power to the screen time management feature in iOS 12.
Downtime Feature in iOS 12
This is a boon to parents where they can remotely manage their kid’s apple device usage with Family sharing app . The downtime feature in iOS 12 aims at helping parents to limit their kid’s access to apps or websites and even set time to each applications .
Bye bye to Long list of Notifications
No more irritating thread by thread notifications to pile up your home screen . Everything is now sent as a grouped notification on a single thread . This single thread notification is one of the best things that happened with iOS 12
Read Also : iPhone Vs Samsung which is better – iPhone Vs Galaxy Compared
Do Not Disturb & Critical Alerts
Set time to enable Do not disturb and toggle on Do not disturb whenever you want to stay away from getting distracted because of mobile. But one better thing is Critical alerts from healthcare persons will work even when your Do not disturb is enabled .
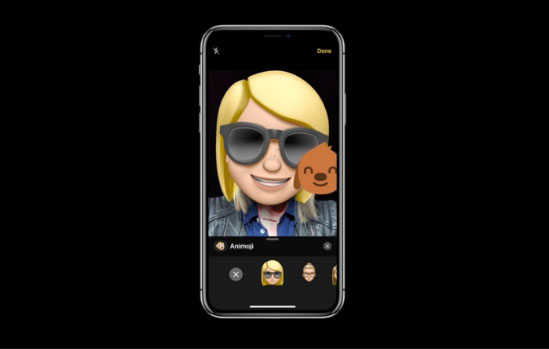
There are more features like – iOS Photos – For You Tab , Siri shortcuts for iOS 12 , ARKit 2.0 , USDZ format , Add 2 Face Id Profiles , Better password manager , Apple camera app with Improved Portrait mode , better battery health , better QR scanner , Better screenshots on iPhone , New Apple map design , location sharing , Animoji and memoji trends , iOS 12 Siri suggestions improved .
How to update iPhone / iPad to the Latest iOS update
Now let us dive into the core topic ,that is how to update iPhone/iPad with latest iOS . Before you do iPhone Sofware update you have to backup iPhone /iPad before you update iOS .
How to Backup iPhone /iPad /iPod before updating to iOS 12
Before you download iOS 12 , You have to backup iPhone /iPad /iPod to prevent loss of data while software upgrade.
You may be aware that there are two methods to update iPhone –
- Update iPhone using iTunes
- Update iPhone using iCloud
Now before that all you need is to learn to back up iPhone / iPad /iPod
Read Also : Factory reset iPhone without password or iTunes with data backup
How to Take iTunes Backup of iPhone/iPad/iPod
To prevent iPhone data loss before you update iPhone or any of your iOS device , take a iTunes backup . Follow the given steps –
- Ensure that you have updated latest iTunes version , if no install latest iTunes version first .
- Now open iTunes
- Connect your iPhone/iPad/iPod to your computer
- Now you will be asked to verify the computer by entering the passcode .
- Next you have to enter your Passcode information correctly .
- Now select your device on iTunes window’s left corner .
- You have to click on the Summary option that you can see on the left corner of the window
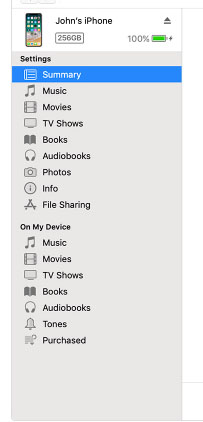
- At this time yo can see your device information on centre of the window displayed out . Also there you can find an option This Computer
- Toggle it and below that there is an option Encrypt device backup , Click that and enable tick mark for that to protect it with password
- Now on Manually backup and restore option click on Backup Now
- Click done .
Read Also : Best iTunes Cleanup Software for better iTunes experience
This is how you can restore iPhone/iPad /iPod using iTunes . Make sure that you do take a back up iphone /ipad before updating to ios 12 .
How to update iPhone / iPad to the Latest iOS update
Now let us learn how to download iOS and install latest iOS on your iPhone , iPad and iPod . So i guess you have taken back up of your iPhone . If so proceed on how to download latest iOS ( How to dowload iOS 12 ) –
- To update iPhone with latest iOS 12 you must either take iClod / iTunes backup of your device first
- Now to install iOS 12 using iTunes follow the given steps
- Go to iTunes
- Plug your Device , that is plug iPhone / iPad / iPod
- Now select the device icon that can be found at top left
- Go to Summary
- Now click on Check for Update
- Select Download and update option
- Now click Agree button mentioning you agree to all the terms and conditions
- Enter your device passcode
- Now to install iOS 12 using iPad / iPhone software update follow these steps to update iPhone iOS with iOS 12
- Take iCloud Backup
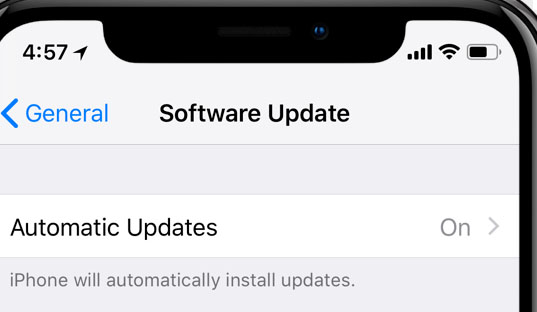
- Go to device Settings option
- Go to General
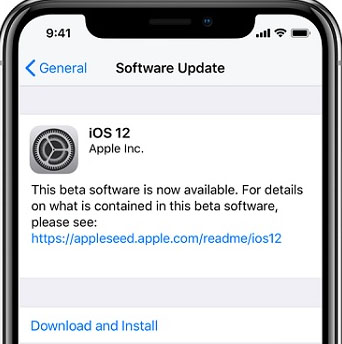
- Now click on the Software update
- There you can see and option called Download and Install , just click that
- Proceed with entering your device passcode and simple agree to terms and conditions4
- Click Agree to confirm
That’s it , this is how to update iPhone with iOS 12 , hope you are clear with how to download iOS 12 and install iOS 12 .
Android Vs iOS – Comparing Android P Vs iOS 12
After Android O (Android Oreo) google has released Android P , that is Android Pie , the very latest Android OS . So with the release of iOS 12 , most of the users have a confusion which is the best Android Vs iOS ( On a cross comparison between Android or iOS) . So here we will take a look at Android P Vs iOS 12 .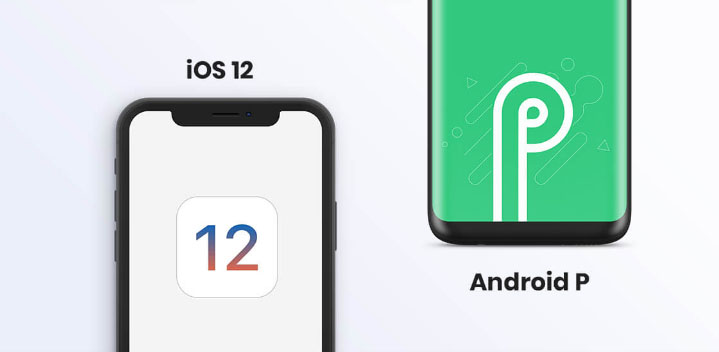
Many of the devices are apt for Android 9 Pie as OS . And we have already discussed iOS 12 supported devices and how to upgrade to iOS 12 . Google Pixel 3 XL will come with Android 9.0 (Android P) . And in many other devices using Android Oreo you can update Android Oreo to Android Pie ( Android O to Android P )
Read Also : Android Oreo Vs Android Nougat Vs Android Marshmallow Vs Lollipop
Now lets take a look at iOS 12 Vs Android P –
- iOS 12 Vs Android 9.0 comparison Google’s Android P is the best with respect to maps and navigation performance when your compare with iPhones. So google maps is best when compared to apple maps .
- While encountering comparison between the virtual voice assistants in Android P and iOS 12 , Android wins the heart . Even though Apple has brought so much of new updates to Siri , still Google assistant remains favourite for majority .
- Digital health aspects is taken more carefully by iOS than Android , so in that case iOS is winner
Read Also : iOS 11 Vs Android Oreo – Who wins gadget lover’s Heart
Read Also : Update to Latest Android OS : Android Pie -Stay with Nougat / Marshmallow/ Oreo
Read Also : Backup Android Device to PC or Google
There are more differences that will be discussed separately and in detail .
So i guess we have given our users a very detailed idea on iOS 12 and iOS 12 supported devices , a cross comparison between iOS 12 Vs Android P & our core point how to update iPhone / iPad / iPod to latest iOS 12.