Category: Tech

  • Update to Latest Android OS : Oreo -Stay with Nougat / Marshmallow

    Update to Latest Android OS : Oreo -Stay with Nougat / Marshmallow

    Android is about to come up with its new OS , Android Q . With its launch so many exciting features are going to get a new look and experience . Android Q will be a better experience than Android P . So every time Android OS gets a new version , you might feel you are lagged behind the tech scene . May be you might feel your phone is slow when compared to your friend’s phone with the latest android OS . So inorder to tackle this you can simply upgrade to latest android OS . So now we will learn how to Update to Latest Android OS .

    Android Q

    Gonna be the 17th version of Android Operating system released . Foldable phone support will be its one highlight feature . Dark mode by default and so many features . Will discuss in detail on Android Q features soon after its first release .

    Android P

    The current running version of Android OS is the Android Pie , popularly known to be the Android pie version . Most of you might be aware of its exciting features . Also its comparison with Android Oreo . Android P is the 16th OS release .

    Android O

    The new version 8.0 is also named before a dessert ‘Oreo’ like any other previous versions. It is available with Google pixel in the market and it has been said that this new version provides 2X boot speed. It has also improved the problem of operating system update tackles with pesky background activities that drain a huge amount of battery. It also provides some useful design tweaks like picture-in-picture(PIP) mode for Youtube, Hangout etc. These things make ‘Oreo‘ different from Android ‘Nougat‘ and any other previous versions.

    So in this article we can find the reasons to Update to Latest Android OS as well as how to Update to Latest Android OS from Nougat /Marshmallow/Lollipop/Kitkat .

    Read Also : Android Vs iOS – Pros & Cons of Buying Android Vs iOS

    Read Also : Android boot Fix – Steps to Try When Your Android Won’t Boot

    Android again came with a new version in market for its users. Everyone wants to use the latest of the technology so for Android users , they have a strong urge to Update to Latest Android OS .

    Reasons to update Oreo to Pie 

    If you are still on the Android Oreo , then there is nothing to wonder about it at all. It is one of the best android versions available . But still if you are overwhelmed with the responses of Android Pie then you have an option to upgrade Android OS .

    At the end of the section we have given you step by step instruction on how to upgrade to latest Android OS .

    Now let us take a look at the reasons on why you should prefer Pie over Oreo ( Android Pie Vs Oreo )

    1. More convenient gesture navigation control .
    2. Better system performance
    3. Updated settings to ensure more secured privacy lock feature
    4. Best tools for screenshots.
    5. New look for the device and the notification.

    Reasons to update Nougat to Oreo:

    Here is the reasons why you should Update to Latest Android OS “Oreo” from old Nougat .

    1. Performance : Oreo ‘per app disk space quota’ feature enables the system to automatically delete cached file from apps.

    2. Battery : It saves battery a lot beacuse of its background execution limits.

    3. Notifications : This is one of the major improvement that enables you to snooze notifications for a certain amount of time simply by swiping left.

    4. User friendly : Oreo has come with some features like autoFill which helps you to fill forms faster.

    5. Audio : Oreo’s Volume Shaper gives you option of ‘fade-in/fade-out’ and ‘cross-fade’ sounds.

    6. Visual Changes : Oreo comes with a lot of improvement in visual experience of users. The biggest modification is the settings menu which is completely changed.

    As the theory says, every new version should be the best, we will now look for some previous versions and their comparisons. These are the reasons to update Nougat to Oreo latest Android OS.

    Read Also : Android Oreo Features to fall in love with Android mobiles often

    Reasons to update Marshmallow to nougat:

    Before ‘Oreo’ Google has launched 7.1.1 Android version named as ‘Nougat’ and it is available with Nexus smartphones and tablets, and the pixels. Nougat has provided everything that leads any android user to update to this. From multi-window support to improved battery life with Doze, a smarter settings menu, instant apps and many more things attracted every marshmallow user to it. We have listed the features below:

    1. Notification area has been improved : It provides some great features like the ability to quick reply to message notifications.

    2. Multitasking is much more faster now : This feature provides quick switch between apps . You just need to double tap the recent button and the last app you used has been bring backed.

    3. Multi-Window mode : This feature of Android Nougat helps you to run two apps at the same time.

    4. Improved performance : Android Nougat tweaks the Android Runtime compiler which provides faster gaming graphics.

    5. Interface tweaks : A huge number of tweaks have been made to the visual user interface in Android Nougat and they are largely information based.

    6. Improved Doze mode : This is the biggest feature of the Nougat that , if your phone remains untouched doze mode saves battery for a quite while.

    Given above are the reasons to update to latest Android OS from Marshmallow to nougat To Oreo Os update for Android mobiles .

    But still many of us say that android marshmallow is still the best . So let’s have a look to the reasons.

    Read Also : Android Oreo Vs Android Nougat Vs Android Marshmallow Vs Lollipop

    Reasons to use Marshmallow:

    If you have a detailed look about the new features of android ‘ Nougat’ then you will find that many of the features are not all new and most of them are traced back from Samsung and Sony phones. The Multi-Window feature that Android Nougat provides , has been introduced by Samsung way back in 2011. Then you are happy with marshmallow, then there is no reason you want to upgrade to ‘Nougat’.

    Now the question that comes in our mind is that what about the previous versions before marshmallow and is it still worth to use android lollipop. Well the answer is that Android version 5.0 named as ‘Lollipop’ has been reported as full of bugs by many people. It also increases RAM usage and has been reported that with this version people are facing excessive battery discharge and horrible lag time on touch selections. So in my opinion it is better to upgrade then to stay with Android Lollipop. Now most of you have question that can we update Lollipop to Nougat or Marshmallow.

    Read Also : Backup Android Device to PC or Google

    How to update your old Android OS to latest Android OS : Update to Latest Android OS

    You can Update to Latest Android OS from old version of Android OS easily . There are various methods to Update to Latest Android OS . Here is the simplest solution .

    Here is the two methods on a single line to Update to Latest Android OS .

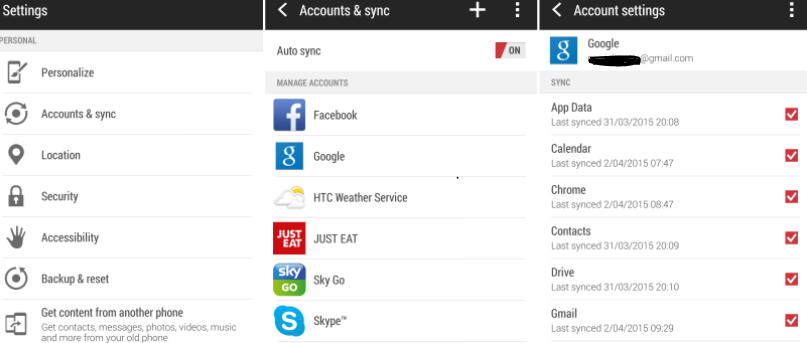
    1. You can simply go to System updates on your mobile and check for updates and safely upgrade to Marshmallow and then if you want you can update to Andriod Nougat.
    2. There are other methods also , you can download Android ROM and install it in your device , this will manually update your Android version.

    Read Also : How to Use Google Assistant on Android Devices (Without Root)

    Overall which is the best android version depends upon our needs and use. So , first know that which version is best and compatible with our device and then make any upgrading decision because every new upgrade increases RAM usage.

    Hope this article helped you to take a decision to Stay with Android Nougat/Marshmallow and two methods to Update to Latest Android OS .

  • Skype for Business: Fix “Cannot sign in because the server version is incompatible with Microsoft Lync” error

    Skype for Business: Fix “Cannot sign in because the server version is incompatible with Microsoft Lync” error

    Skype for Business: Fix “Cannot sign in because the server version is

    incompatible with Microsoft Lync” error

    The basic and first question that arises is that: What is Skype for Business

    The idea of using Skype for business is very old and it’s use for business started very soon after it’s inception. There are many cases in which one organization or professionals from very far away want to collaborate with someone else or have a meeting to discuss things out. There is no way that either of those parties want the conversation to be compromised so here Skype comes in picture. It provides live video call with security to it’s users and also allows big companies to have conference meetings and discuss their propaganda through this virtual meetings. Thus Skype has been really a boon for business through which many deals have taken place. So these are the different uses of Skype and it’s variety of features which make Skype so popular.

    Read Also : Fix “Voice search has been turned off” error for google now

    In 2014 Microsoft announced that their product named as Lync could be replaced by Skype for Business in 2015. They claimed that it would combine features of consumer Skype software which was their best feature and in April 15 Microsoft officially launched Skype for Business which gave Skype a bit of a shock. In September-October Skype for Business for Mac client was released which was an initiative by apple to make Skype compatible with their machines.

    If you ever use your Skype for Business you might have noticed that your Lync client will automatically get upgraded to the latest version from itself without any hassle but if you are in a rather older Office Communication Server (OCS) version or an environment. Then this could cause an incompatibility problem and you might have to do it all by yourself but relax since you are at the right place. The error which you might get could be of following type: “Cannot sign in because the server version is incompatible with Microsoft Lync “. Contact your support team with this information. And specifically and fortunately for this most common problem there is a registry hack that will get you working again as smooth as before.

    Read Also : Best free calling Apps for all Smartphones

    Fix “Cannot sign in because the server version is incompatible with Microsoft Lync” error : Skype for Business

    The usual simple and easy steps are as follows:-

    Step 1) Select “Start” > “regedit” > and then press this keyword carefully which is “Enter”.
    Step 2) Now all you have to do is to navigate to this path: HKEY_LOCAL_MACHINE / SOFTWARE / Policies / Microsoft / Office / 16.0 / Lync
    Step 3) Thank me and enjoy since it is done

    Read Also : 10+ Best Alternatives to Whatsapp you will love this year

    So technically you need to add a Registry Key to tell your Microsoft Lync client to ignore the server compatibility check. Another similar but a slightly different approach would be:-

    Step 1) Run regedit and for some mind blowing geniuses. (Open command prompt, type regedit)
    Step 2) You now have to navigate to the path HKEY_CURRENT_USER > Software > Policies > Microsoft > Communicator.
    Step 3) You now have to right-Click, Select New > DWORD (32-bit) Value.
    Step 4) You now have to enter the Name exactly as “DisableServerCheck”.
    Step 5) You now have to right click on the new Registry key you just created and select Modify.
    Step 6) You now have to enter value data of 1 (Base = Hexadecimal).
    Step 7) Click OK(again most difficult step among all the steps mentioned above).
    Now when you attempt to sign in again you should be greeted with success which is completely yours.

    Well there is no conclusion but all I can say is try to keep yourself updated and be safe and secure. Till then good day or night depending on when are you reading this article and keep sharing.

  • Fix “Voice search has been turned off” error for google now

    Fix “Voice search has been turned off” error for google now

    Fix “Voice search has been turned off” error for google now

    I have got an error of “Voice search has been turned off” error from google now which was weird at first and I did not understand how on the earth was that possible.

    The options on official website of Google was good but it did not help me much so finally my brain came to my rescue and I decided to research on it. The research part is quite boring but the results are equally exciting and fruitful so I decided to sit down with my pen and paper and decided to solve this issue with a better approach. My research yielded well and today I will share both the solution and also the approach to solve such various types of problem.

    So after gathering as much information as I could about the issue I started by debugging and I am here sharing my method with you so that you can also solve Voice search has been turned off error .

    What Is Google Now ?

    It is basically an intelligent and a smart personal assistant (or just an artificially intelligent AI software piece) which was developed by google to give better quality service to their customers.

    Google Now has been launched integrated in the Google app for both the Android and also the iOS. This particular service had became available specially for iOS since the 29th of April in 2013 with an exclusion from most of the features available today.

    Google Now Vs Google Assistant ?

    Basically there is a comparison between both that is Google Now Vs Google Assistant .

    Google Now is basically a voice responsive personal assistant. But unlike Siri and Cortana like AI’s Google Now is not a platform specific since this app works on both Android and iOS devices. This amazing app lets you quickly and efficiently search the web and perform a variety of tasks(logically you do not have to type and perform operations) such as scheduling events and alarms or adjusting your volume and even posting to social media all this using your own commands in person (or voice commands). You can do Voice search on Google Now .

    Whereas Google Assistant is technically a next generation of Google Now meaning it does most of the things similar to Now but including a friendlier and more conversational interface which is better. It basically performs all the same tasks as Google Now which are events and alarms or adjusting your volume and even posting to social media using your own commands directly in person (or voice commands).

    Read Also : How to Use Google Assistant on Android Devices (Without Root)

    What To Check When Google Now Voice Search Is Not Working ?

    When you find that Google Now Voice search Is not working then check out certain things .

    There are various methods to check and What I did was basically hook up a microphone and tested it using my favorite operating system windows(do not ask me which version of windows did I use). After a long time I was nearly ready to start yelling out loud like a mad man “OK Google” just so that I could bring up the Google Now screen to perform voice searches but to my surprise it did not work and after that I was pretty sure that the microphone had no issues what so ever and it was something else i was looking for so instead of directly bringing up the search screen I did it manually and the chrome browser threw a message saying that said “Voice search has been turned off”.

    Read Also : Use Kindle Fire as Second PC Screen / Display Ultimate Guide

    At this point of time I was really confused not realizing that the solution was right in front of me. So my view got stuck to details tab and I selected the “Details” link which was not at all useful not really that much, and I was again not able to find the solution of the issue. After banging my head with the floor for quite some time fortunately and finally I was able to fix this problem of Voice search has been turned off with just a few steps and I realized how easy it was to solve this issue.

    After my research I was not only able to find a single solution but I developed two solutions after that I was at the top of the world and really happy. So now my friend I will state not one but two methods on how to solve this issue.

    Easiest Method to ” Fix Google Now Voice search error” is to utilize Address Bar for enabling

    When you are on the same google page where you received this annoying message of “Voice search has been turned off” you can observe a bit closely to check that if you see an icon there that has appeared previously in your address bar just next to the bookmark star. All you have to do is put your mouse over it and if and only if it says “This page has been blocked from accessing your microphone“, then you are in no trouble since from there you have to perform these simple steps:

    • All you have to do is select the icon in your address bar and then you have to choose or tick on “Always allow www.google.com to access your microphone.” and that’s it. This basically gives the access to your microphone which was not given before.
    • After you have to select the microphone you were using from the drop-down menu you see.
    • Finally the most difficult step is here so take note, you have to select ‘Done’ and just remember me for solving your problem.

    The second Method by Chrome Settings are useful for enabling Google Now Voice search

    Here you have to open google chrome and select the Menu button which will be located at the upper-right corner and if you do not find it probably it is time for you to wear glasses.

    • You have to select select Settings.
    • Then you have to open the “Advanced” tab which will be at the bottom and if you do not see it just leave it and screenshot your error in comment section.
    • Then you have to go in the “Privacy and security” section and when you are in it you have to select “Content settings” option to move further and if you do not see this then probably commenting a screenshot in the comment section would be a better choice.
    • Then after you have completed the above mentioned steps successfully you have to select the “Ask when a site requires access to your microphone (recommended)” option(If it is selected then deselect it and then again select it) or you can simply skip this step and directly select the “Allow” option. Then you have to add “https://www.google.com” to this list and then set it so that it allows audio.

    After you have successfully implemented one of the above mentioned methods then you should now be able to use Google Voice commands with Google Chrome without a problem. If there is any error then repeat the above mentioned method once again and refresh your page. At last you have to share this article so that maximum people can read it and comment any suggestions you would like me to include.

  • Use Kindle Fire as Second PC Screen / Display Ultimate Guide

    Use Kindle Fire as Second PC Screen / Display Ultimate Guide

    Kindle Fire is voted as one of the top e-reader which is even considered better than iPad . Kindle Fire is actually a Google Android Operating System based tablet from Amazon . Kindle Fire has 7 inch display screen that is really idle for using it for reading e-books as well as to watch movies . Today we will give guide on how to Use Kindle Fire as Second PC Screen / Display .

    Ever wondered that the use of an Android tablet is beyond the means you have used till date . Then it is for those wondered folks that you can turn your Android tablet as second PC Screen / Monitor . I mean Android tablet can be converted as Second PC Monitor Easily .

    Today Particularly we will deal about the methods to Convert Kindle Fire as Second PC Monitor . Also a short hack to Use Kindle Paperwhite as Second PC Screen / Display .

    Read Also : Kindle Fire Silk Browser Alternatives

    Use Kindle Fire as Second PC Screen / Display Ultimate Guide

    In your Kindle Fire you can find a socket for HDMI connecting by just plugging into it you cannot Use Kindle Fire as Second PC Screen . This HDMI socket is only for output not for Input configuration . To make Amazon Kindle Fire as Second PC Monitor you have to do just install good fire applications . This helps in sending data via WiFi by using Fire tablet as second PC screen.

    Read Also : Download free eBooks For My Nooks or Kindle -Read eBooks

    Method 1 – Use Kindle Fire as Second PC Screen / Display Using :  iDisplay 

    iDisplay is actually a paid application that is available for both Android and iOS to mirror any android or iOS device to Windows or Mac PC . The app connects the android /iOS device to your PC ( Mac / Windows) via WiFi. So you can make use of the resources of the PC on the device you connected . You can Use Kindle Fire as Second PC Screen using iDisplay app .

    Step 1 – Go to Android store .

    Step 2 – Now you have to download the iDisplay application for Android as you know Kindle Fire operates on Android OS. Also ensure to install associated softwares from the website.

    Step 3 – Now on your PC whether it be Windows or Mac , open the downloaded software and run it .

    Step 4 – Ensure both Kindle and your PC is running on same network .

    Step 5 – Open iDisplay application on Kindle Fire Tablet .

    Step 6 – From the given option find Computer and select in the iDisplay app .

    Step 7 – Now you can see that your Kindle Fire screen acts as a second monitor to your PC  . Now you can control the resources using the software in PC . This helps really good in dragging and dropping certain windows which you want to work on Kindle Fire instead of PC .

    This has got some minimal time lag but works absolutely fine . This is ideal to Use Kindle Fire as Second PC Screen .

    Read Also : Connect Google Pixel to TV Easily with these Exclusive Guide

    Read Also : Connect dual displays / monitors to one computer on Windows & MAC

    Method 2 – Use Kindle Fire as Second PC Screen / Display Using :  AirDisplay

    Same as that of iDisplay application only this AirDisplay app also works with WiFi to make your Android /iOS  device as the second monitor to Windows / Mac PC. AirDisplay is also a paid application . You can Use Kindle Fire as Second PC Screen using AirDisplay app.

    Step 1 – Download the AirDisplay application from the application store .

    Step 2 – Also install the related supporting software for AirDisplay app .

    Step 3 – Same like for iDisplay , you have to run the software on your Computer . Also ensure the same local network prevails on both Kindle as well as the Computer System.

    Step 4 – Choose Computer option in the app .

    Step 5 – You can try to drag one window from the PC and that window will be visible on the connected Kindle Fire screen thus it will act as the second monitor to PC .

    Read Also : Battery Health : How to keep your phone or tablet battery healthy

    The other apps that makes tablet as second PC screen includes two more as best in the prevailing industry –  Splashtot app , TwomonUSB .

    You can use a Remote desktop software and connect the Kindle Fire to Raspberry Pi then make an adhoc network set up with Pi to make it function like as router . This helps to use Kindle Fire as second screen display to Raspbery Pi .

    The same you can Use Kindle Paperwhite as Second PC Screen . So this is all about the simple and easily structured steps to help you to Use Kindle Fire as Second PC Screen.

  • Google Pixel WiFi Calling Enable and Disable

    Google Pixel WiFi Calling Enable and Disable

    The newly introduced Google Pixel phone has a wonderful camera which can work awesome especially in a lower light. Google Pixel phone is highly and elegantly designed to match your needs and The Google Assistant answers your voice in a more natural way and with a greater human approach. Google Pixel WiFi Calling feature is a vital improvement in the technology of phones. This article explains the feature in detail and how to use it for better call experiences.

    Features of the Google Pixel phone

    Before discussing Google Pixel WiFi Calling enable and disable let’s have a look at Google Pixel .

    To put it in short Google Pixel phone is a high-end Android phone. It is a smartphone which was launched in the month of October 2016.

    There is a 5.00-inch touchscreen display and the resolution is 1080 pixels by 1920 pixels at a PPI of 441 pixels per inch. The RAM is about 4 GB and comes with 1.6GHz quad-core Qualcomm Snapdragon 821 processor. It carries a 32 GB internal storage memory and it cannot be expanded further.

    Read Also : Google Pixel Dictionary – Add words / Phrases to Dictionary

    The camera specification is like 12.3-megapixel primary camera on the rear and an 8-megapixel front shooter for selfies. It basically runs Android 7.1 and has a power of 2770mAh no removable battery. The measurement of the battery is as 143.80 x 69.50 x 8.60 (height x width x thickness) and weigh 143.00 grams. The Connectivity options of the Google Pixel includes Wi-Fi, GPS, Bluetooth, NFC, 3G, and 4G. The Wi-Fi standards supported is as 802.11 a/b/g/n/a. The WLAN features are as follows:  Wi-Fi 802.11 a/b/g/n/ac, with a dual-band, with a direct connection to Wi-Fi, DLNA, hotspot. It accepts only a Nano SIM. Using the Google Pixel WiFi Calling application one can identify the number of other devices which are connected to the Wi-Fi network which you are using. As you are using the Pixel W-Fi and the device you are using is rooted you can even re-open any of the sessions which are opened by any of the other devices which basically used your same Wi-Fi network connection.

    How to use Google Pixel WiFi Calling

    The main and most popular feature of any smartphone is Wi-Fi Calling as they ensure there is an increase in call quality. This feature especially works well when the signals are poor. Most of the mobile phones use the age old technology for voice calls and that is the main reason that most of the voice calls are not as crispy and clear as that of any of the VoIP calls which are made via Skype. In case if you own a Google Pixel phone with a Wi-Fi calling ability then even when there is a poor cellular reach which would be unable to penetrate into the building where your home or office is located, you can go ahead and place a call rather than depending on the cellular radio.

    To enable Wi-Fi calling in your Google Pixel phone you need to install the USB drivers in your phone device. Google enables a list of few of the universal USB drivers and it is not necessary and it also depends on your operating system.

    Read Also : WhatsApp Exclusive Guide – Everything about WhatsApp Features

    Initially, you need to download the ADB binary for the particular operating system you are using like Windows, Mac, Linux etc. These links will automatically download the latest version and there is no need for the user to source it from the web.

    Read Also : Android: Prevent apps from running at startup(Stop/Disable Apps)

    You need to extract the zip file into a folder which you think can quickly access. Then in your phone enter the settings tab and click on About phone. You need to scroll down to find the Build number and to enable the developer options one needs to tap it almost 7 times. After hitting the enter key on the developer options and finding the USB debugging enable the same. As most of the phones do not allow the user to enable ADB charge only mode the user need to plug in the phone device to the computer and change it from the charge the only mode to the file transfer mode which is otherwise known as MTP mode.

    Read Also : Connect Google Pixel to TV Easily with these Exclusive Guide

    After opening a command prompt in the ADB folder holds the shift key and select the open command prompt here option. What is to be done now is you need to re-run the ADB devices command and a serial number will be printed by the terminal. After doing this hit on the ADB shell command.

    Once the ADB shell prompts to hit the command settings put global wfc_ims_mode 2 and you are done. Need to toggle the airplane mode on and off and go to the Wi-Fi section after opening the settings tab and the preferred Wi-Fi settings should be active.

    Read Also : 10+ Best Alternatives to Whatsapp you will love this year

    Steps to Enable or Disable Google Pixel WiFi Calling

    1. Open the “Phone” app.
    2. Select “Menu” in the upper-right corner.
    3. Choose “Settings“.
    4. Select “Calls“.
    5. Select “Wi-Fi Calling“.
    6. Set the slider to “On” (to enable) and “Off” (to disable)

    If you open the settings directly, then follow step 3 to step 6 only.

    Read Also : Google Pixel Haptic Feedback / Vibration Mode Enable or Disable

    Google Pixel WiFi Calling Advantages

    The main advantage of using Wi-Fi calling using a pixel phone is that when you have a weak carrier coverage you can use the settings and make calls. This works especially when the user is traveling to a remote village or country side or residing in a building which has a spotty reception. A built in Wi-Fi connection has definitely an added advantage over few third party services like Skype WhatsApp, Facebook Messenger, Viber who uses voice over Internet Protocol to place a call either using a Wi-Fi connection or a cellular data connection. If the Wi-Fi you are using is carrier branded it would be definitely a different one. As it is directly infused into your device directly the user need not connect to any of the services to use it. It can be set as a default way of placing a call using Wi-Fi and in case if the phone loses out the signal it will immediately switch over to Wi-Fi calling.

    Read Also : Skype for Business: Fix “Cannot sign in because the server version is incompatible with Microsoft Lync” error

    As the service is built in one need not have to add contacts separately as we do with other services. It will access the existing phone and the one you are calling need not download any third party service calling to receive the call. It all needs very little effort to set up the calling and other services.

    Conclusion

    Thus basically these Pixel phone using Wi-Fi connections are a great boon and can be used from any place even in a remote village even though the network from the other carrier gives out very low signals.

  • Google Pixel Dictionary – Add words / Phrases to Dictionary

    Google Pixel Dictionary – Add words / Phrases to Dictionary

    Google is the world leader in internet related services and products. The world’s most popular smartphone Operating System, Android is owned by Google. Launched in October 2016, Google Pixel smartphone is a flagship product designed, developed and marketed by Google that runs the Android OS. Now with all excitement launched the latest Android O with Exciting features . The other consumer electronic devices by Google are the Pixel C tablet and Chromebook Pixel laptops. Now we will see one feature with Google Pixel that is to Google Pixel Dictionary : Add words / phrases to Dictionary.

    How to Add words / Phrases to Dictionary on Google Pixel Dictionary

    The Pixel smartphone suggests words and phrases from its dictionary while you are typing. You can type faster using this feature. The dictionary will be updated automatically when you type new words. But you can also Add words / Phrases to Dictionary. There are two ways/methods/options to add an entry to the Google Pixel Dictionary .

    Option 1 –  Add words / Phrases to Google Pixel Dictionary

    while typing

    You can add Add words / Phrases to Google Pixel Dictionary while typing as and when you are typing.

    • Step 1: Tap the area where you can enter the text which you want to add to dictionary .
    • Step 2: Now just Enter the word or phrase that you want to add to Google Pixel Dictionary .
    • Step 3: You can find the word that is underlined in red. Tap that word.
    • Step 4: Tap Add to dictionary .

    This is the first method to add words or phrases to Google Pixel/Pixel XL Dictionary . This way you can add words/phrases to dictionary .

    Tips on Google Pixel/Pixel XL Keyboard 

    Just tap on the backspace to remove the word on Google Pixel.

    You can Tap Keyboard and select settings from more and find Text Correction to Correct words in Google Pixel.

    You can remove any words from Pixel Dictionary by simply touching the word which you want to remove from Google Pixel and then long press or hold it till it get selected. Now there appears an option to trash/remove that word . All you have to do is to Just click it , the word is removed from your keyboard.

    Option 2 – Ways to Manually Add words / phrases on Google Pixel Dictionary( Pixel/Pixel XL) 

    • Step 1: Go to the Settings option.
    • Step 2: Tap Languages & input.
    • Step 3: Tap Personal dictionary.
    • Step 4: Tap the + at the upper right corner.
    • Step 5: Type the word or phrase you want to enter in the top field.
    • Step 6: Select the back arrow at the bottom of your screen when you finish.

    This is the way to manually add words to Google Pixel Dictionary .

    Setting up a Dictionary shortcut on Pixel /Pixel XL

    You can also set an abbreviation for a full word. For example, if you have a word like “Howzit!” in your dictionary, you can set a shortcut like “zit” for the word. So, when you want to type the word “Howzit!”, just type the word “zit” and it will be converted to the entire word “ Howzit!”.

    Why Google Pixel is the best Android phone apart from Google Pixel Dictionary

    Google Pixel phone can be easily said as the best Android phone of the time available in the market. It has many advantages over other Android phones which makes it the most amazing phone in recent times.

    Here are some of special features of Google Pixel phone that makes it unique.

    • Google Assistant

    Google Pixel is the only Android phone which has Google Assistant. It is an incredible digital assistant from Google superior than any of its competitors.

    Read Also : How to Use Google Assistant on Android Devices (Without Root)

    • Built-in 24/7 customer service

    The phone has an inbuilt customer support app that runs 24/7.  It has a feature called “screen share” that lets you share your screen with the customer support agent and easily troubleshoot your problem.

    Read Also : Android: Prevent apps from running at startup(Stop/Disable Apps)

    • Snapdragon 821

    The Pixel phones are powered by the most advanced Qualcomm Snapdragon 821 chipset which is the company’s most powerful processor available in the market.

    • Best camera ever

    The Pixel comes with the best camera ever on any smartphone with a DxOMark score: 89. With a HDR of 12.3 megapixels it gives the best shooting experience any user can dream of.

    Read Also : Exciting free Photoshop Alternatives for high quality photo edits

    • Unlimited storage facility

    It comes with an unlimited online storage facility that lets you store all your high resolution photos and videos automatically in Google photos.

    • Timely Android updates

    It takes more than a year for most Android phone to get updated on new Android versions. The Pixel is the only phone that gets Android updates as soon as they are available.

    Read Also : Android boot Fix – Steps to Try When Your Android Won’t Boot

    • Daydream

    “Daydream” is a virtually reality platform by Google. By connecting your phone to the Daydream headset, you can play games and watch videos on Netflix, You tube etc., and have an out of the world VR experience.

    • Faster charging

    The Pixel comes with a 2770mAHh battery. According to Google, 15 mins of charging the device and can last 7 hours which is amazing. But it  depends on how you use your phone.

    Read Also : Battery Health : How to keep your phone or tablet battery healthy

    • Easily switch from other devices

    The Quick Switch Adapter makes it very easy for you to transfer all your files from iphone or other Android devices to Pixel phone.

    • See your phone screen on your television

    You can connect and mirror your Google Pixel phone screen to your television screen to watch your favourite videos on Netflix, You tube etc …

    Google Pixel phones enjoy an exclusive status among all other smartphones. They come with a version of Android that’s not available on any other smartphones in the market. Every feature available on this phone is unique which makes it the most luxurious smartphone ever.  The whole experience of owning a Pixel phone is something that is really great.

  • Get Celebrities Notice Maximum on Twitter – Popular Tweeter Hacks

    Get Celebrities Notice Maximum on Twitter – Popular Tweeter Hacks

    Get Celebrities Notice Maximum on Twitter – Popular Tweeter Hacks

    Have you ever imagined that you might get a tweet or a re-tweet or a reply from your favorite celebrity and woken up from your dream but what if I say it is not a dream anymore. Yes my dear friends there is a way and let me tell you celebs really love their fans a lot and many of them even reply to their fans occasionally even follow their fans while re-tweeting their fans every once in a while. Your friend here wants to help so that you can Get Celebrities Notice Maximum on Twitter .

    I would like to mention a few things before I start my researched methods. The chance of you being noticed by a celebrity depends on many factors(especially number of their followers on twitter). So if your celeb has some millions of followers and fans and if they only tweet once in a week or so (for example Taylor Swift) then your chances are significantly less but not zero.

    Recently many celebs are utilizing their twitter account to promote projects(Example #asksrk by @iamsrk). You can verify their timeline to see if they ever reply to fans or only tweet about their upcoming films, songs, events etc if the answer is latter one then sorry but you should not waste your time trying to get reply from such a celeb as the odds are really not in your favor.

    At last please be aware about the fact that some celebs twitter accounts are actually run by their managers or publicists. So be extremely careful if you try to talk about personal stuff because when you think you are being funny you actually could get reported or blocked. So here are some tips that will ameliorate your chances significantly.

    Read Also : Battery Health : How to keep your phone or tablet battery healthy

    Get Celebrities Notice Maximum on Twitter – Popular Tweeter Hacks

    Follow the below steps to be noticed by Celebrities on Twitter and become a popular tweeter .

    • Tweet to celebs when they are online or tweeting

    Majority of your celebs would not see a tweet buried deep in their timeline so check the time since some celebs are often online like while some celebs are online late at night after their busy day like Benedict Cumberbatch, Shahrukh khan etc. So get an approximate idea about the tweeting time of your favorite celeb’s schedule and tweet only when they are available. That is the right time to tweet Celebrity to get re-tweet/ reply is at the time they are online.

    •  Check their timeline for clues about what they reply to.

    Some celebs have a habit of RT funny jokes while some reply to the compliments given to them by their fans while some respond to questions about their career and hobby. Note that some stars do not like to brag generally but they like to share some good news for instance if they are nominated for a global award or complete their graduation early like Dove Cameron, Nolan Gould. You have to congratulate them and they might reply to your tweet or RT you or might follow you as well. This is one of the way to Get Celebrities Notice Maximum on Twitter.

    • You can meet them at their tour or concert (this is tough, but if you live in Mumbai or New York your chances are pretty good)

    Some celebs often say if you meet and greet them once then they without a doubt will follow you. So you can meet them and even post a photograph to remind them and after they follow you do not forget to thank them. At least you just might get a response from them.

    Read Also : Record iPhone iPad Screen on Windows & Mac

    •  You got to have patience

    Say the celeb you like have over 10 million followers which are increasing day by day so due to this they just might not see your tweets but true fans do not give up even after a week, month or even a year.

    • You have to have a positive attitude

    Sadly some celebs are the ones who might not reply to a complement but would surely reply to hate against them. Once there has been a really crazy fan war between Bella and Zendays. Though bella did reply to calm things down in which she succeeded to a great extent but you might probably get blocked and keep in mind that the other fans will attack you brutally and not spare you. So again that is simply and clearly not worth it! But still one of the way Celerities notice you on twitter and thus you Get Celebrities Notice Maximum on Twitter

    •  You have to be graceful

    After following my methods when you do get noticed or followed or if you get an RT or tweet like “thank you” do not ever think that now you are their acquaintance and they are going to have a long conversation or they will reply every time you tweet them. You have to be grateful and gracious.

    All I hope and pray for is that these tips work out for you and remember to comment or screen cap your reply or RT when you get one so that you can motivate other people to get them their favorite celeb RT or reply or follow. I will end this by informing all of you that I meet a lot of celebrities and a lot do reply to me. I will also let you know when and where the celebs are meeting their beloved fans so that all of you can take advantage of that. Till then Share this so that maximum people can get to their celebrities

  • Battery Health : How to keep your phone or tablet battery healthy

    Battery Health : How to keep your phone or tablet battery healthy

    Battery Health : How to keep your phone or tablet battery healthy

    You know by now that your smartphone is smarter than you and same goes for the PC / laptop on your desk or the tablet in your backpack(even if your backpack is of different brand than your laptop) and even a simple gadget like a normal watch on your wrist. Since all of them are important irrespective of what each gadget is capable to do. But every smart gadget dies when its battery dies . So it is very important to increase your gadget battery life . So here we will focus on the ways to improve your gadget’s Battery Health .

    There are batteries in almost all of our latest gadgets which ranges from iPhones and laptops(for those who are or like to look rich) to Bluetooth headphones to tablets. Most of them are lithium batteries which are pretty advanced when compared to NiMH and other rechargeable batteries that came earlier. The Li metal ions can pack a good amount of power into a relatively smaller size and additionally they do not drain that energy either to leakage or when they are not not being used.

    So let me first get some facts straight which many people might have misconceptions about. The overcharging is not a significant issue because opposite to what you generally think (or might have been told or have a myth) is that leaving either your phone or laptop plugged in all the time especially during night is not at all bad for its Battery Health. All is possible because your gadgets and the batteries in them including the chargers you use with them to are really smart about the way they operate. So the question arising in the smart minds would be how to take care of my beloved and important Battery Health .

    So let’s see how to improve your Phone Battery life or your laptop / tablet Battery life.

    So if you follow some basic rules I give you can easily avoid it and one advice i’d like to give is that avoid the exposure to heat whenever possible and even if you do expose your to sunlight you would still be fine. I know it is very natural to obsess over battery care and to let those charging myths metastasize into a lunacy.

    Battery Health : How to keep your phone or tablet battery healthy

    So below given are some steps to keep in mind if you want your Android / iPhone / Lithium ion Battery last longer .

    1. Stay Calm

    Most of gadgets which are smart along with their batteries are pre-designed to keep you geniuses from ruining them. So the modern lithium ion batteries now a days are smarter, reliable and more efficient than those nickel metal battery which was in use around centuries ago.

    So when it comes to choosing best Battery for Phone / tablet choose Lithium ion battery on a comparison with Lithium ion battery Vs Nickel metal battery .

    2. Charge in bits and pieces

    Our lithium batteries do not like being fully charged up and then running completely down. The efficiency is maintained much better if you charge in little bits here and there. You are bound to charge your battery around 20% of the time though the percentages may vary from phone to phone the 20% is average which should be done. Make sure that the temperature of case should not be too hot to cause damage to your phone.

    Read Also : Android Oreo Features to fall in love with Android mobiles often

    3. Keep charging as long as you want

    Never worry about overcharging batteries in your gadgets and do not worry ever about overcharging your laptop. The mechanism of batteries in phones is similar to the mechanism of batteries in laptops. Moreover many laptops are smart enough to just stop the battery of being charged entirely once it becomes full.

    5. Batteries like medicines should be kept cool

    Talking of temperature be sure not to leave your phone in a hot car all day or leave it on top of your gaming PC and never go with your battery in a sauna(really in sauna you are …). One important thing to note is that beware of dash/quick chargers and though your phone and charger are smart enough to minimize the damages from high voltage chargers but a lot of power on a super fast speed can generate sometimes an uncontrollable heat. Always store a gadget or its battery or both of them in a cool and dry place.It increases Battery Health and Battery life thus ensuring long life to battery.

    Read Also : Fast Forward , Rewind , Scrub Music in iPhone & iPad Music Player

    6. Go replaceable

    Go with removable batteries whenever you can to avoid the tension you might face and also avoid the lunatic things you might do for charging. The least you can do to avoid these bad battery practices is at least starting with fresh battery whenever you think it is unanimous.

    7. Use Good Quality Chargers

    The simple idea behind using good chargers is that whatever product if you maintain it it is bound to last long. The good quality chargers are smarter than normal chargers since they are able to change their flow if they detect any change in voltage or current of your phone. A good charger will smartly avoid all the excessive amount of voltage which otherwise could cause destruction of your phone.

    Read Also : Connect Google Pixel to TV Easily with these Exclusive Guide

    8. Don’t let your battery rule your life.

    Take it from me that your batteries irrespective of how much you care about them are going to die one day or maybe a night. So there is really no amount of delicate and obsessive care which would save you from having to deal with a less capable battery from now within a few years so it is just a matter of time.

    Like it or not we are all destined for that annoying end of our favorite game that comes when a battery degrades or you are either tethered to all the above mentioned steps. All of have been there before once and we would be there again not immediately but definitely. Do not worry as long as you follow my guidelines. The best you can do is that you can maximize your distance from here to the end of your beloved battery.