Author: Azhar Mithani

  • Find the best radio station for iPod or iPhone FM Transmitter

    Find the best radio station for iPod or iPhone FM Transmitter

    Find the best radio station for iPod or iPhone FM Transmitter

    Here we will discuss about finding the best radio station for iPod or iPhone FM transmitter for car as well as finding best radio frequencies and best FM transmitters .

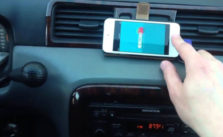
    Ever in your life have you ever been driving along in your car listening to your music either in your iPod/iPhone or any other music player with an FM Transmitter. Then one day all of a sudden your heart wrenching song gets interrupted by some disturbance. The radio waves can be really give you a lot of pain and be very annoying when you are using your iPod/iPhone in your vehicle. I am really grateful for some really informative pieces of knowledge which has helped me a lot and I was able to solve this issue. I will solve help you solve this issue with my personally developed methods. So here is the best radio station for iPod or iPhone FM Transmitter.

    SiriusXM

    SiriusXM is an app which provides an FM Channel Finder on their online web site where you are able to search for the best possible FM radio channel in or near your area which is relatively safe to use with the SiriusXM’s own Satellite Radio. You can also use this tool to find some really good and amazing radio stations for your personal listening in your iPod/iPhone along with either Zune or any other music player’s FM Transmitter and your work is done. 
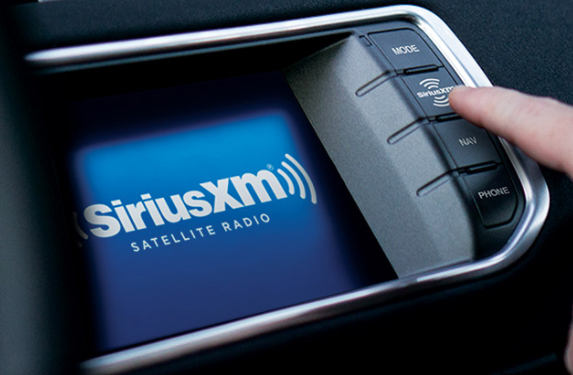
All you have to do is punch in your area code and the this Frequency Finder will provide several available options for radio stations which you can easily program your FM transmitter to listen and then just sit back and enjoy the crystal clear music of your favorite album in your vehicle and then enjoy your ride but if you have an internet connection then whats the point of listening to FM right so here are some other ways which can prove to be of a better utility.

    Read Also : Top Satellite Car Radio Installation and specification guide

    Read Also : Best Smart Home Gadgets for Home automation- Smart home

    Humble FM transmitters

    Humble FM transmitters are the handy little devices which can plug into the dock of the connector either of your iPhone or iPod which basically creates their own sort of mini radio station.

    It transmits whatever song you are playing on your personal iPod app over such an FM radio frequency so that even your car’s radio can tune frequency just like it does generally with normal radio stations but be careful since this frequency has a range of about 10 meters so anyone else can also tune in to the station so try not play some personal phone recording or anything confidential to your life.

    Since these FM transmitters can be used send your music over a range as long as 10 meters which is more than enough for a use in a single car. Only thing you need to be concerned about is of finding an empty band on the spectrum or there is a possibility of a clash with other commercial broadcasts stations which are coming in that area. Every transmitter of FM comes in different shapes, sizes and at different price and with numerous functions. Few of them have charging cables and sometimes even their own apps so that you can select a clear and better frequency.

    You can find the Best FM Frequencies For Your Car Transmitter using –

    • ClearFM
    • Radio locator
    • SiriusXM Channel Finder

    For helping you selecting the best FM transmitter I have been on the road with many different devices and from many of them I am giving here my favorite five and all of them are with different manufacturers just so that you can put them all through the wringer.

    1. Belkin TuneBase FM LIVE

    2. Griffin iTrip Auto

    3. KitSound MY FM

    4. Logic 3 FM Transmitter Charger

    5. Monster iCarPlay Wireless 300

    The above given are the Best iPhone FM Transmitters for Your Car . This help you to find the best radio station.

    Read Also : Best iTunes Cleanup Software for better iTunes experience

    Ease of use

    The easiest of all the FM transmitters which are currently available in the market including the latest transmitters released till the date of this article’s publication it is relatively easier to use is the Belkin and the sole reason for using it is purely because the stand of Belkin basically aligns your iPhone every time in such a way that it is maintained at an eye level. As because of this really amazing feature all you have to do is only glance across at the dock and make a tap on the screen while it is running the Belkin ClearScan LIVE app to change things to set them as per your convenience so that you can easily use this app when required. This will make the accessibility of the so easy that you do not even need to change your iPod app to skip a track a track when you do not want to listen one which undeniably is the best feature of these FM transmitters.

    Most of the griffin generally takes the second place which is all thanks to having this amazing feature through which we can track all of the controls just through your at your finger tips using its own iPhone app. The Monster will come not because of it’s functionality or some other advantages it provides because it is a simple fault in their business model which is UI that is because of its old fashioned and classical display with frustrating control system.

    The concluding part will be that just having a FM transmitter and knowing how to use it is not just enough. You have to know about the utility and mechanisms as well will be useful to all of you in the longer run. So read the above written article as many times as you want and try to understand the basic mechanism of the working of FM transmitters and remember me when you use it :).

    Guess this serves the best in helping you to Find the best radio station for iPod or iPhone FM Transmitter

  • Garageband Alternatives- iPad / iPhone / Android

    Garageband Alternatives- iPad / iPhone / Android

    Garageband Alternatives- iPad/iPhone/Android

    Here we will discuss about the Garageband Alternatives  for iPhone ,iPad and Android.

    Speaking of olden days it was considered a break through when The Beatles were able to record their very first song at the Abbey Road studio by using the most popular twin-track vacuum-tube machine. The chance of dubbing the sessions were same just as if recording live performances. Diluting the information to common man “the legendary Fantastic Four had to record each of the songs precisely in only one shot. A single mistake could cost them their busy time and enormous amount of money since they had to re record each and everything from the start as a brand new.

    As speaking of today the 9 year olds can easily pirate those recording sessions using a normal smartphones. All this without any musical instrument whatsoever and that also with as many takes and retakes as wished by them. Today almost anyone could just come to a recording studio with virtually almost unlimited tracks in his/her pocket in the simplified form of an app. As this era can really be called as “The golden age” for all of our talented musicians.

    The GarageBand is an important foundation stone for music making apps to appeal the masses which even as of today remains unrivaled. The sad part is that the GarageBand is (You know I don’t like to say but always) available exclusively just for iPhones and iPads. There is no reason to worry as your savior is right here to help you out. So I have listed some alternatives for the GarageBand app after performing extensive amount of research which are absolutely free and work well. We will check out the Garageband Alternatives for iPad/iPhone and Garageband Alternatives for Android

    Read Also : Best iTunes Cleanup Software for better iTunes experience

    Read Also : Factory reset iPhone without password or iTunes with data backup

      • 1st Alternative – Magix Music Maker Jam

    This amazingly splendid app helps you to create your music by combining the loops which are basically short chunks of music which you can play over and over again in loops which justifies it’s unconventional name. It has around 100 different music styles and a total of 8 channel mixer which could give you enough room to channel every angle of your thoughts and emotions in the direction you wish.

    This beautiful app allows you to also record all the external voice and you can use this awesome feature to record your own singing, beat boxing, rapping or many other different kinds of sounds and you can also add all of them to your personal song. As soon as you have finished recording your amazing song, you can also share it with the entire world using the sharing feature of your smartphone. A new music discovery can also be done in the professional Music Maker community by sharing and testing your discovery with many other talented users.

    Read Also : Android boot Fix – Steps to Try When Your Android Won’t Boot

      • 2nd Alternative – PocketBand

    This awesome app is the combination of an utilitarian app and a professional and useful online service that can either help you generate and also share content with your fellow musicians who are located at different beautiful places of this amazing world. All you got to have is a valid account with an active internet connection along with almost every device you have to use it properly.

    This awesome app has the effect of 12-channel mixers along with the 3 band parametric equalizers and which comes with an automated pan and volume for each and every available track. The different loops can generate an amazing music piece because of using the audio recording feature which comes with the import recording pre built function from the music library or any other of your numerously installed music apps(Don’t tell me you do not have any).

    Read Also : How to reset iPod Nano or steps to unfreeze iPod Nano

      • 3rd Alternative – EasyBand Lite (Pro)

    In this app as its name says it focuses on the relatively easier side of music creation. A linear and straight forward music making process is by this app. All you have to do is simply drag and drop the chords into your timeline which would as per the chords generate a full band. The changes you can make are either edit the chord or change it to a major or minor or make it play lengthier or just a chunk while using many different styles and types of band. You can also modify the BPM (beats per minute) and drum fills with many other types of variations which completely depends on your creativity.

    The lite version of Alternative, EasyBand has partial functions like limited styles like cherry or dramatic mellow, either rock-it with piano or stinger and many more as well. Every version comes with numerous combination of different types musical tools and heart wrenching playing style. Though the Pro version has numerous different features and it gives you many more styles(but you know how to get Pro version right).

    Read Also : Exciting free Photoshop Alternatives for high quality photo edits

      • 4th Alternative- WalkBand

    As you can clearly see from the appearance of this amazing app along with it’s fast music creation process. This app named WalkBand might be almost same when you see the GarageBand compared to other Android driven music-making different applications. Depending on your mood you can either pick and play a single musical instrument like guitar or bass, piano or drum kit or even drum machine and you can use all these either individually or with a combination of as many instruments as you like and additionally you even digital loops.

    All the different and various instruments have their own personalized settings and one feature that I personally think is an interesting one is its capability to play a duet piano either with another person or each player plays at only one side of the phone in landscape mode(Similar to the games like ludo which are available in playstore). It comes with a feature of multi-track recording session which assigns just one instrument to only one track and mix all of its result into just one song.

    Everything is good and you are happy if you are one of the GarageBand users who has a skill to always find a similar app in the Android environment for every app in playstore. Though an important thing to note is that this app is not an add free one so it could interrupt the flow with which you are working. One way to remove all the ads is that you have to simply pay for an upgrade.

    Read Also : Android: Prevent apps from running at startup(Stop/Disable Apps)

    Conclusion

    So you must have known all the apps like garageband for iphone as well as apps like garageband for android & methods of almost every music making app you would ever find and if not go to start and read carefully. So by using anyone of the above given apps your need can be satisfied. If you have any query or problem do let me know and I will solve them asap and one important note do not download or copy the version because there is something known as intellectual rights. So as long as you want to maintain your authenticity I will say “Keep it Real”

    Just a note before concluding if you look for apps like garageband for Windows or MAC .You can Find it out on our portal .

  • Enable / Disable Internet Explorer Extensions and Add-ons

    Enable / Disable Internet Explorer Extensions and Add-ons

    Enable/Disable Internet Explorer Extensions and Add-ons

    Sometimes we all need to Enable / Disable Internet Explorer Extensions as well as Add-ons for some annoying reasons. Today we will discuss on three different methods to do it .

    Before we deal the actual , let’s get a rough idea about this Stuffs .

    Add-ons are just like applications that the web-browser Internet Explorer makes use of  in order to make interaction with numerous web contents such as videos & games. The toolbar, extensions these are also kind of Add-ons only . One of the most common Add-on that everyone know is the Adobe Flash. Internet Explorer is basically designed to give users Add-ons free experierence in web browsing as most of the users find irritated with add-ons. You will only be able to use Add-ons in Internet Explorer for the desktop.

    If you are loading a page that requires Add ons then to see it in the desktop: swipe up from the bottom of the screen to bring up the app commands and then select the Page tools button then finally select View in the desktop(Not that efficient but utilitarian).

    Different Ways to Enable / Disable Internet Explorer Extensions and Add-ons

    This easy and simple methods show you exactly how to enable or disable along with the dexterity to run various different extensions and Add-ons in your favorite  Microsoft Internet Explorer. Additionally this will equip you to both enable and disable all/specific system users to have the capability to either enable or disable extensions along with the Add-Ons through the Internet explorer Add-on Manager in Windows(Only if you are using IE which no one in India would do). For all these you are supposed to be logged in as an administrator so you can carry out all the steps in this magnificent methods. The different options are as follows:

    Read Also : Enable / Disable JavaScript : Mozilla Firefox Hacks

    Option 1 – Enable / Disable Internet Explorer Extensions and Add-ons From Internet Explorer Settings

    Step -1) Click on the icon of Internet Explorer.
    Step -2) Select the Settings Gear at the most upper with right corner and choose “Internet Options”.

    Step -3) Choose the “Advanced” tab(Seriously is there anything Advanced in Internet Explorer).
    Step -4) Keep scrolling down until you find the the “Browsing” section.
    Step -5) You can select/deselect the “Enable third party browser extensions” as desired.
    Step -6) You now to restart the Internet Explorer for the setting to take effect.

    Read Also : uBlock Origin Replaces Adblock plus(Best Adblock Plus Alternative)

    Read Also : WannaCry Attack Security Tips- Protect computers from Ransomware

    Option 2 – Enable / Disable Internet Explorer Extensions and Add-ons Group Policy

    Choose this only if you know something about group policy. So from the Group Policy Editor expand the following:

    Step -1) Choose the options in the following set of sequence as Computer Configuration > Administrative > Templates Windows > Components > Internet Explorer > Security Features > Add-on Management

    After properly executing the above steps you have to simply set the “Deny all Add-ons unless specifically allowed in the Add-on List” to one of the following settings.

    Step -2) Enabled – Does not allow Add-Ons unless they are listed in the “Add-on List” policy setting. Though the disabled users might be able to use Add-Ons.

    Read Also : Connect dual displays / monitors to one computer on Windows & MAC

    Read Also : Android: Prevent apps from running at startup(Stop/Disable Apps)

    Option 3 – Enable / Disable Internet Explorer Extensions and Add-ons Registry

    Step -1) Login with the credentials of the user you wish to change the setting for ensuring that the Internet Explorer is closed.
    Step -2) Holding the Windows Key press “R” to bring up the run dialog box.
    Step -3) Type “regedit” and then press “Enter”.
    Step -4) Select “Yes” if you are prompted to allow access by Admin Account Control.
    Step -5) Navigate through the registry(only if you really want to).
    Step -6) Select the HKEY_CURRENT_USER from the left.
    Step -7) Set the value for “Enable Browser Extensions“. If the value does not exist then you can create it by right-clicking “Main” and click “New” > “String Value”. Set it simply to “no” if you wish for your extensions to be disabled. Set it to “yes” if you wish for extensions to be enabled.
    Step -8) Close the Registry Editor and Restart your computer. The next time you launch Internet Explorer the capability to use Add-Ons and extensions could be modified as you desire.

    Note: If you have disabled your extensions the user will still have access to install or enable them under the Manage Add Ons screen but they will not work despite showing.

    So in the end I will conclude by saying that please follow the above instructions with care. Enough information has been provided so digest it at your own pace with the best possible output. So keep reading and sharing.

  • Connect dual displays / monitors to one computer on Windows & MAC

    Connect dual displays / monitors to one computer on Windows & MAC

    Connect dual displays/monitors to one computer

    A much more screen space is provided by dual displays/monitors to one computer and it can be very useful for increasing efficiency and productivity. The two monitors can be easily configured to show either the same image or give you a much larger screen. Follow this article to get your monitors set up right the first time.Here will discuss methods to connect dual displays

    Method One of Two to connect dual displays:Windows

    Here is the first method by which you can connect dual displays or monitor in one computer where here the step by step guide for connecting dual system to one windows computer.

    For Windows Users to connect dual displays

    1)

    First step to connect dual displays is that you need to check your ports and also you will need two video out connections on the back of your computer one for each monitor.

    Basically there are mainly four types of connections which are listed here from oldest to newest: VGA, DVI, HDMI and Display Port. So for the best results we can use two of the same connectors to connect dual displays.

    The monitors are directly connected to the motherboard or the graphics card and most graphic cards support two or more monitor connections. Although most motherboards support one and sometimes two if you have a monitor with a VGA cable and if your port is DVI then you can purchase an adapter that will connect to your VGA connector and allow you to hook it up to a DVI port.

    Though the ability to connect dual displays depends completely on the power of your graphics card and CPU, running a second monitor puts more strain on your system. A more capable graphics card means the display has more pixels which makes a connect to dual displays possible and this ends your first step to connect dual displays on your computer.

    Read Also : The ultimate guide to make Windows run faster (Boost Computer Speed)

    2)

    Now for the second step to connect dual displays you can connect the 2nd monitor to the open port on your computer and in most cases the Windows OS will intrinsically detect the new monitor but if it does not restart the computer then to connect a another monitor there is only one port on your motherboard or graphics card. You will need to install a brand new and latest graphics card in order to attach the secondary monitor. Whatever monitor you wish to choose has no compulsion to be from the same vendor or the same size but for a reasonable viewing both the monitors should be of the same size so that your desktop stays consistent and this ends the second step to connect dual displays on your computer.

    3)

    Now in the third step to connect dual displays you need to follow the monitor setup wizard. In majority of the cases this will automatically start when a new monitor is plugged in and you will be given options to either mirror or extend your desktop depending on your wish. The option of mirroring mirror’s what is shown on your original monitor and this is most useful for giving seminars,presentations etc wherever your machine may be connected either to a projector or a TV.

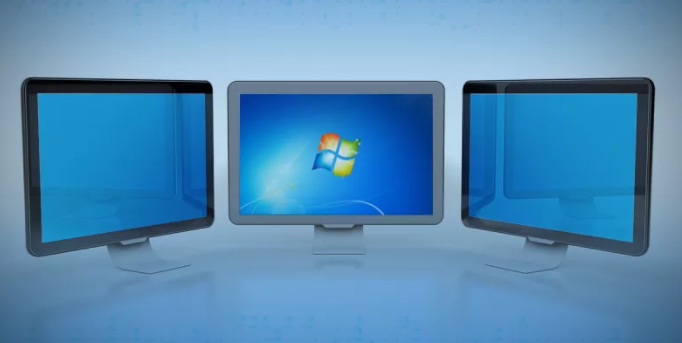
    The protraction makes the secondary monitor another screen for your desktop allowing you to drag and drop different windows and icons onto the other monitor which would give you more space to multitask.You can even set the second monitor as your primary desktop monitor and this is really useful if you attach a monitor to a laptop and want to use it instead of your laptop’s display so this ends your third step to connect dual displays on your computer.

    Read Also : uBlock Origin Replaces Adblock plus(Best Adblock Plus Alternative)

    4)

    This is the last step to connect dual displays manually. If either your monitor wizard does not automatically start or you want to change the settings for yourself you can use the display Settings tool. The procedure is to right-click the desktop and then select Properties or Personalize. You then decide to click on display settings from the list of available options and now you would see icons with various different numbers representing your attached monitors but if by any chance, if one is not working then that would look grayish in color. Now you can select the second monitor and choose to protract your desktop or replicate your desktop. Your options may rely on the graphics card that you have installed and you may need to make these changes from within your nVidia or ATI control panels. If you have these already installed then they can be found in your start up menu and this ends your final step to connect dual displays on windows .

    Method Two of Two to connect dual displays:MAC

    Here is the second method by which you can connect dual monitor in one computer where here the step by step guide for connecting dual system to one MAC computer.

    For Mac OS X Users to connect dual displays

    1)

    The first step to connect dual displays for the Mac users is that your Mac must have available video connectors to attach a second monitor. Since each display will need its own video cable, so to facilitate it there are several types of connectors that you may come across. Depending on the age of your Mac:

    VGA – This is one of the the oldest analog standard and most monitors support being connected via VGA cables and DVI – This is a core step up from VGA in quality. Although it is being replaced by HDMI and display port there are very few MacBooks that use the Mini-DVI which requires an additional adapter to connect to a standard DVI cable.
    Display port or Thunderbolt – This is one of the most common connectors found on newer Macs because Thunderbolt is the newer version of Display port and can carry both audio and video signals . By any chance if your monitor only supports HDMI then you will need a Thunderbolt-to-HDMI adapter.

    HDMI – This is the standard for all digital display devices and majority of every new display manufactured in the last few years supports HDMI connections because HDMI can carry both audio as well as video signal.
    All the above given information was necessary for upcoming steps to connect dual displays on your computer.

    Read Also : Kindle Fire Silk Browser Alternatives

    2)

    The second step to connect dual displays is similar as of windows because most displays will be recognized automatically and you will be prompted to choose your choice of settings and if you choose to mirror then the same image will be shown on both monitors. 
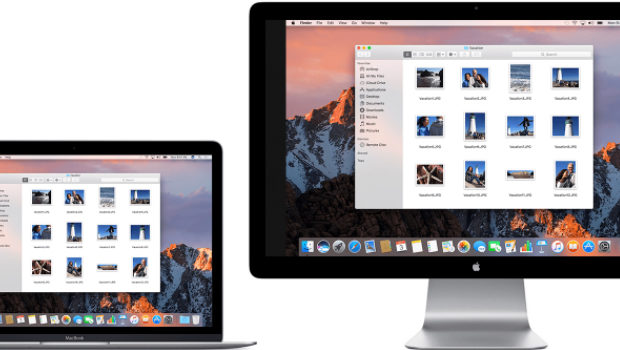
If you decide to choose extend then your desktop will stretch across both monitors but if the display is not recognized then open the Displays preferences and click Detect Displays and this ends your second step to connect dual displays on MAC.

    Read Also : Record iPhone iPad Screen on Windows & Mac

    3)

    The third step to connect dual displays requires you to adjust your settings manually. If you would like to change the settings yourself then you can do so through the display’s preferences menu. Now get there and click on the the Apple menu and select System Preferences and open the Displays tool. Now to extend the desktop you can click on Arrangement and then follow the simple instructions on the screen. Now to mirror the image you have to set both your displays to the same resolution. Now finally click on Arrangement and then click on Mirror Displays and this ends your final step to connect dual displays on your computer.

    These are the ways to connect dual displays on both Windows and MAC computers.

  • Android: Prevent apps from running at startup(Stop/Disable Apps)

    Android: Prevent apps from running at startup(Stop/Disable Apps)

    Android: Prevent apps from running at startup(Stop/Disable Apps)

    I have been installing too many apps on my Android device(after all what’s the point of having an android if you don’t have all the apps you might need). The device performance became slow and choppy(which make’s me mad occasionally and some days frequently). Digging deep I realized there were tons of android apps(out of a millions i installed) loading at startup and most of them had no setting to prevent apps from running at startup.

    Android OS is cool enough to kill all your low priority background apps and free up your device’s precious memory. Though there is no built in feature to control this there are some solutions that would help you to control or disable already running apps if necessary(“necessary” that is basically the reason you are reading this).

    Luckily there are some good and effective solutions to permanently prevent apps from running at startup.

    Now there are 2 ways for this:

    1) The boring technical ways(for technology enthusiasts)
    2) Completely Automated(install an app for preventing apps to load startup)

    1) The normal unanimous boring technical method(for technology enthusiasts)

    Lets begin the little boring technical way itself . After all a technology related problem should be given a technical solution .

    1st Method: Dynamically Freeze Apps

    There are some Android devices that specially provide a way for you to Freeze apps which is also known as Disabling app though this feature is useful for those apps that came with your device and cannot be uninstalled(if you still remember them).

    You can generally freeze an app with these simple journey of steps:

    i) Open Settings > Applications > Application Manager.
    ii) Choose the app you wish to freeze.
    iii)Select either “Turn off” or “Disable” depending on your priorities.

    Important Note: Options can(will definitely) vary depending on the device you own and version of the Android OS you are running.

    2nd Method: Startup Cleaner

    Again some Android phones have this special feature. The app comes pre-installed. The app runs dynamically when you click on it and prevents selected apps from running when you boot your Android device. Follow these simple steps:

    1) You can find it by searching in your Android phone for startup.
    2) Launch the app and tap the minus (–) symbol next to all the apps you do not want to run at your startup.

    If android failed to boot you can also fix it easily.

    Important Note: You would just want to disable items listed under the User tab. Be sure you know what you are doing if you disable items under System but since you got here I expect you to be with some technical background.

    That is all my friends and Now the selected apps would not run whenever you restart/boot/root.

    Read Also : Best Apple Watch Alternatives-Affordable Gadgets

    Read Also : Best Truecaller Alternatives to find Caller Identity

    Read Also : Best free calling Apps for all Smartphones

    2) Almost Intelligent Apps(Not as much as us Obviously)

    A well designed/developed task manager can easily list all the running tasks on your phone even if they are in background. This includes system process and tasks and foreground running apps(basically everything).

    I personally picked a special list(Just for you my friends) of apps from our beloved Google Play Store which are capable to accomplish this task for you. These apps can control all your running android apps and can even stop or pause current running apps or system apps including process and manage background apps intelligently (Just like your Smartphone).

    Read Also : WhatsApp Exclusive Guide – Everything about WhatsApp Features

    My First Favorite App: Advanced Task Manager

    Advanced Task Manager is special task manager designed to kill tasks(murder them), free memory which speeds up your phone saving battery life and offer just one tap to boost your phone.

    Advanced Task Manager’s BoostIt can kill selected tasks while monitoring CPU lagging apps also optimizing your Android apps. It auto kill’s tasks on almost every screen off. All this while showing battery life and cleaning & boost device memory.

    Read Also : Safeguard Facebook Pictures-Prevent profile picture downloading

    My Second Favorite App: All-In-One Toolbox (Cleaner)

    All-In-One Toolbox is a special Android cleaner and memory optimizer app equipped with as many as 29 Android system tools. It is designed to clean up junk files and boost memory, protect private info and speedup your Android with just a one tap on cleaning and process killing.

    It can help you to disable running apps from system boot making your system run fast and boost speed up. All this by killing running tasks whenever device slows down or freezes(so it itself run’s in start up). It can disable unwanted startup apps from system boot and keep Android device running at optimum speed.

    Read Also : Improve The World With Smartphone -Top 10 Hacks

    My Third Favorite App: Smart Task Manager

    Smart Task Manager is an all in one system app which can manage many different Android tasks, Application, SD card, Device and System Information in one single shot. 
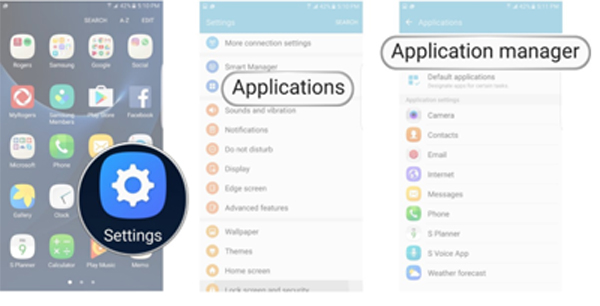
This app can display list of service, background, empty applications and service process and this application show’s you the detailed information of any particular apps like restricting process, boot, delete and some more detailed information including execution of application, update, data usage, evaluation and other details.

    Read Also : 10+ Best Alternatives to Whatsapp you will love this year

    My Fourth Favorite App: Startup Manager

    Startup Manager basically aims at either disabling or enabling startup items from system boot. Android devices which includes most smartphones and tablets can be utilized to see all the system processes that start with main Version of boot from system tabs(better try not to mess with them since it could be potentially harmful). Some processes may not seem necessary to start due to our normal natural using habits and preferences.

    You can simply check and uncheck the processes if and only if you know well about the after effects of disabling them because this app can analyze and monitor all android services (containing many of the user applications along with android processes) in the foreground and can easily stop any apps from getting auto started at your device’s boot.

    So concluding all these researched pieces of precious information and all the required information given above I would like you to have the required details. Once you’re done, then experiment any of the apps since they all pretty much do the same things in this case. Though do not mistake to take apps for granted since they could cause some serious damage to your phone. So be wise and keep sharing.

  • Safeguard Facebook Pictures-Prevent profile picture downloading

    Safeguard Facebook Pictures-Prevent profile picture downloading

    Safeguard Facebook Pictures-Prevent profile picture downloading

    Lucky for you that Facebook has introduced brand new protections for profile pictures for users especially in India. All this in a bid to stop people from downloading, sharing or illegally misusing their personal profile pictures. There is an option for users to Safeguard Facebook Pictures through the new system. It will ensure that others can not copy, share or download their personal profile images. This will prevent strangers from tagging themselves in the image.

    Notifications for Safeguard Facebook Pictures

    Those individuals who will opt in will get a special blue shield border around their image. On android phones(which are most popular and widely used in majority of the Indian market) Facebook says it will prevent users from taking screenshots of individual’s profile images wherever and whenever possible.
    Facebook Safety on themselves posted on Wednesday, June 21, 2017 saying

    They say that it was inspired to offer this special tools after hearing from various different Indian social and safety organizations that some women especially in the country particularly elected not to upload personal pictures including their faces on the internet. These tools were developed with a joint effort with a range of those organizations and different tests indicating the kinds of things that would cut down on the misuse of profile images. For instance Facebook says that something as simple(mind you simple by Facebook standards) as adding a special design overlay to a picture means that others are almost 75% less possible to copy it.

    Read Also : WhatsApp Data Sharing Disable Methods to Protect WhatsApp Data

    So exactly how can design of overlays increase security

    Users have now power to add those layers quickly using Facebook’s system. The tools are less likely to cut out the copying of profile pictures overnight. While Facebook claims it is doing everything in it’s power to stop people from screenshot the profile pictures via Android. Users could still take screenshots on laptop or desktop and the new blue shielded border is a visual cue of protection rather than any other difficult barrier.

    Even though tests have shown that uniquely simple additions can deter opportunists. The tools are a potentially useful option for specific Indian users. As of now Facebook has not yet indicated whether similar measures will come to other countries.

    Read Also : Android boot Fix – Steps to Try When Your Android Won’t Boot

    Keeping your profile pic safe

    Soon after Facebook launched the profile picture guard in India. It would give users more control over who can download and share their personal images several women users have started protecting their display photos.

    Steps for safeguarding your profile

    On the Facebook mobile app you will see a new notification on the top of your News Feed asking to secure your profile picture. Refresh your news feed if it does not show when you log in.

    Once you accept the terms a box will pop up saying “The Profile picture guard would help keep your current photo more secure on Facebook in three ways.”

    1. Keep off creeps
    2. Keep off creeps
    3. Keep off creeps

    So now unknown stalkers would no longer be able to download or send your profile picture in a message anywhere on Facebook. Facebook also claims that it would virtually stop strangers from taking a screenshot of your profile image on Facebook wherever and whenever possible. Though the feature is currently only available for Android devices.

    Conclusion: Shield protection effectiveness

    So how trust worthy these tools are?
    You have to note that there is no 100% effective way as of now to hide your profile picture currently.It is always public by default(what’s the point of uploading if you don’t want to share). These latest methods by Facebook can surely discourage the misuse of the profile picture but would not weed out the problem from it’s root. So for undoubted safety add options to restrict the viewing of profile pictures just to friends and friends of friends only.