How to take Screenshot of Mac? What if my Mac Screenshot is not working?
Are you using a MacBook and wondering how to take screenshots on it? Taking screenshots is very common these days. People take screenshots from their laptops and mobiles for personal use or to even share with their friends or for any official purposes. If you are new to a MacBook and if you do not know how to take screenshots in it, then this article will guide you through it.
How to take Screenshot of Mac?
First, you need to choose what screenshot you want to capture from your MacBook. You can take screenshots of the entire screen, a window, or even a portion of the screen of your Mac.
If you want the screenshot of a full screen then follow three steps: all the three keys shift, command, and 3(#) should be pressed together. A thumbnail might pop-up on the corner of your screen which can be used to edit the screenshot taken. If you do not want to edit the screenshot, then wait for the MacBook to save the captured picture.
If you want the screenshot of a portion of the screen, follow these steps: Press and hold the shift, command, and 4($) buttons together. Drag and select the portion using the crosshair that appears on the screen. You can move the selection while dragging it and pressing and holding the space bar at the same time.
Once the portion of the screen is selected, release the mouse or the trackpad button.
Esc key can be used to cancel taking the screenshot. You can edit the screenshot by clicking on the thumbnail that appears on the corner of the screen. If editing is not required then simply wait for the Mac to save the screenshot on the desktop.
How to take a screenshot of a window or a menu: First, select the window or the menu you want. Press the Shift, Command, 4($), and space bar keys together. Now you will see the pointer changed to a camera icon. Click on the window or the menu to capture and save. (You can avoid the shadow of the window in the screenshot by simply pressing and holding the option key while you click the window or menu).
Use the thumbnail that appears on the screen if you want to edit the screenshot taken. The screenshot taken will be saved on the desktop. Remember, you can always use the Esc key to cancel taking the screenshot. The screenshot taken in your MacBook is automatically saved in the desktop as -” Screen shot [date] at [time].png.” You can change the location and select the one you want according to your convenience.
What if Mac Screenshot not working?
If you cannot take a screenshot using the steps stated above then try the following steps:
Restart your MacBook
Try restarting your Mac – Press the power button and click on the Restart button. You can also restart your Mac by choosing the Apple Key and select the Restart option or press Control, Command, and Eject to restart.
2.Check if shortcuts are activated
Go to System Preferences on your Mac, select Keyboard and Mouse – Choose Keyboard Shortcuts and see if the shortcuts are activated.
3.Make use of Grab
If you find the above 2 options not working, then go to Application > Utilities > Grab > Capture and choose what screenshot to take.
Use Preview to take a Screenshot
You might be familiar with the Preview button. Click on Preview > Click File > choose “Take Screenshot” from the drop-down menu.
Hope now you can enjoy taking mac screenshots as we believe this helped to fix mac screenshot
Let it be a function, a business meeting, a usual day at work, a tie makes your attire look formal and classy. If you have planned on wearing a tie, you can check out the different types of knots you can try out with your various attires according to the occasion. The usual knots of tie that used my men are oriental knot, Full Windsor, and half Windsor knots. But there are many other types of knots too. Here, I will introduce 10 various types of knots to tie a tie. And if you are person who wants to know how to tie a tie in all styles and glamour here we go.
10 Different Necktie Knots
So many tie knots , let us see all classics to trend setter tie knots .
Oriental Knot or the Simple Knot
The most commonly used necktie knot, the oriental knot can be easily worn without much difficulty.
Steps
Take your tie and drape it around the collar of your shirt with the seam facing inward. The end with more width should be on your left side. Make sure that you place your tie at least 2 or 3 inches lower than the length you require.
Now, you should take the thick end across the front of the narrow end. Again, pass it horizontally at the back of the narrow end.
Again, take the thick end and pass it across the front of the knot you have made (from left to right).
Drape the thick end horizontally behind the knot from the right side to the left side.
Take the thick end and pass it across the front of the knot from left to right. You will see a loop now through which you can slip your finger.
Now the tip of the thick end should go underneath the loop. Tuck it up behind the knot and adjust the tie by pulling the narrow end and holding the knot.
Four in hand knot
This necktie knot is one of the oldest styles of tying a necktie and at the same time, it is very easy which is perfect for beginners.
Steps:
First, put the tie around the collar with the thick end on the left-hand side. Remember to always place the thick end at least 3 to 4 inches than the narrow end.
Now take the thick end and cross it over the narrow end.
Bring the thick end behind the narrow portion and cross it horizontally from right to left.
The thick end should now be taken horizontally across the front of the knot (right to left). Slip your finger under the horizontal area.
Turn the thick end upward and slide it under the loop.
Take the broader end through the loop and pull it slowly to stiffen the knot.
Now hold the knot with one hand and pull down the narrow end slowly to place the knot correctly on your neck.
Half Windsor Knot
This knot is also suitable for beginners and is a perfect knot for the thick ties with medium width.
Steps:
Don the necktie around your collar with the narrow end on the left and the thick end on the right (with more length on the wider portion).
Take the thicker end over the narrow end from right to left below your chin which will look like an X.
Now loop the thick end horizontally across the narrow portion.
The wider portion should now be taken over from the top through the opening of the X shape you have made. Pull it tightly.
Take the thicker end on your right hand and wrap it over the front from the right to left.
Grip the knot with your left hand and the wider end should be taken towards your chest from behind the loop. Cross it over the X shape.
Open up the knot (triangle shape) with your index finger of the left hand to pull the wider side.
Adjust the length by pulling down the thin end while holding the knot.
Full Windsor Knot
Suitable for men with a long neck, this Full Windsor Knot also known as the Double Windsor Knot has a triangle shape.
Steps:
Put the tie round your collar with the wide end on the right. The wider side should hang 4 to 6 inches lower than your midriff.
Take the wide end horizontally through the front which will make an X shape below your chin.
The wider end should be tucked up under the loop that should point upwards behind the shape X. Hold the knot with 2 fingers and pull the wide end down.
Take the wide end across and behind the knot. Now pass it horizontally from the left side to the right.
The end of the wider tip should now be flipped and should be tugged diagonally over the front of the knot.
The wider end should now be taken over the top of the loop and bring it back down to the same position.
Take the wide end and bring it horizontally across the front of the knot from left to right. Now you can see a horizontal band. To hold it in place, tuck your finger through it.
The wide end should be taken underneath the loop once again around the collar (the tip should be pointing upward).
The wide end should be turned down and slide the tip through the horizontal loop you made with your finger earlier.
The last step is to pull the wide end down and position the knot correctly.
This is a different style of knot for a necktie in which the seam of the tie will have to face outward when tying.
Steps:
Put the tie around the collar of your shirt with the seam facing outwards. The thick end should hang on the left side with 2 inches lower than your desired length.
Take the wide end below the thin end and pass it through the loop.
Now pull the wider end down and flip the tip (should point to your left).
Take the wide end horizontally over the front and tuck a finger behind the horizontal band.
Put the thick end through the loop below and point the tip of the wider end downwards on top of the smaller end.
The thick end should be pulled down through the horizontal band.
Position the knot correctly by pulling the narrow end while holding the knot.
Eldredge Knot
This is a difficult necktie knot. But if you are already good at tying a knot for your necktie and want to try something new for a function, then go ahead with the fancy Eldredge Knot.
Steps:
Put the tie around your collar, making sure that the thick end is on the right side. The length of the thick end should be placed exactly where you want it to be once the knot is completed.
Pinch the middle of the wide end of the tie and cross the other end over the front of the wide end horizontally.
Take the thin part of the tie and wrap it behind the cross shape from right to left (crossing horizontally).
The narrow end of the tie should be inserted through the loop around the collar.
Across the wide end, bring the narrow end horizontally.
The tip of the thin end should be tucked through the loop around the collar and flip it over the knot (cross diagonally downwards from left to the right side). Now pull it down so that a diagonal band is formed along the right side.
Drape the thin end around the back of the knot and through the diagonal band.
Fill through and pull it tightly to create a diagonal band on both sides of the knot.
Point the thin end upward and tuck it down under the loop around the collar.
Loop the narrow end of the tie upwards around the circle (around your collar). Do not tighten it.
Now the thick end should be tucked down and to the left below the loop around the neck. Also, take it up through the loop you just made.
Time to flip the narrow end over the top of the loop.
The remaining thin part of the tie should be tucked in underneath the wider portion. Tighten the knot by pulling the thick end and adjust the knot to your neck.
Bow Tie
Certainly not an easy knot to tie. Nevertheless, if you love the chic look of bow tie, then try it out using the following steps.
Drape the bow tie round your neck with the seams facing down. Keep the right side of the tie longer.
Take the right end over the left which will make the shape of an X.
Take the longer end behind the X shape and pull it tight. Leave the longer end.
Place your index finger in the wider part of the shorter end and fold it. A bow shape will be created now. The folded tip should be placed across the collar with a shorter end close to your neck.
Hold the bow with your forefinger and thumb of your left hand. Take the longer side down over the shorter ones right in the middle of the bow.
With your right hand, fold the longer end back towards your chest and pinch the fold and double the tip to form a wing shape.
The folded tip of the longer end can now be tucked behind the folded top of the shorter portion through the loop.
Make sure that the wings are in place and tuck the loops behind them. So that the vertical knot will be tightened.
Holding the front of the knot using one finger, twist the wings to form a symmetrical shape.
Position the bow tie correctly on your neck and here you are ready for a function.
Nicky Knot
Follow the below steps to try out a Nicky Knot for your day at the office.
Put the necktie around the collar of your shirt with the seam facing outward. The wider end of the tie should be on your left side and it should be 2 inches lower than the original length you require.
Now cross the wider portion of the tie below the narrow end.
The wider end should be flipped in front of the loop around the collar. Tuck it down the loop, making it point to the left of the narrow end.
Now the tip of the wider end should be brought horizontally across the forward-facing knot.
Using your finger make some space in the horizontal band you have made and bring the tip of the broader portion up below the loop.
Slip the tip of the wider end down through the loop and pull the end and leave it down.
Holding the knot and pulling the narrow end slowly, you can adjust your knot on your neck.
Kelvin Knot
It is not very tough to tie a Kelvin Knot. If you want to try out something innovative, then check out the following steps to tie Kelvin Knot.
Don the necktie around your collar. The seam should appear upwards with the wider end on your left side. Make sure to leave the wider side at least 2 to 3 inches lengthier than the other end.
Take the wider end and place over the narrow ones from left to right.
Wrap the wider portion under the narrow piece (right to left) and continue wrapping it around one more time.
Bring the wider portion horizontally over the front of the knot you have made from right to left side.
Using a finger, make some space in the horizontal band to tuck the wider end upward below the loop.
Now take the tip of the wider end through the horizontal loop you made in step “d”.
Pull the wider end and leave it. Adjust your tie by pulling the narrow end.
Balthus Knot
This is a perfect knot that you can wear for any event and fine dining.
Steps:
Use a long tie for Balthus Knot. The seam should face upward with the wider end on your left. Leave the thick end till it reaches your mid-thigh.
In this knot, you should take the thin side and cross over the wider one. Now the wider end should be brought up in front to tuck it down underneath the thin end.
Again, bring the wider portion back up in the front and make a loop over the thinner ones.
The wider end can be now tucked down behind the thin end.
Turn over the wider portion upwards and wrap it over the center of the knot.
Crossing from right, bring the wider end down behind the knot you made.
Now the wider end should be taken across the front of the knot horizontally (left to right).
Take the wider end to the back of the knot and bring it upward. Do not tighten it now to tuck the wider end through the space you made.
Google maps have become an essential part of our life and business . Here we will take a look at exciting new Google maps features .
It is always difficult for everyone to travel to different places without knowing the route. Checking the signboards, asking someone for direction every time is time-consuming and difficult. Also, if you miss out on any exit, then we will have to look for the next exit and take a diversion. When Google introduced maps (maps google , google my maps ) , all the chaos in finding the correct route to a destination was over. Google Map makes it so easy to find shops, restaurants, tourist attractions, and a lot more. You can drive alone to anywhere you want to visit without any anxiety about finding the route. But one needs clear understanding of all google maps features to use it for their convenience .
First, you should install google map on your phone , select the starting point and destination, and follow the route shown on the map. You can turn on your location on the phone, so that, Google Map will automatically enter your current location. Click on directions and you can choose the mode of transport you are using as a car, two-wheeler, train or bus, walk, etc. Google Map offers aerial photography, street maps, satellite images, real-time traffic environment, and 360-degree interactive panoramic views.
How to Save Route in Google Maps
To save a particular route in google maps that you use often, you have the option of saving the route to your home screen. Once you have installed Google Map on your android phone, choose your starting point and destination. See the top right corner, tap on the three dots or it will be given as the first alphabet of your name and you will be able to see a few choices to select. Click on add route to the home screen. Click on Add.
This is a Great google maps feature for my life i must say .
Why Google maps not available in my country
Google Maps are available in the majority of the countries and regions. But still, there is 1% where Google Map will not be accessible. It can be because of any legal or political issue. We cannot accurately conclude the reason for google maps not being available in certain places and when you search for the Google Map App, it might show as Google Maps not available.
Fix Google Maps not updating location
Make sure the location in your android phone is enabled. If you cannot find the blue dot (your current location) when you open the map, tap on Location at the bottom. If you find it difficult to select the precise current location, you should use a high accuracy mode. In your android phone, go to Settings > tap Location > switch on location > clock on Mode > High Accuracy. Google Map usually finds your current location with the help of Wi-Fi, GPS, and Cell towers. You can also try switching on the Wi-Fi/mobile data, try restarting your phone, or calibrate your phone by opening the google map and make a figure of 8 with your phone until the blue dot is in an accurate position.
This google maps features easy tip can help you have your accurate location on google map .
Google maps not talking or giving direction – How to fix
When you are driving, you do not need to check the map on your phone over and over. Google map comes with voice over and you can just hear the navigation while driving. If you cannot hear the voice, there are a few remedies. First, check your phone’s volume to make sure that it is not muted. Enable the play voice over Bluetooth – If you are using the google map on your car’s Bluetooth system, you should enable the play voice over Bluetooth to hear the navigation.
This is one of the safest driving assistance available in form of google maps features.
Avoid toll roads on google maps
We always like to avoid tolls and ferries enroute to our destination and with the help of Google Map, we can avoid such toll roads. If you want to reach a destination soon and if you want to avoid the toll, first you should select the starting point and destination. Click on three dots on the right top corner of the screen and you will see a few options to select. Click on > Route Options > Select avoid toll roads on google map from the three options given. Click on the Done button. The Google Map will show the route avoiding the tolls present on the main highway. See how superb are these google maps features thanks to such good inventions 🙂
Fix Google Maps not showing street view
Street View map is one of the most commonly used google maps features by the majority of the people because it shows the real images of the places you are going to visit which will be much easier to spot. But if the street view option is not showing on your android, then there might a glitch or some other problems. Check the following steps for the issues.
Sometimes this problem may occur when you update your Google Map App. Check if you have recently updated the app and the street view is not showing. Also, check with other users if they are facing the same issue in your region. Try using the older version of Google Map to solve this problem. Or you can even try using the google map offline mode.
Check if the street view option is available in your area since the street view map type is not available in all the regions.
You can also check for map google nearby places to the destination you want to visit. All you have to do is select one of the famous spots and click on nearby places on the map to see all the nearest shops, restaurants, shopping malls, etc. So that might be able to get a street view near to the destination you are looking for.
This google maps features always helped me with shopping and travel whenever am in a new place .
Try getting the map through a google search. Give your current location first in the search bar and then select the maps section. Drop a pin anywhere you like to get the image of the area you are looking for.
Zoom on Google maps with one finger
When you have selected your origin and destination point, the map will be reflected on the screen. If you want to zoom a particular spot on the map, you can do so by simply double-tapping the spot. To zoom in you can just pinch in the spot. You can also use two fingers to zoom out the spot you want too. Likewise, to move the map and see the route you can just press on the screen with one finger and move your finger right, left, top, or down to see.
Set up plus codes on Google maps
Getting the plus codes on google map is very easy. You can share the plus code with anyone and with that plus code your friends or relatives can search the map on their android just like a street address. Open the Google Map on your android and select the destination. Tap and press on the drop in on the map to the plus code and you can find the address and the plus code below. this icon shows the plus code and you can share the plus code by simply copying the code and paste it into mail or WhatsApp etc.
How to set multi-stop directions in Google maps
With Google Map, you can set up multi-step directions easily. This means, other than entering the origin and destination point, you can add other stops between the journey. To add other stops, open Google Map on your android and click on the Go button on the left bottom corner. Enter the origin and destination point. Click on the settings option which will be represented by 3 dots on the top left corner. From the drop-down menu, select Add Stop. You can add several stops as you wish in your Google Map. The stops will be shown in alphabetical order (A, B, C, etc.) You also have the option to reorder the destinations by simply dragging the leftmost button shown as small circles.
Restrict Google maps data grabbing
Google Map is a very convenient technology used by the majority of people to travel. It is so easy to find the routers and landmarks using the Google Map. But using Google Map throughout your journey can consume your phone battery charge quickly and it also used mobile data. If you are thinking about using the map without grabbing the data then, there are a few options that you can try.
Use offline Google Maps: Before you start your journey, you can download the offline map on your android phone easily which will not consume much data of yours. Open the Google Map, click on the setting button on the top left corner and the drop-down menu will show the option of Offline Map. Click on that and download the map.
Disable Data Access: Another option to avoid usage of data is to disable unrestricted data usage. To do that, go to setting in your phone and select the apps from which you can click on the Google Map app. You will see a few options like permissions, storage, data usage, etc. From that, click on data usage and if the unrestricted data usage is on, then turn it off so stop using mobile data.
Use Wi-fi Only: It is not feasible to use wi-fi on the road while you are traveling. But you can stop the usage of data by setting this up on your phone. Go to Google Map, click on the Settings button, and enable the Wi-Fi only option.
Share real-time location on WhatsApp and Google maps
It is very easy to share your real-time location with your friends or family. Open WhatsApp and click on the attach option (a pin). Click on Location and tap on share the live location. You can select the duration of time below the same page and also add a comment and share the same with anybody you want.
To share the real-time location on Google Map > Click on three dots on the top left corner (or an alphabet). From the menu, click on Location sharing and share your live location through WhatsApp, mail, messenger, etc.
Create and share custom google maps
It is not feasible to create a custom map just using your android phone. First, you need to use your computer to set up a custom google map, and then you can share the same with your phone. To do that, open google map on your computer and select the origin and destination. Create your custom map by clicking and moving the various routes shown on the map. Once you have fixed on a particular route, click on> Send directions to your phone. You can share the same via mail, text, etc.
Steps to use google maps offline
To use Google Maps offline, first, you need to download the map on your phone. Open Google Map> Click on three dots on the top left corner. From the options given, click on Offline Maps. Select the area you want by zooming in or out using your fingers and select the area. The size of the map you selected will be given below. Click on download map. Once it is downloaded, you can give your origin and destination and find the route offline.
Save locations in Google Maps for – Android and Apple
If you are using the same location often, then you can easily save the location on your phone. Open google map in android or Apple, select the location you want either by typing the destination or by clicking on the map. Then at the bottom, you can see many options including SAVE. Click on the save button and the location will be saved in your phone at that moment.
Google maps clear navigation and search history
If you want to clear or delete the navigation and search history from your phone, click on settings > click on maps history. There we will see many options that you can choose from. You can turn on the auto-delete option if you want which will automatically delete the history from your phone. You can even select months, years, or weeks according to your need and select it so that the search history for that particular period will be cleared.
How to turn off Google map voice search permanently on android
When you use Google Map, once the navigation starts, the google voice will automatically give you directions which is easier for people who drive. If you want to turn the voice off, then once you click on start navigation, you will be able to see a speaker icon on the left side of the map. Disable it to stop hearing the voice again.
Remove location sharing on Google hangouts
With the latest update of Google hangouts, location-sharing is unavailable. However, you can share locations through google hangout using the google map.
How to access Google services on pc
If you want to use Google services on your pc, first your need to install google chrome and follow the instructions. Once it is downloaded, open the chrome, and sign in by giving your Gmail address and password. Create a new account with a username and password if you do not have one and begin using the services of Google on your pc. Likewise, you can download any google services on your pc and sign in to use it.
Another option is to download Bluestacks on your pc. The bluestack acts as a virtual machine that helps in downloading the apps you need. Once you have Bluestack installed, open it and sign in to your google account. Only then you will be able to use Google Play Store to download any apps of google services. With Bluestack you will get the feel of using your android phone on your pc. But it is way slower if you do not have a powerful pc.
Hope this google maps features helps you use this app more conveniently . Let us know your favourite google maps features
Human anatomy is complex. Liver is the largest and the amazing organ that protects, filters, breaks substances, detoxifies body by filtering harmful substances, plays a role in clotting, and produces bile juice and many more. Hepatitis is a two letter word derived from Greek words “hepat” meaning liver and “itis” meaning inflammation. By the definable sense it means irritation or the inflammation of the liver.
Hepatitis is caused by different viruses, mostly known from hepatitis A to E. Hepatitis Viruses include cytomegalovirus (CMV), Epstein Barr Virus (EBV), Herpes Simplex Virus etc.
Hepatitis Symptoms Commonly seen
Hepatitis Symptoms vary from being acute to chronic. Most commonly deprives of the following:
Flu like symptoms
Diffuse pain in the abdomen
Nausea
Vomiting
Jaundice
Muscle and joint pains
Note: Most commonly patients have symptoms of Jaundice that is concerning the health care professionals causing yellow or pale skin and eyes that’s a sign that the liver is unable to perform its functions properly.
The hepatitis signs and symptoms may sometimes vary from one person to another due to other prevailing medical condition existing in their body .
Causes of Hepatitis / Factors contributing Hepatitis
Let us understand the causes of hepatitis –
Types of virus
Age of the patient
Health of the patient
Status of immune system of the patient
Hepatitis A
Hepatitis B & D
Hepatitis C
Hepatitis E
Type
RNA
DNA
RNA
RNA
Incubation
30 days
90 days
40 days
50 days
Route
Faeco-Oral
Parental
Parental
Faeco-Oral
Severity
Mild
Severe
Mild
Mild
Chronicity
None
10%
50% – 60%
None
Hepatitis Transmission Routes
Faeco–Oral: This is when an infected person excretes the virus in the faeces and that comes in contact with food and water passing on the virus to another person. This is also called Entral route of transmission.
Parental: This is when the infection does not include the transmission through the human gut. It might be through subcutaneous, intravenous, and intramuscular.
Alcohol: Patient is told to have alcoholic hepatitis when there is a rapid acute liver failure in response of rapid alcohol intake. It is really a spectrum of diseases it some scenarios it can be mild also can be life threatening. There isn’t much treatment options available except for IV steroids in which very few patients spontaneously improve, however large number of patients die.
Hepatitis Pathophysiology
Let us understand more about how hepatitis happens , how it affects etc .
How these viruses damage the liver?
Once these viruses enter the human being by any mode of transmission they find a special efinity for the liver cells. They reach the liver through the circulation and once inside the liver these cells inaculate into the hepatocytes which are the cells of the liver. The liver is made up of large cells of hepatocytes, which are arranged in clusters called lobules once these cells reach into the liver they multiple because it is very convenient environment for growth and multiplication of these viruses.
Now, the growth of these viruses doesn’t lead to liver damage, what actually happens is that these viruses lead to change in the antigen structure on the surface of the hepatocytes. Due to this the body recognizes these hepatocytes are foreign and starts destroying by a mechanism called “self mediated immune damage”. Body starts destroying as many hepatocytes as possible by the mechanism of apoptosis, necrosis, and fibrosis. This is fine in case of acute infection ie; in case of hepatitis A & E as these viruses do not have chronic infection potentials. These viruses are dormant inside the cells of the liver ultimately reactivate and damage new cells of the liver. Self destruction restarts causing liver cell damage, fibrosis, and distortion of liver architecture causing deterioration of the liver function and since liver performs so many vital functions for the body it presents so many clinical symptoms once the damage is more than expected.
Clinical features of Hepatitis – three phases
Predormal symptoms: Also called Viremia, ie viruses in the blood due to which body releases chemicals like IL1, TNF, causing flu like symptoms. Some patients may also get rashes on the skin from here they step into the next phase.
Icentric Phase: This is called the phase where the liver damages. The patients develop jaundice both unconjugated and conjugated (bile duct damage). The most important symptoms include dark urine as unconjugated bilirubin leaks into the blood and hepatomegaly ie; enlargement of liver due to inflammation. After this phase the patient steps into the third phase.
Recovery phase: this is also called the Convalescent phase where the symptoms become mild and gradually improve. Liver size returns to normal, appetite improves, jaundice decreases, stool and urine color return to normal.
Hepatitis Types
There are basically 5 types of Hepatitis –
Hepatitis A – This viral hepatitis can take Entral route of transmission .HAV (Heptatitis A virus ) is the cause of transmission .
Hepatitis B – It is most common type of Hepatitis , this can spread through coming into contact with infectious fluids like vaginal discharge , semen , using razor of hepatitis B affected person etc .
Hepatitis Treatment
Hepatitis A: Vaccine available antiHV IgM or IgG to diagnose, post exposure immune globulin (2 weeks after exposure), acute only.
Hepatitis B: HBsAg (infectious) and anti HAV (immune), Vaccine available antiHV acute and chronic.
Hepatitis C: No drug available, acute and chronic.
Hepatitis D: Occurs in a person with hepatitis B. No vaccination available, but advantageous for the patient who receives hepatitis B vaccine both acute and chronic.
Hepatitis E: No vaccination available. It causes complications in pregnant women mostly in developing countries, acute only.
Alcoholic Hepatitis: It can be mild, but some scenarios become life threatening. IV steroids, if unimproved only supportive medical care can be provided, unfortunately only few improve. There is another option available for patients effected with severe alcoholic hepatitis and that’s the possibility of a lifesaving liver transplant. Unfortunately, in the US patients have not been considered for liver transplant because of the six month waiting period. The rule says you cannot have a liver transplant unless you are sober for six months waiting period and the rule is now being challenged. After the liver transplant the patient is treated with behavioral modification with the psychotherapist or even pharmacological interventions with the drugs that have been known to reduce cravings for alcohol.
Do’s & Dont’s in Hepatitis :
If you have Hepatitis, then ensure you are consulting your doctor and taking the exact guidelines as he prescribes . Ensure that you make regular checkups and maintain a charted healthy diet as recommended by your Hepatitis Doctor and dietician.
Encourage that even your loved ones to get Hepatitis tested.
Nowadays, taking screenshots has become very common. People take a screenshot to save a current text in a group or to take a quick screenshot of something that you are searching in google and send it to someone. All the computers and android phones come with the option to take screenshots easily. If you are using a computer, you can simply press the print screen button on the keypad. In androids, you can press the volume key and power button at the same time to take the screenshot. But these options in your computer and smartphone will not have many features wherein you can edit or crop the screenshot. There you need some best screenshot tools to enhance screenshot experience .
There are many screenshot tools available now that you can download on your computer and smartphone. For those who are seeking for a good screenshot tool, I hope this article will help you find the best. Below are some of the best screenshot tools to download.
Best Screenshot Tools for Computer & Smartphone
Take a look at the screenshot tools that are ideal for your phone and computer . Even though all mobile and system has the liberation of giving us an option of PRINT SCREEN button , we find it is not just sufficient to Snapshot / screenshot most things .
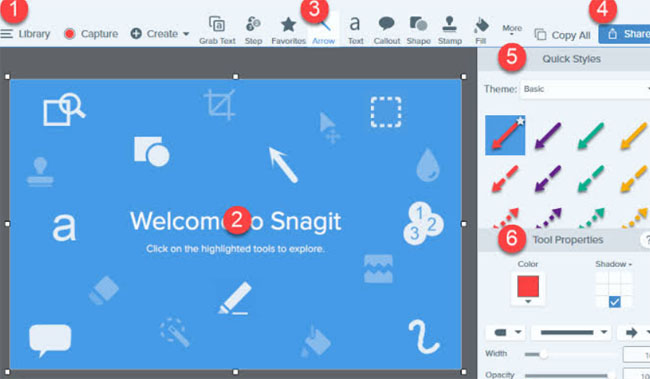
Snagit
You might have heard about the TechSmith Software Company and the Snagit screenshot tool is one of their products. With this tool, the user can add comments on the screenshot taken. Some of the key features of Snagit include: a preview window with a cursor hovering, the images can be edited with special effects, a quick toolbar to capture the image, recording a video and share it via email, etc. This app helps in taking the screenshot of the whole screen of your computer too.
Thus it is one of the best screenshot tools in the market .
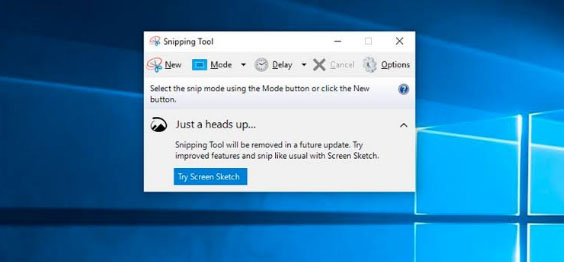
Snipping Tool
This is a default tool on your windows that helps in taking a screenshot in a rectangular form and can also add any notes you want. You can also highlight any sentence with colors or you can strike off any words using the font colors.
All the screenshot taken can be saved in PNG, JPEG, and GIF format and once the image is captured it is copied automatically, helping in pasting it as you require. With the help of the snipping tool, you can take the screenshot in 4 modes which are: free-form snip, window snip, full screen, and rectangular snip. It is one of the best windows screenshot software .
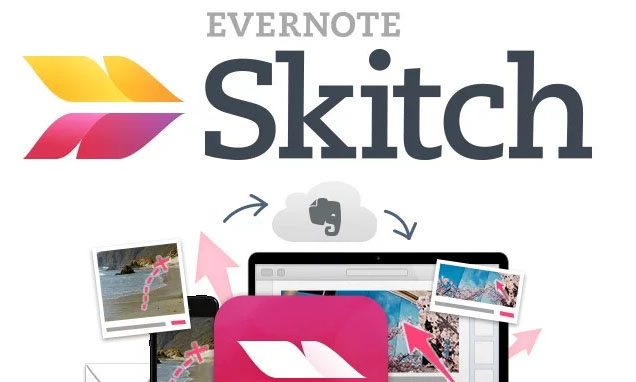
Skitch
Skitch is a screenshot tool of the company Evernote that has been crafted for windows and Mac. This freehand screenshot tool comes with the feature of marking the areas blurry that you do not want to be visible in the image. I find this feature quite useful so that if you want any information on the image like a word or a phone number cannot be visible to any other person to whom you share the screenshot.
Some of the other features like adding a comment on the image, uploading the screenshot in a mail, highlighting, etc. are available. Skitch screenshot tool can be used in both computers and smartphones and all the editing options come under one menu, making it easier for the user to perform the activities.
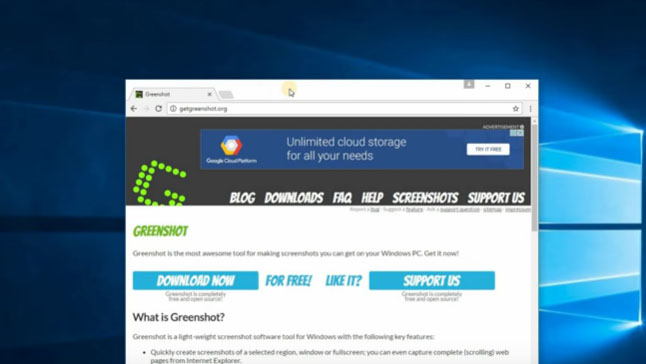
Greenshot
Another screenshot tool called Greenshot is a free and open-source program designed for Windows OS. You can take a screenshot with this app very quickly and easily. A full-screen window can be captured by scrolling the page and you also get a chance to highlight and annotate. One of the advantages of using the Greenshot tool is that you can save the captured image in a different format and can also edit it later.
The captured images can be emailed or you can even print it directly. This screenshot tool is available in 26 languages which makes this tool stand out among the other tools. Moreover, it also offers several capture modes like capture the last part, capture region, capture window, and capture the full screen.
Lightshot
This is a very convenient screenshot tool that is easy to use and can capture the image quickly that can be customized too. It also allows you to select the area you want to capture and in just two button clicks your screenshot is taken. Lightshot tool can be downloaded on your computer and it supports Windows, Mac, Firefox, Chrome, Opera and Internet Explorer. You can share the captured image using this tool and the quality of the captured images are high.
AZ Screen Recorder
The primary function of the AZ Screen Recorder is that it allows you to record your screen in the form of a video. It also comes with the feature of capturing a screenshot as well. Editing features are available with this tool. This screen recorder tool does not come with any ads, watermarks or time limits. This screen recorder can be downloaded in your smartphone from the play store.
Screen Master
This is one of the best screenshot tools and a photo markup tool for your smartphone that allows you to crop and rotate the images captured. You can add a text on the image, add an emoji and you can even blur the selected portion if you want to cover any area that you require. Other features include several image annotations, a floating button for easy access, full web page capture and many more. The whole web page can also be captured by copying the URL into the screen master app. This app can be downloaded for free and even a paid version is available that removes advertising and other features.
Screenshot Touch
For easy and fast access, this screenshot tool called Screenshot Touch comes with an overlay and persistent notification. Features like image cropper, whole web page capture, screen recording, scroll capture, etc. are available in this app. One of the easiest ways to take a screenshot with this app is just by shaking your smartphone. Like a few other apps, this screenshot tool can be downloaded in your android for free or even paid version without advertising pop-ups can be downloaded.
Super Screenshot
With text addition, image blur, image resize and many more features, this Super Screenshot Tool can be one of the right choices for you. It allows you to enable the gesture controls that help in capturing the images on your android. You can share the screenshot on multiple platforms and can be downloaded for free. Other notable features include browsing and copying the screenshot via PC.
Touchshot
Another screenshot app for android phones, Touchshot comes with unique features like camera preview capture function, screen record, quality settings and in one touch you can take a screenshot. Editing and sharing the captured images can be done using this screenshot tool.
Taking a screenshot is very simple in this app which means all you have to do is just to touch on the screen to capture what you want. This tool can be downloaded in all Android devices regardless of the device being rooted or not. You can also screen record videos using the touch shot tool.
These are some of the best screenshot tools for computer and smartphones. Research the possible options and download the best screenshottool according to your requirements and convenience.
Have you ever wondered how to know the size of your baby each month during your pregnancy period? I bet every mother would want to know how much your baby will grow each month. But how will you know it? Well, we are living in the era of technologies and innovations and yes, we have pregnancy apps that every mommy can download in their iPhone or Android handset. Another concern might be, what are the best pregnancy apps that you can download?
A lot of fluctuations happen in your body during the pregnancy period and you would want to know or keep a track of every new experience happening to you. These pregnancy tracker apps can help you find what to assume each trimester and can also visualize the size of your baby with the help of these apps. There are many pregnancy apps that you can easily download. But it is always better to do research and then download the best pregnancy apps for your pregnancy and baby tracker.
Best Pregnancy Apps – Must for Every Mum-to-be !!!
This article is all about a few best pregnancy apps for all expecting mommies and daddies to download in your iPhone & Android and keep a track of your maternity period, symptoms and signs.
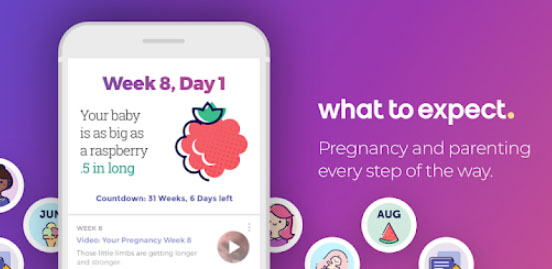
1) What to Expect Pregnancy & Baby App
The first thing that came to my mind when I heard about this app is the movie – What to expect when I am expecting which shows the maternity period of beautiful ladies and their discomfort and lifestyle. Well, this name is also a famous trusted pregnancy brand in the world.
The app can guide you with day to day, week by week and even hourly updates of your pregnancy period. That sounds pretty good right. You can know what is happening in your body right now. Some of the highlights of this app are:
Personalized daily tracker to know the size of your baby, in which week you are and your due date.
It supports pregnancy tips, health news and stories from real parents.
Weekly information regarding your changes in the body and development of the baby through various stages.
You will also receive famous videos on pregnancy to make you understand what changes can happen during this period etc.
Pregnancy period can be irritating, frustrating during a particular trimester and you would want something to cheer you up and see or understand about this prenatal period. So, this Hello Baby Pregnancy Tracker is sure to make you feel good.
This app not only gives you the required updates and information about your baby and yourself, but it also shows interesting illustrations and pictures for each week of your pregnancy. Try this app and you are sure going to love it and laugh every day with funny images and quotes.
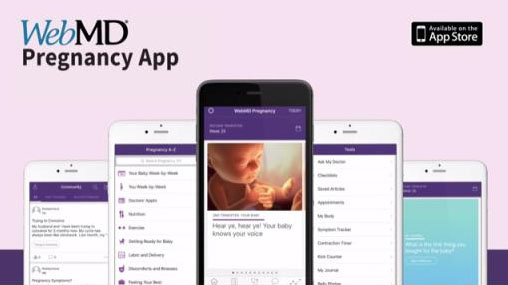
3)WebMD PregnancyApp
This app can give you compact information concerning the kicks of your baby, your weight, blood pressure and you can even know about your contractions.
You will also have the opportunity to record your questions you want to ask your doctor during the next appointments. It is always a good idea to create a checklist during your maternity period and this app can help you in creating one. You can easily list out what you want to purchase for your newborn and what to pack to the hospital when your due date is nearing.
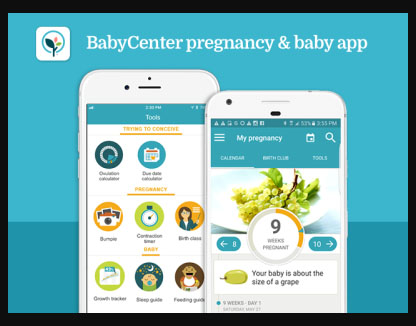
4)BabyCenter Pregnancy Tracker & Baby App
In this app, you can see the development of a baby with images every week. So, it will be easy for you to understand the size and features of the baby being developed during a particular period. You can learn about ultrasound scanning and also study about the feelings of the baby movements with the help of this app.
Another attractive feature of the BabyCenter Pregnancy Tracker is that it automatically changes into a parenting guide after your delivery as you would have already entered your due date in this app.
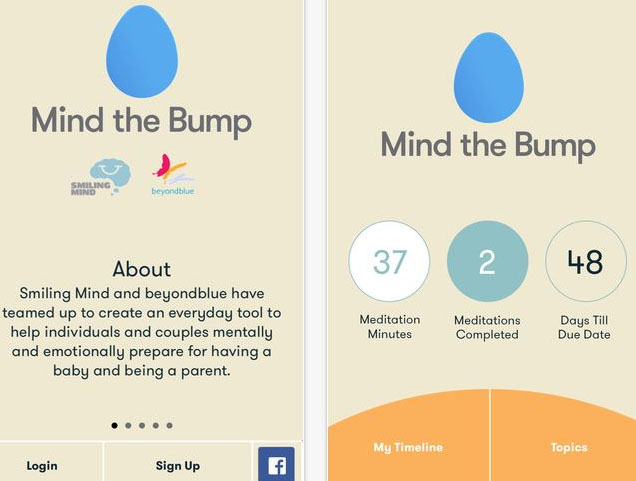
5) Mind the Bump
The best part of this pregnancy app is that it has been developed by mental health experts who are qualified in meditation and prenatal health. I found this app one of the best pregnancy apps because for those mommies who have never thought of meditation and mindfulness can give a thought about it.
The pregnancy period is not a simple and easy-going time frame. It takes you to a whole new experience with lots of mood swings and even depression at times. I always suggest all the pregnant ladies engage in some yoga or meditation to keep your health and mind strong and blissful.
6) Daddy Up App
Well, it is not just the mommies who should have a baby/pregnancy tracker. All the daddies can also download one, for who wants to know about the pregnancy period to take good care of their partner and the newborn. Daddy Up App is one best pregnancy app for dads that can give notes on every step of pregnancy.
You can expect notes from this app every week regarding the size of your baby, tips top look after to make your partner feel comfortable and it also has a pregnancy tracker. Checklist, daily log, contraction counter, etc. are also available on this app.
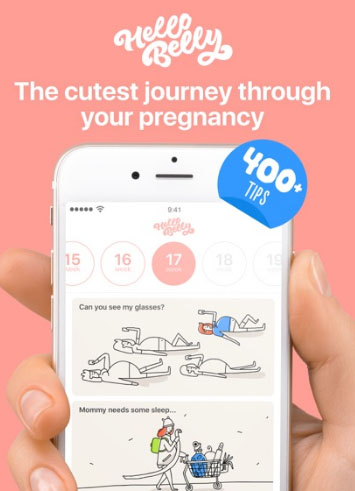
This is another best pregnancy tracking app that you can download in your iOS or Android phones for your maternity period. With this app, you will get detailed insights about how your baby is developing inside your womb. Realistic illustrations of a baby in each week can be seen in the Hello Belly Pregnancy Tracker. You will also receive professional advice regarding your pregnancy and what a mother should do once the baby is born. Other features include the due date calculator, details about you and your body, what to eat, what all normal things can happen during your pregnancy period, etc. Moreover, you will also receive information regarding meditation for pregnant ladies, checklists, handbooks, symptoms, nutrition, and to-do list.
8) Glow Nurture Pregnancy App
With this pregnancy app, you will be receiving alerts for personal care, a symptom tracker, community support, attractive and useful charts and daily up-to-date information regarding pregnancy.
Another attractive feature is the all-in-one experience that is crafted with baby bump photo sharing, checklists, what to pack in your hospital bag, images of baby’s development and you can even add the medication timings as a reminder. You will also have the feasibility to email yourself a PDF regarding the health data from this pregnancy app.
There are many other pregnancy tracking apps like these and you can easily download any app of your choice according to your need, during your pregnancy period. If you have an android phone, go ahead and download your favoritepregnancy app and get all the necessary updates and health information for your safe, hassle-free and relaxed prenatal period. Make yourself updated with enough information regarding pregnancy and the newborns. Pregnancy apps are perfect for all expecting parents, especially the couples who are going to be mommy and daddy for the first time.
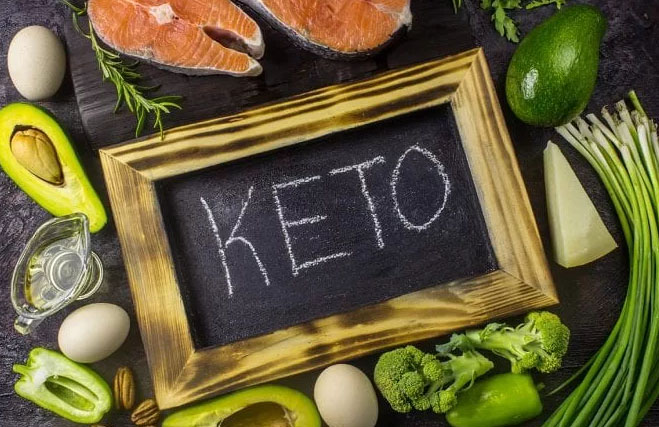
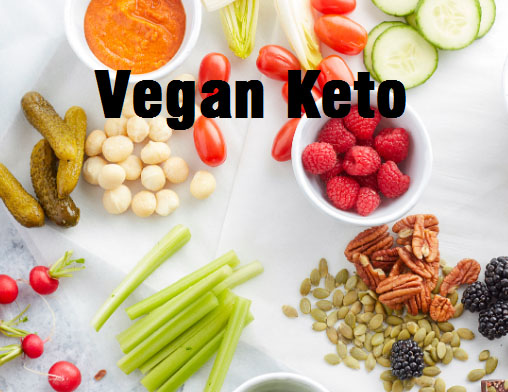
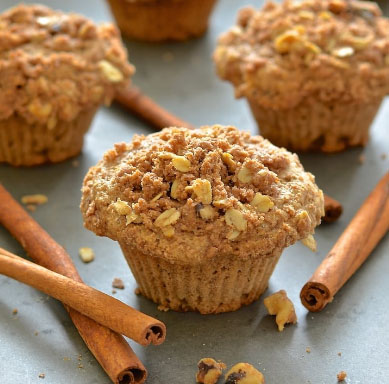
Keto Diet known for weight loss by reducing carbohydrates and increasing the fat is famous among these days. I have already shared an article on Keto diet Foods and How to make a perfect Keto Diet Plan in one of my articles earlier, where you can see what exactly is a Keto Diet and what are the keto foods that can be consumed during this particular diet. Now let me give you some interesting and easy keto diet recipes .
Well, in this article, I will be writing about a few keto diet recipes for weight loss. I will also include vegan keto recipes, diabetic keto recipes and some of the delicious keto desserts so that everyone can enjoy the delicious three-course meal even during a Keto Diet.
Best Keto Diet Recipes
So, are
you ready to see some of the scrumptious keto meals here? Let us go ahead and
find out what you can cook easily at your home when you are following a
Ketogenic Diet.
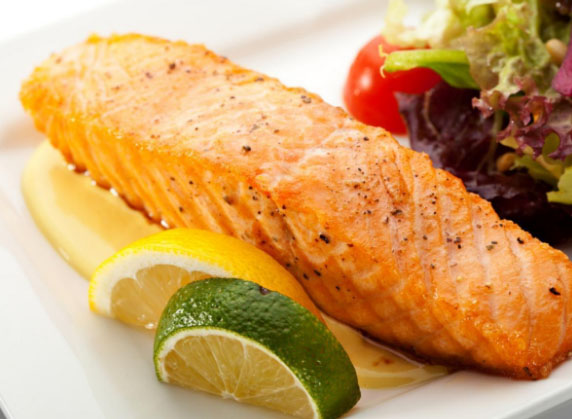
1) Grilled
Salmon with Butter and Lemon Sauce
Ingredients: 2 fillets of salmon (250grams each), 1 Lemon, Olive
Oil,100g of butter, a bunch of broccolini, 1tbsp garlic paste, salt and pepper
to taste.
How to prepare: The first process is to cook the broccolini. I steam it for about 4 to 5 min. Meanwhile, you can turn the grill on and start grilling the salmon by brushing some olive oil, salt, and pepper onto it. Do not forget to grease your grill. You can also sear the salmon on a non-stick pan to get a crispy outer layer. I will leave that to you. You can cook your fish the way you like. Baking is also an option for people who like to have soft bites of fish.
Now it
is time to make the butter and lemon sauce for the fish. Melt the butter in a
pan on medium heat. Next, add the lime juice to the melted butter slowly by
stirring, then add garlic paste. Stir the sauce for about 1 min. Make sure
you don’t burn your sauce. Simmer the fire if required. Get the grilled fish on
your serving plate, place the steamed broccolini and pour the delicious sour
butter and lemon sauce on top. You can also make some cauliflower mash to serve
along with this meal. This can be used as a diabetic keto recipe too.
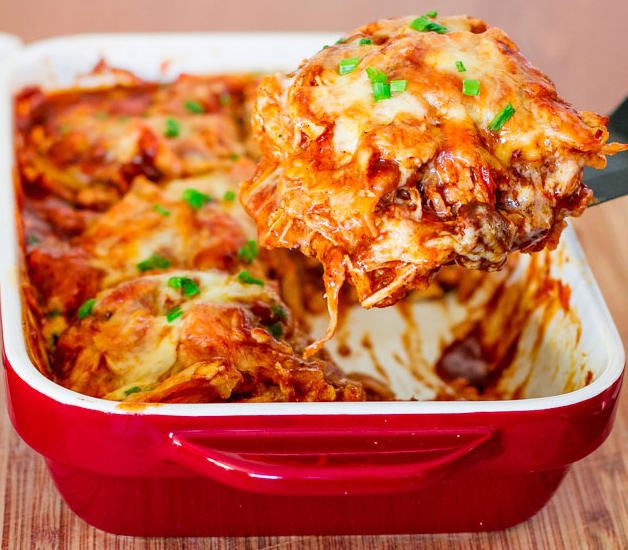
Ingredients: 2lbs skinless boneless chicken(diced), 1lb cauliflower
(cut into small florets), 4 oz cherry tomatoes, 1 leek(finely chopped), 7 oz.
shredded cheese, 34 cup sour cream, 12 cup cream cheese, 3 tbsp green pesto,
12 lemon(juice ), 1½ oz. butter, salt, and pepper to taste.
How to prepare: Preheat your oven to 400-degree F. While the oven is getting heated, you can mix the sour cream and cream cheese with green pesto and lemon juice. Add the salt and pepper to this sauce and keep it aside.
Next,
add the diced chicken to the melted butter in a pan over medium heat. Sprinkle
salt and pepper and fry it until the chicken turns golden brown.
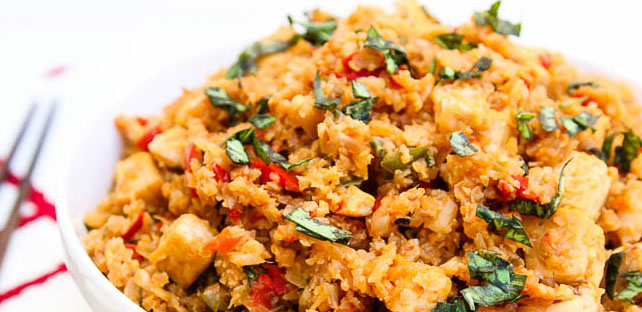
In a baking dish, place the fried chicken and pour the sauce over it. Top it with cherry tomatoes, cauliflower, and leek. Sprinkle the cheese on top of it and bake in the oven for about 30min. You can check the chicken after 30min and if it is not cooked nicely, then keep baking for another 5 or 10min. Aluminum foil can be used to cover the dish. This is one of the yummy keto diet recipes.
3) Steak
Fajita Rolls
Ingredients: Fajita seasoning (you can easily make at home), olive
oil, thinly sliced sirloin tip steak (cut into 2inches width and 6 inches in
length, bell pepper, and onions.
How to prepare: First we should make the fajita seasoning. For that, you have to mix chili powder, a pinch or two of cumin powder, paprika, salt, pepper, 2 dashes of garlic powder and 5 to 6 pinches of oregano. Oregano is the most important ingredient in the fajita seasoning. Mix all these powders well and your seasoning is ready to go. This is one of everyone’s favorite keto diet recipes
Next,
take the steak strips and spread the fajita seasoning onto each strip and keep
it aside. Now slice the onions and bell peppers and sauté them in olive oil in
a grill pan over medium heat. Do not overcook these veggies since you need the
crispiness of the fresh bell pepper when you take a bite of the steak fajita
rolls.
Once
the bell peppers and onions are ready, take the steak strips and place the bell
pepper and onions on each strip and roll them up one by one. Use a toothpick to
secure the steak and place them on the grill pan. Cook them for about 2 min
each side and yes, a beautiful looking delicious keto snack is ready. Diabetic
people can also have this delicious keto meal.
4) Bacon
and Egg Salad
Ingredients
for bacon vinaigrette: 2 slices of
bacon, 1 shallot, 2 tbsp of red wine vinegar, 12 tsp dijon mustard, salt, and
pepper to taste and 3 tbsp olive oil.
Ingredients for the salad: 1egg, a bunch of spinach, 2tbsp crumbled feta cheese, 5 cherry tomatoes.
How
to prepare: First you need to fry the
bacon in a pan with olive oil. Once it is fried, you can chop the slices into
small pieces for an easy bite. Then make the bacon vinaigrette by adding the
shallots to the same pan in which you fried the bacon. On medium heat, sauté
the shallots until light brown. Transfer the shallots into a bowl and add the
red wine vinegar to it along with Dijon mustard, salt, and pepper. Whisk them
well to combine. Add the chopped bacon and squirt some olive oil on top.
The
next step is to fry the eggs. You can cook your eggs the way you like. But I
suggest sunny side up for this beautiful fresh breakfast. Take a serving bowl
and add spinach (can sauté with olive oil), feta cheese, cherry tomatoes and
mix them well with the vinaigrette we made. Top the salad with fried eggs and
serve hot.
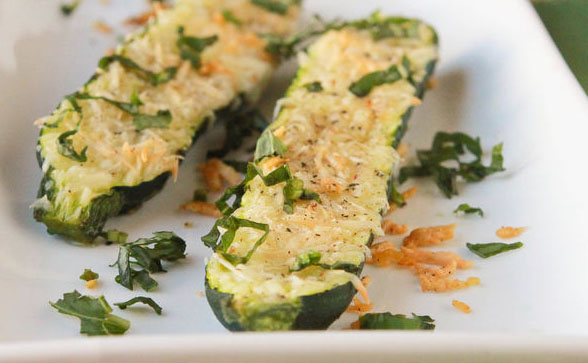
5) Baked
Zucchini stuffed with eggs
Ingredients: 1 zucchini (make strips), 4 cherry tomatoes,4 eggs, 14
cup heavy cream, salt, ground pepper, 14 tsp oregano, 3 tbsp red pepper
flakes, 14 cup cheddar cheese(shredded) and 12 cup chopped ham. I always use
my hand to take an estimated measurement of all the ingredients.
How
to prepare: Preheat the oven to 400
degrees F. Grease the muffin tin with cooking spray or oil. Layer the muffin
tin with zucchini strips which are going to be the crust for your keto
breakfast. Add the chopped ham and cherry tomatoes inside the crust.
Take a
bowl and whisk the eggs along with heavy cream, red pepper flakes, oregano,
salt, and pepper. The next step is to pour this mixture over the tomatoes and
ham. The final ingredient to add on top is the shredded cheddar. Now you are
all set to bake. In 30min your delectable baked zucchini will be ready to
serve.
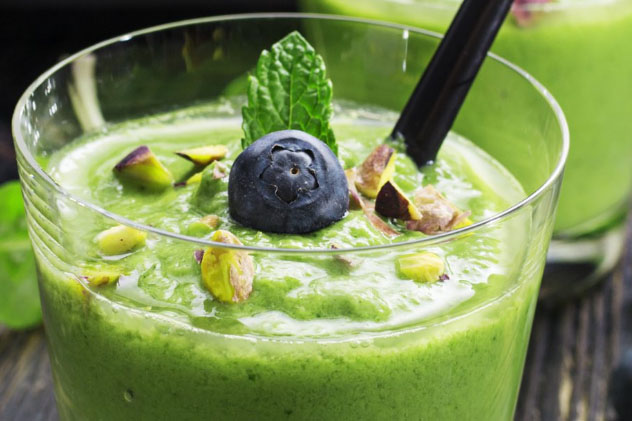
6) Green
Keto Smoothie with berries
Ingredients: 1 oz spinach, 50 grams each of cucumber, celery and
avocado, 1.5cup almond milk,12tsp chia seeds, and 1 tbsp coconut. You can add
protein powder and liquid stevia. It is your choice. As a natural sweetener,
you can use any berries of your choice.
How
to prepare: Blend the almond milk and
spinach first and then add in all the other ingredients and blend well. Your
green smoothie diabetic keto recipe is all ready to drink.
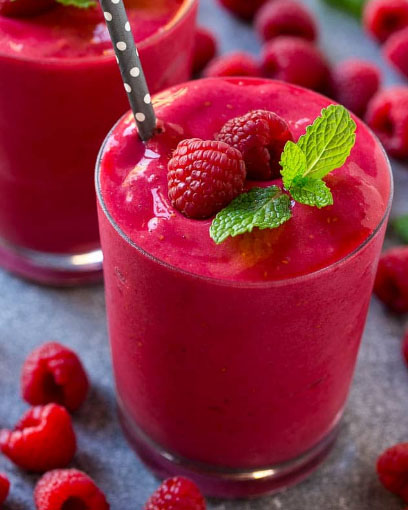
7) Raspberries
Smoothie
Ingredients: 18 cup of fresh raspberries, 12 cup ice(crushed), 12
cup almond milk(unsweetened), 2 or 3 tbsps. of whipping cream, 12tbsp cream
cheese, 14 tsp vanilla extract, and salt.
How
to prepare: First you need to microwave
the cream cheese for 5 seconds. Then you will get your cream cheese very soft
and fluffy. Then add all the ingredients to a blender and blend it until it
becomes smooth. You can add swerve as a sweetener. The raspberry smoothie is
ready to drink. You can substitute the berries and make different smoothies
with the same recipe.
Vegan Keto Recipes
Vegan
Keto Recipes will not include any non-vegetarian or dairy products. The
smoothies we have mentioned above are vegan keto recipes that all the
vegans can consume. Here I will share a few vegan keto recipes with tofu and
other food items for all the vegans who want to undergo a keto diet.
1) Cauliflower
Rice with Crispy Tofu
Ingredients
for stir fry: 12 ounces of firm tofu (always
choose organic), 1 tbsp of sesame oil, 1 small cauliflower(grated) and 2 cloves
of garlic finely chopped.
Ingredients
for the sauce: 14 cup soy sauce with
low sodium, 14 cup of light brown sugar,1.5 tbsp toasted sesame oil, 12 tsp
chilly garlic sauce and 2.5 tbsp peanut butter(almond butter can be used).You
can also add some veggies like boy choy, red pepper, broccoli, etc.
How
to prepare: You should drain the tofu
well in advance about 1.5 hours before you start cooking. Using an absorbent
towel wrap the tofu to remove any excess water from it. Repeat it a few times
and then cover it up with the towel and place a heavy pot over it. Then press
and extract the water from it fully.
Take a
pan and add some oil to it and put the diced tofu. Season it and wait until
golden brown. Meanwhile, you can make the sauce by whisking all the ingredients
for the sauce mentioned above. Taste it and you can add salt or any other
ingredients to make the flavor balanced. Then add the cooled tofu into this sauce
and let it marinate for about 20 min.
Now
heat a skillet, add some sesame oil to sauté the veggies of your choice with a
few dashes of soy sauce. Transfer the veggies into another plate once they are
cooked. In the same skillet, you can place all the tofu and let it get fried a
little with the sauce. The tofu will be coated fully with the sauce. You can
bake the tofu if you like it to be crispier or just the pan fry is more than
enough.
Once
the tofu is done, remove them to a plate and add some sesame oil to the pan and
add garlic. Sauté the garlic until light brown then put the cauliflower rice to
it. Cover the pan and let it cook for some time until the cauliflower is soft.
Once it starts turning light brown add a few spoons of the extra sauce you have
and stir well. Season it if required.
Transfer
the cauliflower rice to the serving dish and top it with veggies and
tofu.
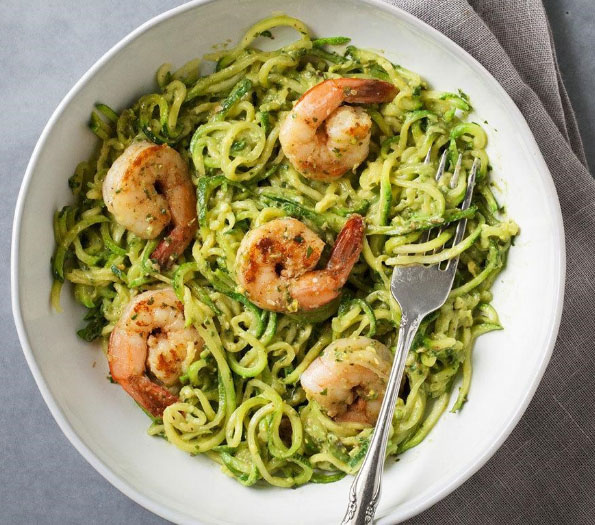
2) Zucchini
Noodles with Avocado
Ingredients:
1zucchini, 1 and half cup basil, 13 cup
water, 4tbsp pine nuts, 2 tbsp lemon juice, 1 avocado, and 12 sliced cherry
tomatoes.
How
to prepare: Use a peeler or a spiralizer
to make the zucchini noodles. Now blend the basil, avocado, lemon juice and
pine nuts with water. You need to get a smooth mixture out of it. Now take the
zucchini noodles and mix it with the avocado sauce and sliced cherry tomatoes.
Healthy vegan keto meal is ready to serve. As for toppings, you can add some
fried zucchini noodles.
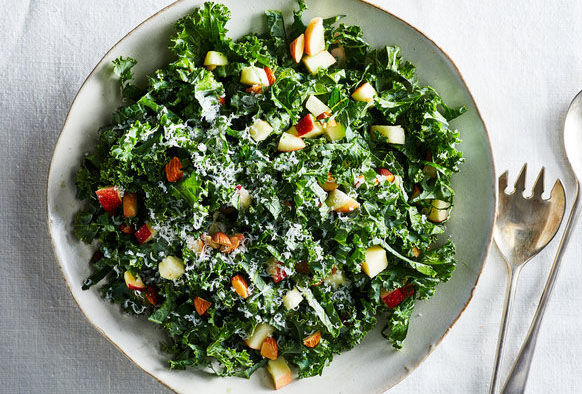
3) Kale
Salad
Ingredients
1: 8 to 10 oz. kale (you can choose
Lacinato kale or aka Tuscan kale or both can be used), 2 tsp toasted sesame
oil, 2tsp extra virgin olive oil (can substitute with flaxseed oil), 2 garlic
cloves(grated), 1 tsp of grated ginger and salt to taste.
Ingredients
2: a handful of chopped snow peas, 2 tsp
coconut aminos, 2 tsp aged balsamic vinegar, 1 avocado(sliced), a handful of
chopped scallions, 1 tsp of orange zest.
How
to prepare: Wash the kale in running
water and cut them into slices removing the stem. Now mix the chopped kale with
all the items mentioned in ingredients 1. Use your clean hands to mix the kale
with oil and other items. Now add all the balance ingredients mentioned above
to the kale combine well. You can either serve it in room temperature or slightly
cold.
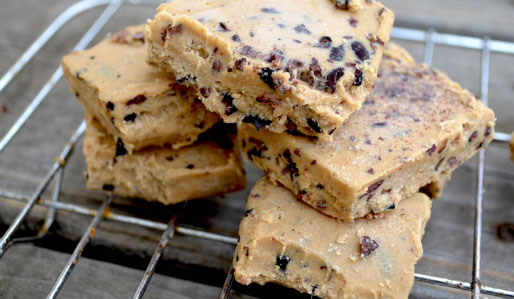
Keto Desserts
Let us see some of best keto sweets , i mean some of the best keto desserts recipe to try .
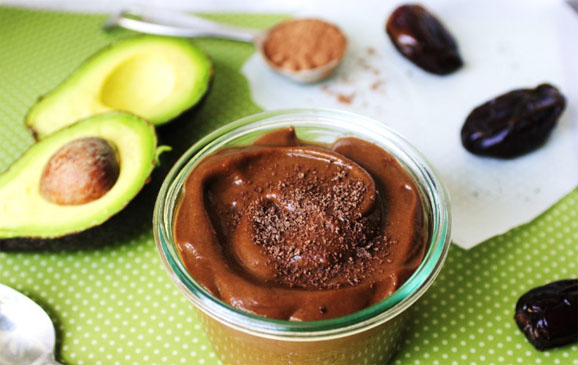
1) Chocolate
pudding with Almond and Avocado (Vegan Keto Dessert)
Ingredients: 1.5 cups of almond milk, 12 cup coconut cream, 3 tbsp
granulated stevia,1 medium avocado, 3 tbsp unsweetened cocoa powder, 1 tsp
vanilla extract, 1 tsp almond extract, and sliced almonds.
How
to prepare this vegan keto dessert: Take
a blender, add all the ingredients and blend them until the texture is smooth.
Now refrigerate this mix overnight and serve it next day with sliced almond as
toppings.
2) Cinnamon
Muffin(Vegan)
Ingredients: 2 tbsp of vanilla protein powder, 12 cup almond flour,
1 tsp cinnamon powder, 1tsp baking powder, 12cup- nut/seed butter of your
choice. I am using peanut butter here, 12 cup pumpkin puree and 12 cup
coconut oil.
Ingredients
for the glaze: 14 cup of coconut
butter, 14 cup of almond milk, 1 tbsp granulated stevia and 2 tsp lemon juice.
How
to prepare: Preheat the oven to 360
degrees F and place the muffin tins with baking sheet. You can make about 12
muffins with the ingredients taken. Now take a mixing bowl and add all the dry
ingredients first. Mix them well then add the wet ingredients. Make sure that
you combine everything well. Get the muffin tins ready and fill it with the
batter. Bake it for 10-15min. Now make the glaze by mixing all the ingredients
for it. Pour the glaze on top of your muffins once they are cooled.
3) Coconut
Pudding
Ingredients: 12 cup coconut (shredded & unsweetened), 12 cup
coconut milk, 14 cup monk fruit sweetener, 4 ounces of cream cheese, 1 egg, 1
tsp coconut extract, 12 tsp vanilla extract.
How
to prepare: In a glass bowl mix 14
heavy cream with the fruit sweetener, coconut and vanilla extract. Mix the
coconut to this cream batter. Heat this batter for about 1 min in a microwave
oven. Take another bowl and whisk the egg with the balance heavy cream. Keep that
aside. Next, cook the coconut milk and cream cheese in a saucepan until the
cheese melts. Make sure that you keep stirring.
Now add
the coconut batter you have made and cook it well. Time to add the beaten egg
and keep stirring until the batter thickens. Pour this pudding batter into 4
small baking tins or you can even pour it one tray and refrigerate it.
For
vegans, you can avoid using the heavy cream and substitute with coconut cream,
so that the pudding becomes a vegan keto dessert. This dessert is also
sugar-free.
4) Keto
Protein Bar
Ingredients
for the base layer: 12cup peanut
butter(unsweetened), 1.5 tbsp coconut flour, 1tbsp protein powder, 1.5 tbsp
granulated erythritol.
Ingredients
for the top layer: 12 cup peanut
butter, 1tbsp unsweetened cocoa powder,1.5 tbsp protein powder, and 1.5 tbsp
coconut flour.
How
to prepare: First step is to preheat the
oven to 175 degrees C. Next add the ingredients for the top layer and the base
layer in 2 separate bowls and mix well with your hands. Take a baking tray and
place a baking sheet on it. First, you need to spread the base layer onto the
baking sheet.
Once
that is evenly spread, add the top layer. Now go ahead and bake the delicious
peanut butter bar for 25min. You can see brown edges on the top layer when it
is ready. Once it is cooled you can enjoy the healthy low carb keto
dessert/protein bar. This is surely vegan and diabetic keto dessert.
5)
Sugar-Free Lemon Bars
Ingredients: 4 large eggs, 2 cups almond flour, ¼ cup lemon juice,
½ cup sour cream, 1/2cup softened butter, 1 lemon zest, 2tsp baking powder and
12 cup of powdered erythritol.
How
to prepare: In 175 degrees, preheat the
oven. First, whisk your eggs until they become frothy. Put the sour cream and
the butter to this egg mixture and blend them well using a food processor. You
can even you a mixer. Now add 14 cup of lemon juice and the zest of 1 lemon
along with powdered erythritol to the food processor and blend well. Add the
almond flour and baking powder to the same mixture and blend well until the
batter is smooth and shiny. Now the batter for the lemon bar is ready to bake.
In a baking tray with parchment paper, pour the batter and spread evenly. Bake
the sugar-free lemon bar for 35-40mins. The top layer should turn light
brown. Once it is ready, take out of the oven and let it set aside to
cool. Cut it into pieces and serve.
There
are more keto diet recipes for lunch, dinner, breakfast, and dessert. You can
always try making your keto diet meals, but first, you need to make sure what
are the food that you can consume while on a keto diet.
Here in this article, I have shared a few keto diet recipes keeping in mind both vegans and diabetic people. So, you can see vegan keto diet recipes, diabetic kept recipes and ketodesserts that everybody can have during their keto diet. If you are preparing to undergo a keto diet, go ahead, make a keto diet plan and enjoy the low carb, sugar-free meals for a better health .
But remember keto diet is not for everyone , but definitely a well maintained keto chart can help in weight loss . If there is a question in your mind like is keto safe , then we cannot say its completely safe but anyway not too risky . Consult dietitian before you start your diet plans
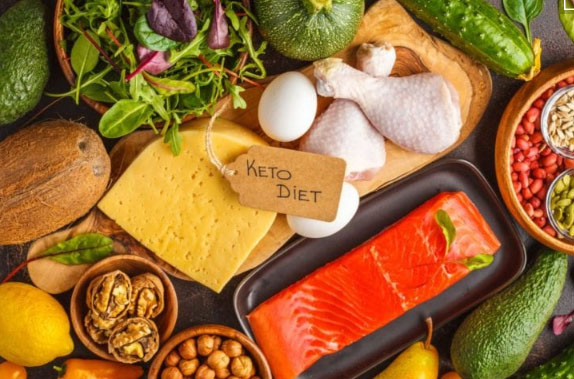
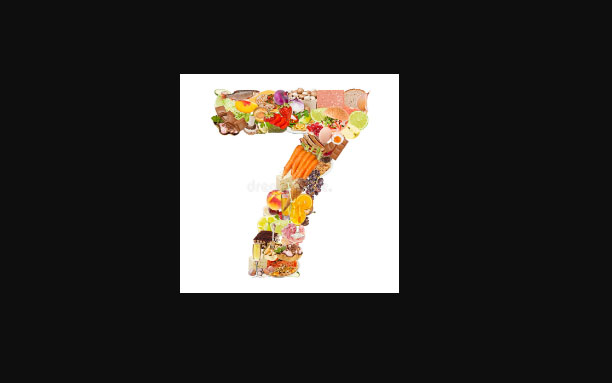
Keto Diet is one of the diets being used by a large number of people these days. As everyone knows, the Keto diet is a new diet that lets you eat meat, poultry, fish, etc. Well, for the meat lovers this diet is surely motivational. Carbohydrates which is one of the major factors of gaining weight is limited to 20-50g per day in a Ketogenic Diet. Yes, that is a major attraction and is more effective in losing weight quickly.
Usually, the Keto Diet will include foods with low carbs, healthy fats, proteins, fiber, and antioxidants. It is not very difficult to prepare keto meals for your diet plan. There are a lot of easy keto plans that will not take much time for you to cook your daily meals.
Next, I am going to give you an idea about the various Keto Diet Foods that can be used for your diet plan.
Keto diet Foods – A complete keto food planner for Vegetarians & Non Vegetarians
Let us start first with
non-vegetarian foods items followed by others for a Keto Diet.
1) Poultry and Meat
These two food items are rich in
vitamin B, minerals, zinc, potassium, and high-quality proteins. Hence meat and
poultry are considered as essential foods on a ketogenic diet. Such potentials
of meat and poultry can help in protecting your muscle mass during the Keto
Diet.
When you are choosing the meat, make sure that you opt for grass-fed meat since such meat will have higher amounts of omega 3 fats and antioxidants.
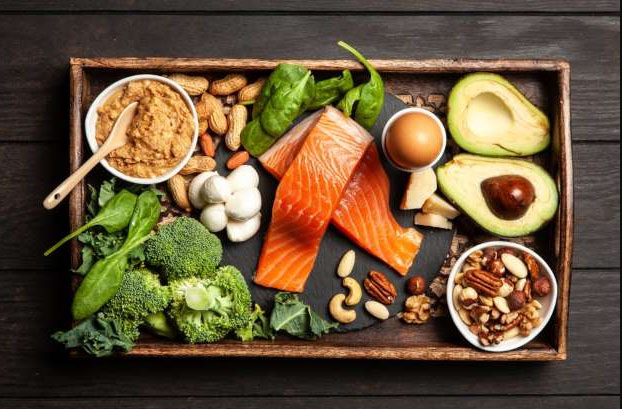
2) Seafood
Seafood is considered as keto diet food since fish and most of the shellfish have either no carbs or very fewer carbs. Fishes such as Salmon, Sardine, Mackerel and other fatty fishes are extremely good for your health. Omega 3 fatty acids in such fish can lower the insulin levels and increase insulin sensitivity in people who are obese or overweight.
It is highly recommended to consume
seafood twice a week even when you are on a Keto Diet or not.
If you include fish more in your meals, the chances of getting ill will be
reduced and it can also give you good mental health.
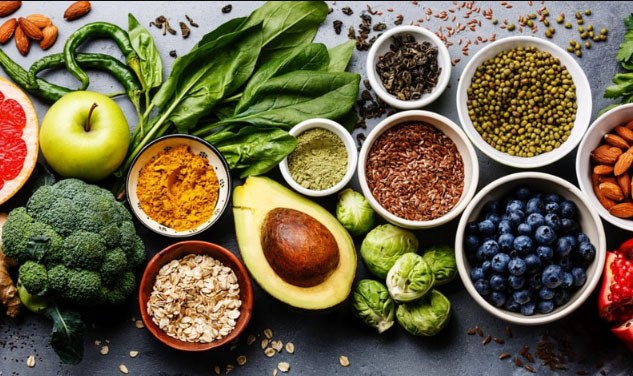
3) Vegetables (Low
Carbs only)
While picking the veggies for a Keto DietPlan, you must choose the low carb vegetables. I say a big NO to potatoes, sweet potatoes, and carrots which are high in carbohydrate. But do not worry, there are other veggies that you can use a substitute for all these. So, here are some of the best low carb veggies / best veggies for keto plan you can consume when you are on a Keto Diet.
a) Cauliflower
– this can be used as a substitute for rice or potato mash. You can also make a
puree with cooked cauliflower that can be added to your meat, poultry or fish.
b) Kale – one of the superfoods which consist of Vitamin A, vitamin K, vitamin C, vitamin B6, manganese, calcium, potassium copper, etc. So, now you know why Kale is known as a superfood and keto-friendly. Moreover, Kale helps in reducing cholesterol from your body which reduces the risk of a heart attack. Consuming Kale helps in preventing cancer, high blood pressure, and anti-depressant because of the antioxidants in it. Likewise, the protein and fiber in kale can help in reducing weight while you are on a Keto Diet.
c) Spinach
– another green leafy vegetable loaded with vitamin c, vitamin a, calcium and
iron. This leafy veggie can be used in any of your meals and is easily
available in the market.
d) Bell
Peppers – this pepper that comes in 3 different colors includes
vitamin c and potassium and can be used in your meal very easily. All you have
to do is cut them into slices or small pieces as you wish and just sauté them
in olive oil and serve it along with your meat or fish. Baking or grilling with
some poultry is also good options for a perfect meal.
e) Arugula
– this is also known as salad rocket, Italian cress, and rucola which is loaded
with calcium, potassium, folate vitamin c, k and a. This veggie helps a lot in
keeping a good healthy body. It can be used as a topping for your main dish,
can be used in a salad, etc.
f) Zucchini–
a very tasty vegetable that can be used as a substitute for pasta. You can
shred or slice the zucchini and bake them or even fry it to have a delicious
crunchy snack. There are many ways you can cook this summer squash like baking,
stuffed and steaming, deep-frying, etc. It consists of vitamin c, vitamin a and
calcium.
g) Broccoli – high in fiber and protein, this veggie can be used in soups, salads, casserole, etc. Broccoli is very filling, so adding this green veggie to your keto diet plan could be a wise decision.
h) Celery – this green veggie is famous for high water content in it. Thus, it is very important to include such a vegetable to your keto diet. Dehydration is common when you undergoing a Keto Diet Plan. So, apart from drinking enough water, it is also important to include a veggie that has high water content.
i) Asparagus
– delicious green veggie that can be added to your salads or as a side dish for
your meat or poultry. You can sauté this in olive oil and sprinkle some pepper
and salt to it. It just tastes so yummy and is also rich in fiber and folate.
You can also include tomatoes,
lettuce, mushroom, eggplant, bok choy, turnip, etc. to your keto diet
plan.
4) Eggs
Eggs can be added to your
breakfast, lunch or dinner. If you are a person who loves to eat eggs, then go
grab a carton of eggs and store in your fridge. Rich in protein, an egg is a
perfect keto-friendly food item that you can consume daily. You should always
eat the egg fully to get the whole protein from it. Avoiding the yolk cannot
give you enough proteins that you require. Eggs can easily fill your
stomach and it also keeps the blood sugar stable. It also includes antioxidants
like lutein and zeaxanthin that helps in protecting your eyesight.
6) Cheese
There are 100 varieties of cheese
available in the market and yes, you can add this delicious food item in your
Keto Diet Meal Plan. Cheese is high in fat and low in carbohydrate; thus, it
makes a perfect keto-friendly food item. It is rich in protein, calcium and
other fatty acids including conjugated linoleic acid that helps in losing the
fat and improving the composition of the body. You can use cheese in your keto
diet foods quickly and easily by just shredding them as a topping or
you can even bake your burger or meat with cheese, just the way you like it.
7) Coconut Oil
This is one of the best oils that can be used for cooking your keto diet foods. Coconut oil can reduce the belly fat and it also helps in reducing the weight for obese people. This oil is rich in medium-chain triglycerides which increases the ketone production. This oil is also good for your brain and nervous system.
8) Olives & Olive
Oil
Olives and olive oil are good for a keto diet plan since olives are high in heart-healthy monounsaturated fats and other antioxidants. You can use olives or olive oil in your salads, to fry any of your meat, poultry or fish or even you can sauté your veggies in olive oil that can add an extra flavor to your keto meal. Always shop extra virgin olive oil as it can protect your heart by avoiding any swelling and also progresses the function of your arteries.
9) Nuts and Seeds
You will surely feel like munching on something in the evening or when you are watching a movie. So, nuts or seeds are a healthy choice as a snack. Nuts and seeds are low in carbs but rich in fat. Consuming certain nuts can reduce the risk of heart attack, a certain type of cancers, depression and other serious illness.
Some of the nuts that you can add
to your keto diet are Almonds, Brazil Nuts, Pecans, Pistachios, Walnuts, Chia
Seeds, Flax Seeds, Pumpkin Seeds, and Sesame Seeds. Out of these, chia and
flaxseed help in reducing the belly fat and also helps in reducing weight. You
should only consume grounded flaxseed and also you should not consume more than
what is required. It applies to all the food that you eat. Do not overeat any
food items.
10) Coffee and Tea
without Sugar
Both Coffee and Tea are not bad for health. But if you add sugar and milk to it, then it becomes high carb drinks. So, avoid using milk and sugar and just have your black coffee. You can choose Green Tea as an option for keto dietfoods which is better for your health and skin.
The caffeine in these drinks can
enhance your metabolism, resulting in improving your physical and mental
performance. Drinking unsweetened coffee or tea can also reduce the risk of
diabetes. If you do not like to have coffee without milk, you can use heavy
cream to it as a substitute for milk.
11) Dark Chocolate and
Cocoa Powder
I know it is difficult to stay away
from desserts if you are a person who loves chocolates and ice-creams. So, for
those dessert lovers, you can consume dark chocolate which is a keto-friendly
food item. Dark chocolate can decrease blood pressure and can also keep your
arteries healthy which results in reducing the risk of heart diseases. Cocoa is
rich in antioxidants and thus a keto diet planner can add
these to your diet.
12) Fruits
Avocado and Berries are the best
choices for a keto diet.
Avocado is rich in vitamins and
minerals including potassium. It can be used in your diet as a salad or a
smoothie or you can even include in your meal in any way you want. Consuming
this can improve your good cholesterol and triglyceride levels. Strawberry,
Raspberry, Blackberry are some of the berries that you can add to your meal.
Make smoothies or eat them raw with your
breakfast or dinner. Apart from berries, you can opt for watermelon, lemon,
star fruit, etc. that are low in fat and carbs. Drinking warm lemon water first
thing in the morning can help in reducing belly fat and weight. It also helps
in easy digestion and avoids gastritis.
13) Cottage Cheese
& Plain Greek Yogurt
Both cottage cheese and plain Greek
yogurt are healthy and high-protein food and thus these 2 items can be added
into your keto diet plan. Even though both have a small number
of carbs, you can still include in your keto diet as these
food items can easily fill your stomach.
14) Butter and Cream
When you are on a keto diet,
both butter and cream can be used since they produce only good fat. Make sure
that you do not eat a lot of it. The moderate use of these is healthy. A good
dollop of cream in your unsweetened coffee can be a good option and you can
sauté your veggies in butter.
These are some of the Best Keto Diet Food that you can include in your diet for losing weight, to control the blood sugar and for other health-related benefits.
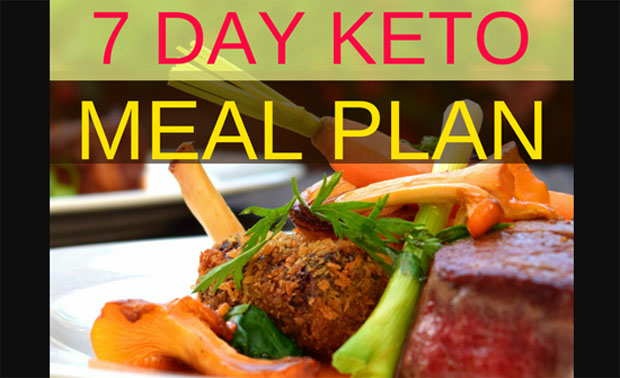
7 Day Keto Planner
You should follow a proper Keto Diet to get the result. When you decide that you need to undergo a Keto Diet, then start planning first. Make a list of keto diet food items that you can consume and go for purchasing the products. Make a Keto Diet Planner and save it on your phone or laptop or just write it down on a paper and stick it on to your fridge. I will be giving a few tips and 7-day Keto Diet Plan for you to start with.
First and foremost, know what food items can be included in your keto diet plan and also their benefits. I have already shared a good number of foods you can eat on keto diet above. Still, you can research more if you like and learn about keto-friendly foods.
Monday
Breakfast: Scrambled eggs in butter
with some sautéed green veggies
Snack: a handful of almonds
Lunch: Grilled salmon with the
spinach salad
Snack: Zucchini fries with
mayonnaise
Dinner: Pork chops with mashed
cauliflower and red cabbage coleslaw
Tuesday
Breakfast: Veggie omelet with
cheese
Snack: Brazil nuts
Lunch: Roasted chicken with
broccoli and cream sauce
Snack: Plain Greek yogurt with nuts
as toppings.
Dinner: Grilled shrimps with lemon
and butter sauce and sautéed asparagus
Wednesday
Breakfast: Stuffed bell pepper with
eggs and cheese
Snack: a handful of berries
Lunch: Grass-fed burger with shredded
cheese wrapped in iceberg lettuce and salad.
Snack: Kale chips
Dinner: Grilled Sardine with
avocado and tomato salad
Thursday
Breakfast: A smoothie with berries
and almond milk with crushed nuts as toppings
Snack: 2 hard-boiled eggs
Lunch: Roasted turkey with
cream-cheese sauce and salad
Snack: Sliced salami and olives
Dinner: Zucchini noodles with
meatballs and cheese
Friday
Breakfast: Chia pudding in coconut
milk topped with crushed almonds and pecans
Snack: Pistachios
Lunch: Salmon burgers (bunless)
with pesto sauce. You can wrap your salmon in lettuce or add bok choy salad
Snack: Unsweetened coffee or dark
chocolate
Dinner: Stuffed avocado with
chicken and bacon salad
Saturday
Breakfast: Boiled eggs with
mayonnaise and asparagus
Snack: Macadamia Nuts
Lunch: Caesar salad with chicken
Snack: Sliced cheese and bell
peppers
Dinner: Zucchini fritters with a
green salad
Sunday
Breakfast: Low carb berry smoothie
Snack: Dried seaweed strips and
cheese
Lunch: Smoked salmon with fried
kale and broccoli and avocado salad.
Snack: Guacamole with low carb
veggies
Dinner: Artichoke and spinach
stuffed chicken breasts
Keto Diet Plan for Vegetarians
For vegans, the same keto diet can be followed by avoiding any meat or poultry. You can follow the meal plan mentioned above but make substitutes for the non-veg food items. Here are some of the best keto diet foods for vegetarians.
a) Tofu – you can substitute tofu for meat, poultry, and egg since tofu is high in protein. This is the best meat substitute on keto diet plan .
b) Vegan
cheese – for pies, dips, and veg burger patties
c) Coconut
– coconut milk, shredded/grated coconut can be used in your breakfast, lunch or
dinner
d) All
low carb veggies – as mentioned above
e) Cauliflower
– can be made a rice or mash that can fill up your stomach easily.
f) Snacks
– All the nuts mentioned in the above list can be included in your vegan keto
diet plan.
Now you have got an idea on how to
move forward and make the best keto diet planner for weight
loss. If you are a person who is suffering from blood sugar or any other kind
of diseases, always consult your doctor before starting a keto diet
plan. According to your health and body, your doctors can suggest what
to eat and what to avoid. People with no blood pressure or sugar, you can go
ahead with the meal plan mentioned above. For the best result, continue the
keto diet for amount 6 weeks without any fail. I know a few people who had undergone
a keto diet and lost all their fat and overweight. So, the keto diet is sure to
reduce your weight and make you healthy. Stay tuned to our site and we will be
discussing easy keto plans and recipes soon.
A rebound relationship is a kind of relationship that some people get into after their breakup with their lover or husband. This relationship is never long-lasting and it will stay only for a while till both the person involved in rebound relationship understands that this is not a healthy relationship. So here we will find out the Rebound Relationship Warning Signs .
Why People Get Into Rebound Relationship ?
Mostly, people get into rebound relationships to forget their past or even to reduce stress and depression after breakup. A feeling of loneliness is the major factor that can lead you to get into a new unhealthy relation. Here we will be discussing a few rebound warning signs that will be helpful for both partners.
In introduction we just stated out what is a rebound relationship . Now we are discussing reasons of rebound relationship . Why do people get into it or why we jump into new relationship soon after breakup .
Breakup is heartbreaking , it is not just true for the first love breakup . Falling out of love and falling apart from love whether it is your tenth date or even your first date , the pain of breakup is very much similar .
Because we love each person in different ways and the memories we had with each person also varies . So it just hurts after breakup .Survival after breakup and getting back to normal life after breakup is a tough phase of life .
Inorder to forget pain of breakup people quickly jump into new relationship . Mostly without knowing the other person completely , without even understanding them quickly you end up surrendering yourself into someone else’s arms to forget pain. Lucky if you find a love of life with this rebound and if you are able to love them with heart then its perfect .
But mostly in rebound relationship finding true love is rare , because we end up in a unhealthy relationship or we end up loving totally incompatible person . Even if they are true love and right choice sometimes we wouldn’t be able to forget our ex , we just needed the new person to forget the pain . Some rebound partners suffer more depression when they realize the other one kept them just to forget their past relationship .
First the one who had a breakup and getting into a new relationship so quickly should check for the signs of rebound relationship , that helps you to understand whether your present relationship is a rebound love or not . In case you find yourself with the clear signs of rebound relationship . The next thing you have to check is whether your love towards that person is true or are you complicating their life . Before you complicate and make the other one’s life a whole mess check for the signs .
This article is helpful for those who is victim of rebound relationship . May you met someone recently and they had a breakup . You may notice them spending more quality time with you , agreeing to all your viewpoints and being so nice to you . Eventually they make you jump into a relationship quickly but they keep on crying over past . They giving you mixed signals . You are confused whether they really love you . Then its time to check whether you someone’s rebound .
In this article, I am going to let you know about a few warning signs of rebound relationship that you should take care of.
Rebound Relationship Warning Signs
These are some of the rebound warning signs that you can identify easily without spending a lot of time with that partner. But for some people, it might take a while to notice these signs. Do look for the following signs in your partner to identify if she/he is just up for a rebound relationship or not. This will help you to know whether you are a rebound lover for them .
1) Relationship happens quickly
Almost all the rebound relationships start very quickly. You might not even know that person much, but still expressing a lot of love and talking always about love and affection can be a little weird right? So, this is when you can slightly smell that this relationship is not going to last longer. If a person shows over love for the other without any solid reason, then it is surely not a good sign.
To have a healthy relationship , both male and female should get to know each other well. Love can happen in seconds , but a relationship that is going to be long term needs patience , understanding and slowly built trust. So if someone commit so suddenly to marry you , may be that can infatuation or one such warning signals of rebound relationship . So, getting into a relationship with an opposite sex within no time is a warning sign that has to be taken into your consideration.
2) Making Ex jealous with Rebound Relationship
Do you find yourself in an uneasy situation where they pour more and more love always when you are around their ex ? Then its a great warning sign of rebound relations .
There may be situation where you both just had an argument and on the street if they see their ex in long distance , they just give up the quarrel right there and pamper you with love and seduction then its just an act of love to create jealousy . The rebound relationship always try to do anything and everything to make their ex feel jealous .Some people get self-satisfaction by showing off like this. They will always take you with him/her whenever and wherever their ex is present.
3) Thinking about ex even when you are in a new relation
If a person thinks about his/her ex even when they are in a new relationship, then it is surely a sign of rebound relationship. The person is just getting involved in a new relation to forget her/his ex and get some peace of mind. But this will eventually spoil all the happiness in life and will be in a position when you cannot even think of a solution. So, it is always better to not jump into a quick relationship just after your breakup. When you find someone who is caring and loving, you may fall for that person easily.
Sometimes they even get anger or tears when asked about their ex . They likely talk more or nothing about their ex . Even these are also signs that they are making you their rebound partner .
4) Calling new partner only when feeling lonely
Another major rebound warning sign to beware is avoiding the partner when not required. When one calls the new partner only when the person is feeling lonely or depressed is a sign of rebound relationship. If a person is in real love, then he/she will surely call the partner whenever required. So if you are receiving a call always when the other is lonely, then please beware.
Talk to that person openly and ask if he/she is into a serious relation or not. If not, then you can be a good friend who can support her and guide her to come over her depression of breakup.
5) Their interest in you might change all of a sudden
Sometimes this happens in a rebound relationship. A person who is not really into a strong relationship might feel that their partner is boring or not interesting at all. This happens when they are not in real love with their partner. They easily get annoyed or frustrated with small things that their partner do. In fact, it will not be any kind of a serious issue, but a person who is into a rebound relationship will feel annoyed for such reasons. This alone cannot be a clear Rebound Relationship Warning Signs .Check for other signs also .
6) Will date anyone who comes across
To start a rebound relationship, one will not be very accurate in choosing the new partner. Such people will start dating anyone who comes to their daily life. This happens, when their mind is not very strong to hold themselves with a positive attitude. When their relationship with their ex is broken, then they will be like leaves falling from the trees. Their mind will go blank and can even cause serious depression. So without thinking much, they will look forward to a new relation to gain happiness.
7) Will never introduce the new partner to friends or relatives
You might find yourself as their little secret love . You will never get introduced to their family , none of their friends knew about this relationship , mostly they make tag lines with you as friends for lifetime in pictures .They need you only when they are upset , you are not their love of life .Eventually, both will understand that this relationship is not going well. Also, such people will never introduce or include their new partner for a family function or for a party with friends.
These are some of the major rebound relationship warning signs to beware. When two people are in a rebound relationship, they will not be able to understand that this relationship is not true. It will take some time to get this thought in their head. Because during the initial stage of a relationship, there will be only love and care which does not actually come from their heart. Sudden urges for love and sex can happen during this period and it will take a while to note these signs of a rebound relationship.
I will always suggest people who have had a breakup to think wisely and move on rather than jumping into a new unhealthy relation. Take some off from your routine life and go on a trip with your friends or family, engage in activities like arts, music etc that you like to keep your mind fresh and blissful.
One you find yourself as a rebound gf/bf , first check for the given Rebound Relationship Warning Signs and your own add to signs . If you get more signs matches then talk to them and try to leave that relationship .
Are you using Chrome browser then you must know about this latest Chrome extension – Password Checkup .
Google has always tried to improve user security and safety . We have seen google notifying us about our least secure passwords on google apps and products . This is the case that applies only to Google accounts , but what is the case with other non-Google website , apps and products which we use daily . How can we detect unsafe passwords used on websites / apps .
We can make use of Password Check up Extension for chrome in order to detect unsafe passwords on other websites .
Data breaches and black market of online credentials like username , passwords commonly used are a serious threat to data security . This puts any user under the threat or may even make users prey of a cyber attack , hijacking , hacking etc .
Use of repeated and common passwords increase your risk . But how well we knew about the leaked and least secured password combinations ? To solve this issue Password checkup helps you out well .
Password Checkup Chrome Extension
One of the best chrome extensions for online safety . Password check up identifies unsafe passwords (least secure / repeated passwords ) . It doesn’t store or save your password and user credentials . I mean this is not a password manager , it just act as a adviser or checker to ensure you are entering each and every website with a safe password.
How Password Checkup Extension Works ?
Password Check up works for Chrome as a chrome extension . It works well for all websites not exclusively for google related accounts . It is not working as a password manager . It actually alerts unsafe passwords and unsafe user credentials without affecting your privacy . This extension doesn’t track user . In case you enter some random username and password the extension identifies if its no longer safe to use . If its unsafe then it alerts you to change / reset password . It check passwords and username have appeared on any third party data breaches as well .
How to Use Password Check up Extension ?
Let us see how to install password check up chrome extension . First go to chrome extensions .
Now as show in the image open chrome web store in a new tab .
Open Chrome Web Store
Now in the search the store box type password checkup .
Searching for Password checkup
Now click on Add to chrome .
Now a dialog box pop ups there click on Add Extension .
Add Extension for Password Checkup
Now the extension is added to your chrome .
In the password checkup extension settings you can make necessary setting change like you can limit the use of password checkup for particular websites or even extend it to all sites .