Tag: Technology

Technology has different aspects and thus definition of technology also has different spheres . The way we define technology is changing from year to year . Technology is the fastest growing sector globally .

We can define it in simple words as a collection of  technical methods , process , skill and techniques used to achieve certain objective / goal or in the production process.

Technology is the tact use of techniques in simpler words.

Ranging from Electricity , Radio , Television , Telephone , Mobile Phone , Computer , Calculator are all products of technology . You can witness that technology is dynamic and it keeps on upgrading each of its invention just like the evolution of  Smartphones , the changing trend of television to LCD , LED , OLED , 4K Smart TV  , the changing speed of Internet from 2G to 3G to 4G to 5G on expectation .

The future will be AI , robotics etc . It is always important for people to know about recent technology updates , technology tips and tricks and to get familiar with new tech products and their specifications .

  • Introduction to Programming Languages : Programming Tutorials

    Introduction to Programming Languages : Programming Tutorials

    For being a perfectionist in any of the programming languages once should dive down into the basics of Computer programming. In this article, we will cover basic introduction of all kind of programming languages used in the software industry. If one wants to be a good developer, his/her programming basics should be rock solid.

    Let start…

    Introduction to Programming Languages

    First let’s get introduced to programming languages by understanding what is a computer program .

    A computer program is basically the  set or the sequence of instructions written using certain Computer Programming Languages (Java, .net, python etc.) to perform some predefined tasks by the computer. A computer program (also called a computer software) is nothing but a set of rules given to the machine to perform specific tasks.

    Computer programming instructions are also considered as program source code and computer programming is also called program development or coding.

    The physical computer (to take input from developer) which executes these programming instructions is called hardware. A computer without a computer program is just a dump box and it is the program that makes computers active. Developers write the solutions in a given language that computer can understand to get the desired results. As a developer when he or she writes any programs, he/she should remember that the computer can only do or execute according to the instruction given by the developer.

    There are many programming languages, few are listed below:

    • Java
    • Python
    • C
    • C++
    • .Net
    • PHP
    • Perl
    • Ruby

    Do not panic in case you didn’t understand the above paragraph. We will take you through every important information in detail below.

    Types of Programming Languages 

    To understand programming languages further, we can logically divide these into below parts . These explains the types of programming languages . In many places you can find 5 or 6 types of programming language so we thought to give you in depth by covering all the types of programming languages .

    1. Machine And Assembly Languages 

    So let’s understand the key differences between  a machine language and Assembly Language . Here we will cross compare Machine Language Vs Assembly Language.

    Machine Language

    As the name suggest, machine language is the set of instruction a computer can understand. Generally we call it machine code that CPU understands (it understands very limited set of instructions). Each instruction is readable and understandable as numbers , binary digits (0 and 1).

    These binary numbers are generally called bits which is a short form for binary digit. Generated binary digits are translated into an instruction by the CPU that tells it to do a very specific job e.g. sorting, multiplying or dividing numbers etc. Machine code (or machine language) is difficult to read and write by humans as it is different from conventional mathematical notation or human language. Also its codes vary from computer to computer.

    Assembly Language

    Assembly Language came into picture as machine language was so hard to develop and understand by developers. Assembly language is one level above machine language. Programmer can introduce names for blocks of memory that hold data. Instead of bits, each instruction is identified by a short name and variables can be identified by names rather than numbers (0 and 1). This makes them much easier to read and write.

    The CPU is not capable to understand assembly language , So we have to convert it to machine language which is readable for it with help of an assembler .Assembly language is completely based on the computer in which it runs against the most high level programming languages, which are generally portable across multiple systems. Utility program is used to convert assembly language into executable machine code. These utility programs are MASM, NASM etc.

    Read Also : Web Servers A detailed overview – Popular Webservers

    2. Business Oriented Languages

    Business oriented languages were introduced to satisfy business level needs. Business analysts can directly write the rules to instruct computer to create set of result(s).

    Common business oriented language also known as COBOL is one of the oldest programming language. A committee of users and U.S. government organizations established CODASYL to develop and oversee its standard across systems in order to ensure its portability. The basic use of COBOL language is for development of business features. COBOL is not suitable for writing programs which are complex in nature.

    Unlike other languages like C, C++, COBOL language do not have in-build user defined variables or pointers. Also the scope of the methods used in COBOL is very limited. This language defines a simple and clear programming technique.

    COBOL as language has proven to be completely suitable for its targeted problems. All the features of COBOL operate in a the domain in which the difficulty of the program lies only in the business rules not in the algorithms or data structures. The places where the business demands complex algorithms, complex data structures, COBOL language take care the needs with an suitable text such as SORTING or SEARCH.

    So as we understood that COBOL is a simple and user friendly language with a quite limited scope of function but the with the beginning of Object Oriented COBOL, its dimension is now changed completely. It include all the benefits of previous versions and at the same time it  also provides –

    • User Defined Functions
    • Object Orientation
    • National Characters – Unicode
    • Multiple Currency Symbols
    • Cultural Adaptability (Locales)
    • Dynamic Memory Allocation (pointers)
    • Data Validation Using New VALIDATE Verb
    • Binary and Floating Point Data Types
    • User Defined Data Types

    3. Declarative Languages / Non Procedural Languages

    Also called non-procedural languages, declarative languages are programming languages in which a program specifies what needs to be done. It does not specify how to do it. Declarative languages have less visible difference between implementation of a program and its specifications. Below are basic kind of  declarative languages:

    Logic languages

    Logic Languages works on relationship between different entities sometime calls inter-dependency of the entities.  The relationship between entities are searched in a systematic way which will answer the desired queries. The best use case of logic programming is natural language processing and other Artificial Intelligence  programs.

    Functional languages

    Functional languages have a mathematical style and these are developed by facilitating different arguments to methods (also called functions). LISP, ML, and Haskel like functional languages generally used as automation of existing scenarios or research tools in language development.

    Structured Query Language (SQL)

    Structured Query Language is basically a medium to interact with the database to give request of desired operation(s). The basic database operations can be inserting, updating and/or deleting data. It also used to manipulate the metadata (Columns, data types etc.) of the table(s). Some database administrators call it non-procedural language because procedural languages needs the details of the action(s) to be specified e.g. dealing with indexes, querying tables, working with file I/O operations etc. All steps needed for SQL execution are taken care by SQL database explicitly. In structured query language, all instructions are given through the statements. Additionally parameters and operands are provided to these statement. SQL standards are being followed by statements and the respective parameters. Generally we group SQL  statements into the following categories:

    Data Definition Language (DDL)
    • CREATE – creating objects, tables, views etc
    • ALTER – modifying existing database object, table, views.
    • DROP – deleting table, view of a table or other object(s).
    Data Query Language (DQL)
    • SELECT – Fetch desired data from tables or views with the help of some conditions

                e.g. sort, order by, group by etc.

    Data Manipulation Language (DML)
    • INSERT – Inserting a record into a table
    • UPDATE – updating existing contents of the rows
    • DELETE – deleting desired records
    Data Control Language (DCL)
    • GRANT – Granting permissions to user(s)
    • REVOKE – removing permissions from user(s)

    Read Also : Enable / Disable JavaScript : Mozilla Firefox Hacks

    4.Object Oriented Languages ( OOP )

    OOP is a programming model which encourages the programmer to focus on ‘objects’ and their interactions with each other. These objects can be any of real life objects like school, employees, cities etc.

    Objects are generally described as their state and behavior (we call them methods).  As a practice, good programmer hides the state within the object and gives access to the object with the help of methods. This process is called encapsulation which is just  like an API to the object.

    In OOP, class is like a blueprint for an object. The next steps can be creating (or instantiating) the desired objects which also called instances of the class.

    Data and the methods are two separate entities which are merged together for the desired result. Object-oriented programming (OOP) enables developers with the ability to create objects that loosely couple both properties and behaviors into a reusable package.

    In OOP, developer define data types and the operations that could be applied to the data structure. In addition, developers can create relationships between two objects. With Object-oriented programming (OOP), many useful features comes along e.g. abstraction, inheritance, encapsulation polymorphism. Objects overlays the desired data and their operations in a sense that only the required operations are publicly available and the data structures behind the scenes are not accessible. This hiding of information made large volume programming much easier by enabling a developer to think in depth about each part of the program. Following are the most popular Object oriented Languages:

    • Java
    • C++
    • .Net etc.

    5.Scripting Languages 

    Scripting languages are also called small (or little) languages. They are intended to solve relatively very small set of programming requirements that don’t need the burden of data declarations and much functions required to make large programs effective.

    PERL (practical extraction and report language) is very popular scripting language which was developed in the late 1980s, for use with the UNIX operating system. It is used for writing utilities for operating system and programs related to file-manipulation. Its  are easy to learn and sometimes used for considerably larger programs. It has all the features of earlier scripting languages. PERL provided many different ways to define common operations and thus allowed  programmer to adopt any suitable style. In the early 1990s it became famous as a programming language for small applications programs and for prototypes of bigger programs. Also with combination of other languages, it became popular for programming computer Web servers.

    6. HIGH LEVEL LANGUAGE

    High-level languages enable the developer to think and write programs which are independent of what kind of computer the program is being run on. Programs developed in high level languages should be translated into a form that the CPU can understand before they can be executed. There are two steps in which this is done – compiling and interpreting.

    High-level languages mainly deal in objects, variables, arrays, boolean expressions, subroutines and functions, locks, loops, threads, and other computer science features rather than dealing with registers, memory addresses and call stacks. More features, like object-oriented language features, string handling routines and file input/output are also present. The main point to be considered for high level programming languages can be presented as no dependency of the programme from the machine.

    High-level languages permit faster development of large programs. The developed code as executed by the computer is not as efficient but the amount of time saving for developer is huge. The reason is that the cost of writing a program is nearly constant for each line of code, regardless of the language. Thus, a high-level language where every line of code translates to 1 and 0, machine instructions costs only 1/10 as much in program development as a low-level language where every program line represents only a single  machine instruction where the code is developed.

    High level languages are:

    • Computer (programming) languages that are easier to learn.
    • Uses English like statements.
    • Examples are C ++, Visual Basic, Pascal, Fortran and
    COMPILER

    A COMPILER converts any high level language to Machine language (or machine code) that computer’s processors understands (in binary format). After developer write a program, the source code is compiled into machine code. This m/c code is then stored as an executable file. Compilers for various languages needs to be installed as per the used programming language such as C, C++, Java and Pascal, etc.

    So in short we can state that compiler is a program that reads code and provides a stand-alone executable file that the CPU can understand. Once the program has been translated into an executable file, programmer do not need the compiler to run the program. At last, developer can execute binary file to perform the programmed task. Many a times, compiler do a better job than human programmers can do in assembly language.

    ASSEMBLER

    ASSEMBLER act as a medium to convert assembly language into computer readable language (machine language or machine code). So as the name suggests, assembler works by assembling and converting written code (java, .net etc) of assembly language into object code  that (zeros and ones) of machine language.

    INTERPRETER

    An interpreter is a type of computer program which executes the statement(s) at runtime. It does not require to convert the source code into machine language. For example any selected language(s) like python, PHP, LISP, Perl etc. do not require any conversion into machine code. An interpreter use to convert such programs line by line. Thus, in case you are writing your program(s) in PHP, Python, Perl, Ruby, etc., you should install interpreters of these languages before you start programming.

    As per above description, Interpreters are more flexible and at the same time they are not much efficient while running of programs because the interpreting process needs to be done every time the program is run. This means the interpreter is needed every time the program is run.

    Traditionally used languages like C, C++ etc are typically compiled, where modern languages e.g. scripting (Perl, Javascript etc.) are interpreted.

    Read Also : Perfect Guide to Know All About Web server

    7. Algorithmic Language 

    Algorithmic languages are purely based on the Algorithms. These are developed for describing computational processes and are so designed to express mathematical and/or symbolic computations. It is part of the group of portable programming languages for scientific computations that had a strong influence on other languages.With this language, algebraic operations can be rendered similar to maths which permit the use of subprograms for reusing common operations. They were the 1st high-level programming languages.

    ALGOL (elaborated as algorithmic language) was originally found by a collaboration European and American scientists in mid 19’s. They were used for doing computations as well as publishing algorithms. Starting versions of ALGOL were 58 and 60. ALGOL used recursive programs that could call internally to solve a problem. This solution was done by by reducing the problem into smaller part of the same kind. ALGOL also introduced block structure where the program is comprised of objects which might contain both data and methods and share the same data-structure as an entire program.

    Initially algorithmic language was widely used in Europe and computer algorithms were published based on this language only. Many other influential languages (Ada, Pascal etc.) are based on ALGOL language. The other important languages got popular with ALGOL are Fortran, COBOL, Lisp etc.

    8. World Wide Web Display Languages 

    WWW (also known as World Wide Web) language is an environment for rendering images, text, graphics and video/audio which are retrieved by using the Internet. Every part which got retrieved is considered as a Web page. These pages contain further web-links that allow its dependent pages to be retrieved. HTML (short form of hypertext markup language) is the one kind of WWW language for developing Web pages. HTML was initially designed by Tim Berners-Lee in Switzerland during the 80s.

    HTML use tags which specify various elements of the document e.g. tables, headings, paragraphs etc. HTML language markup the desired document/data for displaying by a Web browser. The web browser reads and convert the various tags in a predefined layout according to the screen size and fonts. Following are some basic tags with one liner description:

    <!DOCTYPE> Defines the document type

    <html> Defines an HTML document

    <head> Defines information about the document

    <title> Defines a title for the document

    <body> Defines the document’s body

    <h1> to <h6> Defines HTML headings

    <p> Defines a paragraph

    <br> Inserts a single line break

    <hr> Defines a thematic change in the content

    <!–…–> Defines a comment

    XML (extensible markup language) is a most trusted language used for documents that are published on the Web page(s). XML uses schema/DTDs to define data types and the description of tags used inside XML. By following these set of rules, usage of XML becomes very easy to carry data and its parsing.  An example can be that document entities should use both beginning and an ending tag, such as <body>…</body>. XML have more kinds of hypertext links as compared to HTML e.g. links relative to a document or bidirectional links etc. Because an developer can declare/define new tags it is required that XML schema should also contain rules that instruct a Web browser regarding how to convert them. Below are the basic rules for building standard XML:

    1. All XML should have root element.
    2. All tags should be closed.
    3. All tags should be properly nested.
    4. Tag names are case sensitive.
    5. Attribute should appear within quotes (“”).
    6. HTML tags should be avoided (optional).

    We hope you enjoyed the ride of learning basics of all computer programming languages which we have just discussed above. To conclude we can state that all languages have their pros and cons which needs to be considered while deciding the mode of development of your application. Some languages require complete infrastructure and licensed tools for development whereas some languages are very light and can be developed with minimum infrastructure.

    Keep following our upcoming posts for detailed discussion about each Programming languages. We hope to provide you with simple and easy programming tutorials from beginner level to advanced .

  • Pokemon Go Earning methods works for Pokemon Lets Go

    Pokemon Go Earning methods works for Pokemon Lets Go

    Damn sure that there is no such innovation like Pokemon Go !!! Now Pokemon Lets Go … So lets discover Pokemon Go Earning methods that really works for Pokemon Lets Go

    Pokemon Go have hit a change in the market trend and social trend all together.Pokemon Go , an augmented reality game . This is a recent trendsetter of this century. Niantic has released this Pokemon Go very recently on July 2016 . Surprisingly within the short period the game became viral enough. Hard to believe , but its true even Pokemon Go has reached a high number of users than Twitter or Facebook also.Pokemon Go is now officially available in some countries and consistently available in other countries. You can download Pokemon Go on any android mobile and iPhone .

    Now the upcoming on Pokemon series is Pokemon Let’s Go, Pikachu ! and Let’s Go, Eevee !

    This game can be played as both Single user and Multiple user.

    Pokemon Go AR + will be a better treat experience for all Android users now . Thus making Pokemon Gen 4 a better game experience to all the Pokemon lovers around globe . Now you can set the eye on not only to catch Pokemon Go shinies . You have something better to catch now , Meltan , the new Pokemon monster that is trending . But if you want to catch Meltan you must first discover the mystery box , if you haven’t find mystery box you would not see the Meltan .

    Android users who wanna experience the actual size of Pokemon creatures and monsters , download the latest Pokemon Go AR+

    Pokemon Go Earning Methods works for Pokemon Lets Go

    When the craze of Pokemon Go is high among people now its scope in economic way is equally increasing. Some people are getting benefited with Pokemon Go commercially. Pokemon Go is a game that have attracted every section of the society. This made everyone to run around the streets to hunt the monsters. It’s all crazy but it also opened up a new business market for many .Now Pokemon Go make money easily .

    Here we tell you How does Pokemon Go make money  –

    Pokemon Go is not all about fun !!!  It is a mixed platform where you get fun, you earn playing Pokemon Go , you buy services to play Pokemon Go and you sell services related to Pokemon Go .

    1. Boost your local Business / a new start up with Pokemon Go

    If you are a new local start up or a local business person looking to attract more customers. Now you can do it with Pokemon Go to increase your revenue. It’s a best way to make money with Pokemon Go .

    pokeman go for business

    Many restaurants, bars, family now make money with Pokemon Go by attracting people by placing a lure near any PokeStop . People now want to get a refreshment center where there is entertainment. So using Pokemon Go to attract is one way to earn money using Pokemon Go.

    1. Start a Recharging Station in PokeStop Parks

    People on their craze to hunt monsters come to parks to find the monsters and their phone battery will drop out with their great time of playing .Here it is a chance to make your business . Go to such PokeStops and place a table and start renting Portable chargers to Pokemon Go players.

    1. Start a Refreshment centre in PokeStop Parks

    POKESTOP REFRESHMENT

    Recharge the Pokemon Go players with your refreshment centre. Offer water bottles, soft drink cans, snacks. For sure this will not give you over stock if you place it on a good PokeStop and to avoid further complications check the terms of license at your place to set up your refreshment centre. This is a way to earn money using Pokemon Go .

    1. Sell your Pokemon Go account on High rates

    You have a Pokemon Go account with crossing about 15 to 20 levels then you are sure you can win it again. But some crazy Pokemon Go lovers want to play the game without touching fingers till the main levels. So you can sell your top account for a good amount of money.This is a way to make money by playing Pokemon Go.

    Note – According to Pokemon Go’s Terms and conditions selling your account is banned. So try to rent it. Why you kill a golden duck in one stab!!!

    1. Claim the best gigs

    TaskRabbit & Mechanical Turk are now your place to earn some extra money with Pokemon Go .Here you have to find out the high paying gigs.

    1. Drive With a Pokemon Go Player and earn

    pokeman go bus

    The 24/7 Pokemon Go bus is now hitting the business in Newyork and in every part of the country we can find freelance drivers who take the Pokemon Go players around for drive to help them find the monsters around the streets .It is a brilliant way to earn more money with Pokemon Go.

    1. Become a pet/kid caretaker

    Lovers of the game now look for a pet/kid caretaker as they need to make their time with their favorite game to hunt monsters. Irrespective of your educational background here a new world of opportunity is opened before you to earn more money with Pokemon Go.

    1. Be a Pokemon Go adviser to earn with Pokemon Go

    Help Pokemon Go lovers by giving them guidance to install, tips on playing Pokemon Go  and to find the monsters. You can earn by this and also by giving advice to new start up to use your idea of boosting their business with Pokemon Go & tell them how does Pokemon Go make money.

    1. Advertise your PokeStop and earn

    Advertise your PokeStop and get players gather there which will eventually give a market for your business. One multinational trick used by an American mobile company was brilliant to give free data plan on Pokemon Go app to attract more customers. So it’s equally a working plan for the small, big to Multinational companies to earn money with Pokemon Go.

    1. Sell rare Pokemon

    Again we remind you selling is banned but still you can rent your Pokemon Go account . In  case you are not willing to play much but you have the rare Pokemon captured then your account is still worth. It doesn’t matters how many levels you crossed . All that matters is how many rare Pokemon you have captured in the game.

    1. Become an egg hatcher to earn Playing Pokemon Go

    Those who are lazy to walk and run but curious to play the game look for someone who can walk for them and find the rare Pokemon Go Egg and hatch it for them. For this service you can charge well. It’s an easy way to earn playing Pokemon Go .

    These are the all possible ways to earn money with Pokemon Go .These are the  guidelines to reap money with your service , efficiency and how you can get benefit from a PokeStop . Near the PokeStop lucky you are to earn more.

    Earn with Fun & Pay for Fun !!!

  • Roku Pros & Cons -Reasons to Choose Roku Streaming Stick

    Roku Pros & Cons -Reasons to Choose Roku Streaming Stick

    Roku Pros & Cons -Reasons to Choose Roku Streaming Stick

    Today Streaming sticks are really a craze but before you buy a streaming stick you must have a fair idea about the reviews , pros and cons of streaming sticks at the market.Here is the Roku Pros & Cons this will help you to take a decision whether to choose roku streaming stick or not to choose roku

    Roku Pros:

    These are the top reason to choose roku where it showcases all the Pros of Roku Streaming stick .

    Cost: Being priced below $100, one can enjoy online content on their television. Even when the paid channel subscription ends, one can retrieve the costs if the cable TV  or satellite television service is being cancelled.

    Read Also : Hard and Soft Reset Roku Manual – Fix Frozen Roku Streaming Stick

    Simplicity:  Before the introduction of Roku, there was a necessity to run some sort of video cable from the computer to the television. Later, a keyboard and a mouse were used to browse programming. The television and the computer could not be used at the same time. However, in case of Roku, it is easier and more simple to install this device and its use has no impact over the computer.

    Flexibility:  Every Roku models is supporting wired as wireless both kind of Internet connection, & most tv connection cable. Hence, it shows that, compatibility is not an issue.

    Remote Control: Roku has many advantages over the usage of computer, including the remote control.     The remote control makes it easy to control the programming without even moving out of the couch.

    Future proof: Roku promises to be updated with its software, hence supporting new channels and features.

    These are the advantages/pros of Roku to choose roku streaming stick.

    Roku cons:

    These are the top reason to not choose roku where it showcases all the Cons of Roku Streaming stick 

    1. No program storage: Certain people enjoy the ease of recording television shows and movies using a     Tivo, a DVR-enhanced cable or satellite box, a media server, or a home media center and network. The     Roku devices have a coupon instant replay feature, however, users are not provided with the library of their favorite programs or shows
    2. No inter-connectivity: Most people own more than one television. Modern media networks enable in starting and stopping programs from different locations, but Roku has not yet added this feature.
    3. Absence of High-definition Internet: Roku supports high-definition at 1080p, but few Internet sites actually support high-definition Internet. Even when a signal is sent at 1080p, certain users have Internet connection handling such a signal. There a few Internet service providers who limit the customers’ monthly usage, hoping to reduce the loss of cable television subscriptions caused by the use of digital video players.
    4. Another Box:  There may already be a DVD player as well as a cable box or satellite tuner. This could be another device placed near television and one more remote control on the coffee table.

    Thus now you can take a decision whether to buy or not to buy roku streaming stick based on Roku Pros & Cons.

  • Top Satellite Car Radio Installation and specification guide

    Top Satellite Car Radio Installation and specification guide

    Top Satellite Car Radio Installation and specification guide

    The satellite radio has been around over the decade, but this technology is not been used widely or be understood as traditional radio. this technology has some similarities with the both satellite television and terrestrial radio. But the formatting of both the radio is same, but most of the stations are presented without the commercial interruptions. However, satellite radio is subscription based like satellite television. Today will discuss on Top Satellite Car Radio Installation.

    The satellite radio services also require some specialized equipment such as the satellite television. The main advantage of the satellite radio is that the signal is being available over the much broader geographical area than anyone terrestrial radio station covers. The handful of the satellites is capable of blanketing an entire continent and every satellite radio just offers the same set of stations and programs to the entire coverage area.

    There are two different kinds of the satellite radio one is XM Satellite and another is Sirius Satellite Radio which started commercial service in 2001 and 2002 respectively. Both the satellite radio uses S-band of 2.3 GHz microwave, but the systems are different. But in 2008 both of the companies get merged to the Sirius XM Radio. Across the U.S. this radio has approx 22.9 million subscribers.

    One of the main driving force behind satellite radio is automotive industry. Both Sirius as well as XM, have pushed automakers to include the satellite radio in their vehicles. Most of the OEMs have one vehicle which offers service to the others. Nowadays the vehicles usually come up with the pre-paid subscription to Sirius and XM.

    Now we will move to our actual topic Top Satellite Car Radio Installation

    Top Satellite Car Radio Installation

    Here we will detail on Top Satellite Car Radio Installation

    If you are being familiar with the Sirius XM Satellite radio, then you really know that it is much joy to listen to it.Although , you need to pay a fee for monthly access and you will definitely get a crystal clear stereo sound. From few days with the trend has allowed Sirius XM technology to be bundled into devices which act like MP3 players. Some list of the satellite radios are:

    SiriusXM XEZ1H1 Onyx EZ

    This is one of the most convenient satellite radio for the vehicle, this is one of the great low price options which comes with a remote control. Other nifty features include: easily browse what’s playing on other channels while listening to the current one, store 10 favorite channels for one-touch access.

    Top Satellite Car Radio Installation of this car satellite radio is much easy in the vehicle. In your vehicle, just connect the antenna, powered cord and auxiliary cord to your vehicle stereo system. The blue LCD light at back shows the basic information such as artists, channel, title, etc. moreover, the hardware is fairly bare bones, Onyx EZ is an easy entry point into XM./Sirius and it is much hard to argue with the price.

    Read Also : Connect dual displays / monitors to one computer on Windows & MAC

    Runner-Up, Best Budget: Sirius XM SSV7V1 Stratus 7:

    This is one of the basic satellite radio which has push button navigation that allows for the easy channels surfing also in this radio you can store 10 favorite channels for one-touch access. Listening to the radio in the multiple vehicles need distinct kits but it extends the use cases of Stratus 7. The overall design of his radio is very basic and there is no wow factor to its factor and feel but in reality, it gets the job be done. In this radio, TuneScan is a feature which allows you to start a song from the beginning on a new channel, is not available. Same applies on the TuneStar this allows the individuals to create their own music channel by blending their favorite music channel. Although this satellite radio may lack some features but offer clear signal and easy installation.

    Read Also : Factory reset iPhone without password or iTunes with data backup

    Best Features: SiriusXM Satellite Radio SXPL1V1 Onyx Plus:

    This satellite radio is the big brother of the Onyx EZ, Sirius XM SXPL1V1 a feature-rich, vehicle ready player. In a package that is 3.4-ounces and 4.55″(W) x 2.4″(H)x.7″(D), there are many features to keep the pickiest Sirius XM listener happy. The addition of both the TuneStart and TuneMixx are the two features which make the price tag worth. This satellite radio allows subscribers to start a song from the beginning on a new station, while it latter allows the creation of a music station based on the favorite channel. Also, the Onyx EZ offers pause, rewind, and replay functionality o your favorite channel for up to 30 minutes.

    Installation of this radio in the vehicle is much easy with the included kit in the vehicle that includes adapter, antenna, etc and thus allows the transfer between cars on a single subscription. The full-color display shows album art, channels, and graphics to add some visual appeal. Some advanced features are also available such as one-touch access to traffic and weather, as well as the one-touch jump back to the previous channel.

    Read Also : Hard and Soft Reset Roku Manual – Fix Frozen Roku Streaming Stick

    Best for Sports Fans: SiriusXM ST4-TK1 Starmate 4:

    This is a simple, sleek, and full of the features that offer easy installation., a five-line graphics display, and 44 minute instant replay function. Seek will save minimum up 30 song titles and alert the individuals whenever one is playing but the game alerts prompt subscribers when their favorite sports team is playing.

    The Starmate 4 decodes the digital signal for more than 130 music sports, sports and news station with the subscription.Its kit offers the easy portability between the vehicles with the single subscription.

    Read Also : Cancel / Reverse Venmo payment : When a Venmo payment goes wrong

    Best Splurge: SiriusXM Lynx Portable Radio:

    It is one of the most expensive and portable satellite radio 3.5 inch multi-touch and it makes the display is much beauty to view as it is used. Approximately it is just same as the 5th generation iPod has the powerful battery with micro SD slot continues to show the difference between other satellite radios. The Lynx runs a heavily modified version of Android.

    The home-screen of this radio has six various options satellite, the Internet, my library, show finder, Bluetooth connect settings. Users can have up to the 25 preset stations along with the alerts that notify your favorite show, song, or artist to next play. All the option of the pause, play and rewind are being present and also the subscribers can play up to 30 minutes of the live content on tuned channel. Also, if you are being connected with the WiFi Hotspots then, you can access over 150 channels.

    Best Screen Display: SirirusXM Commander Touch:

    This satellite radio offers an enticing and beautiful touchscreen display which provides full color 480*180 pixel displays about the album, art, name, song title, channel logo, and information of the program. This advanced portable satellite radio offers the pause, rewind, and replay, for up to 60 minutes of listening. This has a TuneMix feature that creates a mix of the songs from the subscriber’s favorite stations with album art and channel logos. With this, the songs will be automatically gets paused when stop occurs while listening in the vehicle also will get played from where the song has been paused. This will also offer the software update to commander touch via the USB flash that offers the new features and capabilities as they are available.

    The radio installation in the car is a snap and has been simplified with the multiple car attachments just on a single subscription.

    Read Also : Venmo User Guide for Safe Transactions – Venmo payment

    Best App: SiriusXM Smartphone App:

    This is a true portability satellite radio which can be found via Android, Blackberry, and iPhone smartphone application. this radio can help you to gain complete portability, streaming channels, and all subscriber options.

    That’s the detailing about Top Satellite Car Radio Installation.

  • Connect dual displays / monitors to one computer on Windows & MAC

    Connect dual displays / monitors to one computer on Windows & MAC

    Connect dual displays/monitors to one computer

    A much more screen space is provided by dual displays/monitors to one computer and it can be very useful for increasing efficiency and productivity. The two monitors can be easily configured to show either the same image or give you a much larger screen. Follow this article to get your monitors set up right the first time.Here will discuss methods to connect dual displays

    Method One of Two to connect dual displays:Windows

    Here is the first method by which you can connect dual displays or monitor in one computer where here the step by step guide for connecting dual system to one windows computer.

    For Windows Users to connect dual displays

    1)

    First step to connect dual displays is that you need to check your ports and also you will need two video out connections on the back of your computer one for each monitor.

    Basically there are mainly four types of connections which are listed here from oldest to newest: VGA, DVI, HDMI and Display Port. So for the best results we can use two of the same connectors to connect dual displays.

    The monitors are directly connected to the motherboard or the graphics card and most graphic cards support two or more monitor connections. Although most motherboards support one and sometimes two if you have a monitor with a VGA cable and if your port is DVI then you can purchase an adapter that will connect to your VGA connector and allow you to hook it up to a DVI port.

    Though the ability to connect dual displays depends completely on the power of your graphics card and CPU, running a second monitor puts more strain on your system. A more capable graphics card means the display has more pixels which makes a connect to dual displays possible and this ends your first step to connect dual displays on your computer.

    Read Also : The ultimate guide to make Windows run faster (Boost Computer Speed)

    2)

    Now for the second step to connect dual displays you can connect the 2nd monitor to the open port on your computer and in most cases the Windows OS will intrinsically detect the new monitor but if it does not restart the computer then to connect a another monitor there is only one port on your motherboard or graphics card. You will need to install a brand new and latest graphics card in order to attach the secondary monitor. Whatever monitor you wish to choose has no compulsion to be from the same vendor or the same size but for a reasonable viewing both the monitors should be of the same size so that your desktop stays consistent and this ends the second step to connect dual displays on your computer.

    3)

    Now in the third step to connect dual displays you need to follow the monitor setup wizard. In majority of the cases this will automatically start when a new monitor is plugged in and you will be given options to either mirror or extend your desktop depending on your wish. The option of mirroring mirror’s what is shown on your original monitor and this is most useful for giving seminars,presentations etc wherever your machine may be connected either to a projector or a TV.

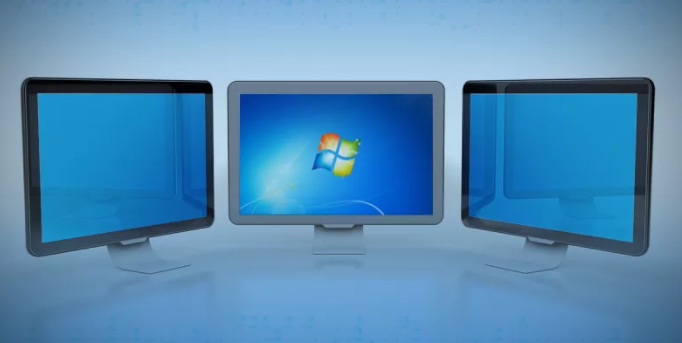
    The protraction makes the secondary monitor another screen for your desktop allowing you to drag and drop different windows and icons onto the other monitor which would give you more space to multitask.You can even set the second monitor as your primary desktop monitor and this is really useful if you attach a monitor to a laptop and want to use it instead of your laptop’s display so this ends your third step to connect dual displays on your computer.

    Read Also : uBlock Origin Replaces Adblock plus(Best Adblock Plus Alternative)

    4)

    This is the last step to connect dual displays manually. If either your monitor wizard does not automatically start or you want to change the settings for yourself you can use the display Settings tool. The procedure is to right-click the desktop and then select Properties or Personalize. You then decide to click on display settings from the list of available options and now you would see icons with various different numbers representing your attached monitors but if by any chance, if one is not working then that would look grayish in color. Now you can select the second monitor and choose to protract your desktop or replicate your desktop. Your options may rely on the graphics card that you have installed and you may need to make these changes from within your nVidia or ATI control panels. If you have these already installed then they can be found in your start up menu and this ends your final step to connect dual displays on windows .

    Method Two of Two to connect dual displays:MAC

    Here is the second method by which you can connect dual monitor in one computer where here the step by step guide for connecting dual system to one MAC computer.

    For Mac OS X Users to connect dual displays

    1)

    The first step to connect dual displays for the Mac users is that your Mac must have available video connectors to attach a second monitor. Since each display will need its own video cable, so to facilitate it there are several types of connectors that you may come across. Depending on the age of your Mac:

    VGA – This is one of the the oldest analog standard and most monitors support being connected via VGA cables and DVI – This is a core step up from VGA in quality. Although it is being replaced by HDMI and display port there are very few MacBooks that use the Mini-DVI which requires an additional adapter to connect to a standard DVI cable.
    Display port or Thunderbolt – This is one of the most common connectors found on newer Macs because Thunderbolt is the newer version of Display port and can carry both audio and video signals . By any chance if your monitor only supports HDMI then you will need a Thunderbolt-to-HDMI adapter.

    HDMI – This is the standard for all digital display devices and majority of every new display manufactured in the last few years supports HDMI connections because HDMI can carry both audio as well as video signal.
    All the above given information was necessary for upcoming steps to connect dual displays on your computer.

    Read Also : Kindle Fire Silk Browser Alternatives

    2)

    The second step to connect dual displays is similar as of windows because most displays will be recognized automatically and you will be prompted to choose your choice of settings and if you choose to mirror then the same image will be shown on both monitors. If you decide to choose extend then your desktop will stretch across both monitors but if the display is not recognized then open the Displays preferences and click Detect Displays and this ends your second step to connect dual displays on MAC.

    Read Also : Record iPhone iPad Screen on Windows & Mac

    3)

    The third step to connect dual displays requires you to adjust your settings manually. If you would like to change the settings yourself then you can do so through the display’s preferences menu. Now get there and click on the the Apple menu and select System Preferences and open the Displays tool. Now to extend the desktop you can click on Arrangement and then follow the simple instructions on the screen. Now to mirror the image you have to set both your displays to the same resolution. Now finally click on Arrangement and then click on Mirror Displays and this ends your final step to connect dual displays on your computer.

    These are the ways to connect dual displays on both Windows and MAC computers.

  • Fix Excel Freezing or Slow -Excel not responding / hang issues

    Fix Excel Freezing or Slow -Excel not responding / hang issues

    Excel not responding often we get this type of messages when we work on Microsoft excel workbook. Sometimes Excel crashes, hangs, freezes or  stops responding. In this situation you receive messages of ERROR.  Microsoft excel is very robust program that we use for the making sheets, files, documents etc. But when Excel doesn’t respond while working we get irritated and have to stop our work in between.  In this article you will learn some troublesome aspect of excel freezing that can help resolve the common issues when you receive an Excel not responding error or hangs when you launch Excel or open a file. Sometimes it happens that problems with Excel files crashing, hanging or freezing may be caused by  several things and you need to Fix Excel Freezing or Slow -Excel not responding / hang issues

    How do I start Excel in Safe mode ?

    It is a difficult problem when your excel hangs so to Fix Excel Freezing all you can do is to start MS Excel in safe mode.

    Does excel freezes every time when you use ?

    If you find any problem(freeze) with excel files then you can follow these steps given below.This will help to Fix Excel Freezing

     Try to Start Excel in Safe Mode

    You are having problems with Excel ?  If so, then here is the easy way for you to start Excel in “safe mode” that would help you to display Excel very easily, you are just required to follow few steps given below:-

    1. First, make sure Excel is not running or close it completely.
    2. Then hold the Windows key and press “R” to run the dialogue box.
    3. In the search box type excel.exe /s then press ENTER. Now you will see Excel starts in fixed mode. If there is any problem occurs in excel mode you can follow the next steps.
    4. Select “File” } option”.
    5. Now choose “Adds-ins”.
    6. In the Manage, select “Excel Adds-ins“. then Select “Go“.
    7. Now normally exit the program and select “OK“.
    8. Finally close Excel, and Restart it normally.

    With all above steps you would be able to start Excel in safe mode.

    Now first you need to check if Excel sheet is freezing or hanging in between more then one time. If you find any problem with Excel as you open it so you don’t need to worry about it as it is the part of the program itself. And if it is happens only in one file then you will have to check what exactly the problem is.   

    Read Also : Enable / Disable Windows File Protection & Fix Windows File errors

    Reinstall MS Office

    1. First Right-click the “Start” button, then select “Control Panel“.
    2. Choose or Select “Programs“.
    3. click on  “Uninstall a program“.
    4. Now Locate “Microsoft Office” in the list. Right-click it, then choose “Change“.
    5. Select “Quick Repair“, then click “Repair“.
    6. Once the repair and every thing is complete. Try to launch Excel properly and see if you have a freezing problem. If the problem persists, try the “Online Repair” option.

    This is one way to Fix Excel Freezing when no other options work out.

    Read Also : Connect dual displays / monitors to one computer on Windows & MAC

    Excel Freezes in Only One Spreadsheet

    If the problem only occurs  only with one spreadsheet file is open, there is something in the file causing the problem. You can apply given steps to solve the problem if excel freezes in only one spreadsheet.

    Clear Conditional Formatting

    1. If you have problem with opening in excel file then, select “Home” } “Conditional Formatting” } “Clear Rules” } “Clear Rules From Entire Sheet“.
    2. At the bottom of the sheet select additional tabs, and repeat step one on each of them.
    3. Now,Select “File” > “Save as” and make a additional/new copy of the spreadsheet with a different name. The old one will exist if you need to revert to it due to lost data.

    These above step will help you in excel file. If you no longer experience freezing or slowness or any problems in the Excel file, you will need to narrow down which section is causing the problem and reapply the conditional formatting.

    Remove/Delete Styles

    First, Download Remove Style, then run the file. At the button option of “Home” select the “Remove Styles“, and see if speed of files are good or not.

    Clear Objects (Shapes)

    You have to be very careful with this solution if you wish to keep objects.

    1. First hold CTRL and press “G” to bring up the “Go To” box.
    2. Select the “Special…” button.
    3. Now first select the “Go To Special” screen, select “Objects“, then select “OK“.
    4. Press “Delete“ option.

    Read Also : The ultimate guide to make Windows run faster (Boost Computer Speed)

    How can I repair corrupted Excel files?

    Corrupted excel files can harm your data and documents. As recovery of corrupted excel files allows to avoid the important information. Microsoft recovery excel is designed for effective data recovery from corrupted Microsoft excel sheet. So to prevent your excel files from any harm you can recover your corrupted excel files by scanning or analyzer. Here is step by step process that you can use to repair corrupted excel file.

    1. First open your Microsoft excel
    2. Open the folder that contains corrupted files
    3. In the open dialogue box, select the corrupted files
    4. Next to open button click the arrow, and then click open and Repair.
    5. Now you can repair as much as you can cover your workbook or files.

    It is the good process to cover Microsoft excel files but if by chance, Repair isn’t able to recover your data, then you can extract data to extract value and formulas from the workbook. You can also take some measure to avoid your files from being corrupted by automatically a backup copy  of your work book and by creating recovery file from time to time.

    What to do when Excel Freezes on MAC ?

    Freezing, hanging, corrupting files these are the common issues for Microsoft excel but can be very dangerous for as it can detect your important files. But to recover excel files on Microsoft Mac is different thing as you would experience some issues like program will close automatically, you will receive error message, files could crashes and you won’t be able to access normal computer functions. To resolve excel freezing on Mac problem you can follow these steps given below:-

    1. First leave all program and close all windows
    2. In the file or apple menu click force quit
    3. Now remove excel preference and office setting
    4. Make sure all your mac program are closed, now on Go menu, open the hidden library
    5. Open the group container folder , and open the “office” folder
    6. In this folder, look for the Com.Microsoft.officeprefs.plist file.you can delete this file
    7. Restart the folder and check is issue resolved, if it isn’t you can delete the whole folder that will delete your previous setting
    8. Now you can restart your Microsoft excel
    9. If there is any problem while restarting it then you can remove and reinstall office again.

    Read Also : Record iPhone iPad Screen on Windows & Mac

    What Should I avoid to stop Excel freezing or to avoid Excel running slow – Fix Excel Freezing

    Slow excel work is hindrance foe many of us. Sometimes it is frustration keep up with a slow excel sheet.

    • Use faster formulas technique – Excel gives you many techniques that can can do same thing if you would able to find new technique then it can be very helpful for you.
    • Avoid volatile function – Functions such as NOW, TODAY, INDIRECT etc. These function recalculate everything every time there is a change in the workbook. This takes additional processing speed and you end up with a slow excel workbook.
    • Use less data – if you use less data then you would find that excel is not freezing and working properly.
    • Use excel tables and named ranges – This is the amazing feature that hold your data and makes referencing super easy. It almost good idea to make your excel easy and faster.
    • Keep all reference and data in one sheet – If you keep your all data in one sheet then your excel would run faster. Although it is not easy to keel data in one sheet but you can try.
    • Use Manuel calculation mode – Using Manual calculation gives you the flexibility to tell excel when to calculate, rather than Excel taking its own decisions.
    • Function ,Efficiency usage – While doing a huge matrix if you tend to use so many formulas other than using VLOOKUP ,This would enhance your excel speed .

    This will help you to Fix Excel Freezing both in windows as well as in MAC .

  • Google Maps Features Exclusive guide

    Google Maps Features Exclusive guide

    Google maps have become an essential part of our life and business . Here we will take a look at exciting new Google maps features .


    google maps features guide

    It is always difficult for everyone to travel to different places without knowing the route. Checking the signboards, asking someone for direction every time is time-consuming and difficult. Also, if you miss out on any exit, then we will have to look for the next exit and take a diversion. When Google introduced maps (maps google , google my maps ) , all the chaos in finding the correct route to a destination was over. Google Map makes it so easy to find shops, restaurants, tourist attractions, and a lot more. You can drive alone to anywhere you want to visit without any anxiety about finding the route. But one needs clear understanding of all google maps features to use it for their convenience .

    First, you should install google map on your phone , select the starting point and destination, and follow the route shown on the map. You can turn on your location on the phone, so that, Google Map will automatically enter your current location. Click on directions and you can choose the mode of transport you are using as a car, two-wheeler, train or bus, walk, etc. Google Map offers aerial photography, street maps, satellite images, real-time traffic environment, and 360-degree interactive panoramic views. 


    How to Save Route in Google Maps

    To save a particular route in google maps that you use often, you have the option of saving the route to your home screen. Once you have installed Google Map on your android phone, choose your starting point and destination. See the top right corner, tap on the three dots or it will be given as the first alphabet of your name and you will be able to see a few choices to select. Click on add route to the home screen. Click on Add.

    This is a Great google maps feature for my life i must say .

    Why Google maps not available in my country

    Google Maps are available in the majority of the countries and regions. But still, there is 1% where Google Map will not be accessible. It can be because of any legal or political issue. We cannot accurately conclude the reason for google maps not being available in certain places and when you search for the Google Map App, it might show as Google Maps not available. 


    Fix Google Maps not updating location

    Make sure the location in your android phone is enabled. If you cannot find the blue dot (your current location) when you open the map, tap on Location at the bottom. If you find it difficult to select the precise current location, you should use a high accuracy mode. In your android phone, go to Settings > tap Location > switch on location > clock on Mode > High Accuracy. Google Map usually finds your current location with the help of Wi-Fi, GPS, and Cell towers. You can also try switching on the Wi-Fi/mobile data, try restarting your phone, or calibrate your phone by opening the google map and make a figure of 8 with your phone until the blue dot is in an accurate position. 

    This google maps features easy tip can help you have your accurate location on google map .


    Google maps not talking or giving direction – How to fix

    When you are driving, you do not need to check the map on your phone over and over. Google map comes with voice over and you can just hear the navigation while driving. If you cannot hear the voice, there are a few remedies. First, check your phone’s volume to make sure that it is not muted. Enable the play voice over Bluetooth – If you are using the google map on your car’s Bluetooth system, you should enable the play voice over Bluetooth to hear the navigation. 

    This is one of the safest driving assistance available in form of google maps features.

     Avoid toll roads on google maps

    We always like to avoid tolls and ferries enroute to our destination and with the help of Google Map, we can avoid such toll roads. If you want to reach a destination soon and if you want to avoid the toll, first you should select the starting point and destination. Click on three dots on the right top corner of the screen and you will see a few options to select. Click on > Route Options > Select avoid toll roads on google map from the three options given. Click on the Done button. The Google Map will show the route avoiding the tolls present on the main highway. See how superb are these google maps features thanks to such good inventions 🙂 


    Fix Google Maps not showing street view

    Street View map is one of the most commonly used google maps features  by the majority of the people because it shows the real images of the places you are going to visit which will be much easier to spot. But if the street view option is not showing on your android, then there might a glitch or some other problems. Check the following steps for the issues.

    Sometimes this problem may occur when you update your Google Map App. Check if you have recently updated the app and the street view is not showing. Also, check with other users if they are facing the same issue in your region. Try using the older version of Google Map to solve this problem. Or you can even try using the google map offline mode. 

    Check if the street view option is available in your area since the street view map type is not available in all the regions. 

    You can also check for map google nearby places to the destination you want to visit. All you have to do is select one of the famous spots and click on nearby places on the map to see all the nearest shops, restaurants, shopping malls, etc. So that might be able to get a street view near to the destination you are looking for. 

    This google maps features always helped me with shopping and travel whenever am in a new place .

    Try getting the map through a google search. Give your current location first in the search bar and then select the maps section. Drop a pin anywhere you like to get the image of the area you are looking for.


    Zoom on Google maps with one finger

    When you have selected your origin and destination point, the map will be reflected on the screen. If you want to zoom a particular spot on the map, you can do so by simply double-tapping the spot. To zoom in you can just pinch in the spot. You can also use two fingers to zoom out the spot you want too. Likewise, to move the map and see the route you can just press on the screen with one finger and move your finger right, left, top, or down to see.


    Set up plus codes on Google maps

    Getting the plus codes on google map is very easy. You can share the plus code with anyone and with that plus code your friends or relatives can search the map on their android just like a street address. Open the Google Map on your android and select the destination. Tap and press on the drop in on the map to the plus code and you can find the address and the plus code below.   this icon shows the plus code and you can share the plus code by simply copying the code and paste it into mail or WhatsApp etc. 


    How to set multi-stop directions in Google maps

    With Google Map, you can set up multi-step directions easily. This means, other than entering the origin and destination point, you can add other stops between the journey. To add other stops, open Google Map on your android and click on the Go button on the left bottom corner. Enter the origin and destination point. Click on the settings option which will be represented by 3 dots on the top left corner. From the drop-down menu, select Add Stop. You can add several stops as you wish in your Google Map. The stops will be shown in alphabetical order (A, B, C, etc.) You also have the option to reorder the destinations by simply dragging the leftmost button shown as small circles. 


    Restrict Google maps data grabbing

    Google Map is a very convenient technology used by the majority of people to travel. It is so easy to find the routers and landmarks using the Google Map. But using Google Map throughout your journey can consume your phone battery charge quickly and it also used mobile data. If you are thinking about using the map without grabbing the data then, there are a few options that you can try.


     Read also : How to Spoof location


    Use offline Google Maps: Before you start your journey, you can download the offline map on your android phone easily which will not consume much data of yours. Open the Google Map, click on the setting button on the top left corner and the drop-down menu will show the option of Offline Map. Click on that and download the map. 


    Disable Data Access: Another option to avoid usage of data is to disable unrestricted data usage. To do that, go to setting in your phone and select the apps from which you can click on the Google Map app. You will see a few options like permissions, storage, data usage, etc. From that, click on data usage and if the unrestricted data usage is on, then turn it off so stop using mobile data.


    Use Wi-fi Only: It is not feasible to use wi-fi on the road while you are traveling. But you can stop the usage of data by setting this up on your phone. Go to Google Map, click on the Settings button, and enable the Wi-Fi only option. 


    Share real-time location on WhatsApp and Google maps

    It is very easy to share your real-time location with your friends or family. Open WhatsApp and click on the attach option (a pin). Click on Location and tap on share the live location. You can select the duration of time below the same page and also add a comment and share the same with anybody you want. 

    To share the real-time location on Google Map > Click on three dots on the top left corner (or an alphabet). From the menu, click on Location sharing and share your live location through WhatsApp, mail, messenger, etc. 


    Create and share custom google maps 

    It is not feasible to create a custom map just using your android phone. First, you need to use your computer to set up a custom google map, and then you can share the same with your phone. To do that, open google map on your computer and select the origin and destination. Create your custom map by clicking and moving the various routes shown on the map. Once you have fixed on a particular route, click on> Send directions to your phone. You can share the same via mail, text, etc. 


    Steps to use google maps offline

    To use Google Maps offline, first, you need to download the map on your phone. Open Google Map> Click on three dots on the top left corner. From the options given, click on Offline Maps. Select the area you want by zooming in or out using your fingers and select the area. The size of the map you selected will be given below. Click on download map. Once it is downloaded, you can give your origin and destination and find the route offline.


    Save locations in Google Maps for – Android and Apple

    If you are using the same location often, then you can easily save the location on your phone. Open google map in android or Apple, select the location you want either by typing the destination or by clicking on the map. Then at the bottom, you can see many options including SAVE. Click on the save button and the location will be saved in your phone at that moment.


    Google maps clear navigation and search history

    If you want to clear or delete the navigation and search history from your phone, click on settings > click on maps history. There we will see many options that you can choose from. You can turn on the auto-delete option if you want which will automatically delete the history from your phone. You can even select months, years, or weeks according to your need and select it so that the search history for that particular period will be cleared. 


    How to turn off Google map voice search permanently on android

    When you use Google Map, once the navigation starts, the google voice will automatically give you directions which is easier for people who drive. If you want to turn the voice off, then once you click on start navigation, you will be able to see a speaker icon on the left side of the map. Disable it to stop hearing the voice again. 


    Remove location sharing on Google hangouts

    With the latest update of Google hangouts, location-sharing is unavailable. However, you can share locations through google hangout using the google map. 


    How to access Google services on pc

    If you want to use Google services on your pc, first your need to install google chrome and follow the instructions. Once it is downloaded, open the chrome, and sign in by giving your Gmail address and password. Create a new account with a username and password if you do not have one and begin using the services of Google on your pc. Likewise, you can download any google services on your pc and sign in to use it. 

    Another option is to download Bluestacks on your pc. The bluestack acts as a virtual machine that helps in downloading the apps you need. Once you have Bluestack installed, open it and sign in to your google account. Only then you will be able to use Google Play Store to download any apps of google services. With Bluestack you will get the feel of using your android phone on your pc. But it is way slower if you do not have a powerful pc. 

    Hope this google maps features helps you use this app more conveniently . Let us know your favourite google maps features


  • Best Screenshot Tools for Computer & Smartphone

    Best Screenshot Tools for Computer & Smartphone

    Nowadays, taking screenshots has become very common. People take a screenshot to save a current text in a group or to take a quick screenshot of something that you are searching in google and send it to someone. All the computers and android phones come with the option to take screenshots easily. If you are using a computer, you can simply press the print screen button on the keypad. In androids, you can press the volume key and power button at the same time to take the screenshot. But these options in your computer and smartphone will not have many features wherein you can edit or crop the screenshot. There you need some best screenshot tools to enhance screenshot experience .

    There are many screenshot tools available now that you can download on your computer and smartphone. For those who are seeking for a good screenshot tool, I hope this article will help you find the best. Below are some of the best screenshot tools to download.

    Best Screenshot Tools for Computer & Smartphone

    Take a look at the screenshot tools that are ideal for your phone and computer . Even though all mobile and system has the liberation of giving us an option of PRINT SCREEN button , we find it is not just sufficient to Snapshot / screenshot most things .

    Snagit

    You might have heard about the TechSmith Software Company and the Snagit screenshot tool is one of their products. With this tool, the user can add comments on the screenshot taken. Some of the key features of Snagit include: a preview window with a cursor hovering, the images can be edited with special effects, a quick toolbar to capture the image, recording a video and share it via email, etc. This app helps in taking the screenshot of the whole screen of your computer too.

    Thus it is one of the best screenshot tools in the market .

    Snipping Tool

    This is a default tool on your windows that helps in taking a screenshot in a rectangular form and can also add any notes you want. You can also highlight any sentence with colors or you can strike off any words using the font colors.

    All the screenshot taken can be saved in PNG, JPEG, and GIF format and once the image is captured it is copied automatically, helping in pasting it as you require. With the help of the snipping tool, you can take the screenshot in 4 modes which are: free-form snip, window snip, full screen, and rectangular snip. It is one of the best windows screenshot software .

    Skitch

    Skitch is a screenshot tool of the company Evernote that has been crafted for windows and Mac. This freehand screenshot tool comes with the feature of marking the areas blurry that you do not want to be visible in the image. I find this feature quite useful so that if you want any information on the image like a word or a phone number cannot be visible to any other person to whom you share the screenshot.

    Some of the other features like adding a comment on the image, uploading the screenshot in a mail, highlighting, etc. are available. Skitch screenshot tool can be used in both computers and smartphones and all the editing options come under one menu, making it easier for the user to perform the activities.

    Greenshot

    Another screenshot tool called Greenshot is a free and open-source program designed for Windows OS. You can take a screenshot with this app very quickly and easily. A full-screen window can be captured by scrolling the page and you also get a chance to highlight and annotate. One of the advantages of using the Greenshot tool is that you can save the captured image in a different format and can also edit it later.

    The captured images can be emailed or you can even print it directly. This screenshot tool is available in 26 languages which makes this tool stand out among the other tools. Moreover, it also offers several capture modes like capture the last part, capture region, capture window, and capture the full screen.

    Lightshot

    This is a very convenient screenshot tool that is easy to use and can capture the image quickly that can be customized too. It also allows you to select the area you want to capture and in just two button clicks your screenshot is taken. Lightshot tool can be downloaded on your computer and it supports Windows, Mac, Firefox, Chrome, Opera and Internet Explorer. You can share the captured image using this tool and the quality of the captured images are high.

    AZ Screen Recorder

    The primary function of the AZ Screen Recorder is that it allows you to record your screen in the form of a video. It also comes with the feature of capturing a screenshot as well. Editing features are available with this tool. This screen recorder tool does not come with any ads, watermarks or time limits. This screen recorder can be downloaded in your smartphone from the play store.

    Screen Master

    This is one of the best screenshot tools and a photo markup tool for your smartphone that allows you to crop and rotate the images captured. You can add a text on the image, add an emoji and you can even blur the selected portion if you want to cover any area that you require. Other features include several image annotations, a floating button for easy access, full web page capture and many more. The whole web page can also be captured by copying the URL into the screen master app. This app can be downloaded for free and even a paid version is available that removes advertising and other features.

    Screenshot Touch

    For easy and fast access, this screenshot tool called Screenshot Touch comes with an overlay and persistent notification. Features like image cropper, whole web page capture, screen recording, scroll capture, etc. are available in this app. One of the easiest ways to take a screenshot with this app is just by shaking your smartphone. Like a few other apps, this screenshot tool can be downloaded in your android for free or even paid version without advertising pop-ups can be downloaded.

    Super Screenshot

    With text addition, image blur, image resize and many more features, this Super Screenshot Tool can be one of the right choices for you. It allows you to enable the gesture controls that help in capturing the images on your android. You can share the screenshot on multiple platforms and can be downloaded for free. Other notable features include browsing and copying the screenshot via PC.

    Touchshot

    Another screenshot app for android phones, Touchshot comes with unique features like camera preview capture function, screen record, quality settings and in one touch you can take a screenshot. Editing and sharing the captured images can be done using this screenshot tool.

    Taking a screenshot is very simple in this app which means all you have to do is just to touch on the screen to capture what you want. This tool can be downloaded in all Android devices regardless of the device being rooted or not. You can also screen record videos using the touch shot tool.

    These are some of the best screenshot tools for computer and smartphones. Research the possible options and download the best screenshot tool according to your requirements and convenience.

  • Google Keep Dark Mode – Enable / Disable The Night Theme

    Google Keep Dark Mode – Enable / Disable The Night Theme

    Google Keep is quite popular among those who love note taking applications . Have you ever felt there is a need for Dark Theme for note taking apps .Then here we go with the Google Keep Dark mode .

    Enable / Disable Google Keep Dark Mode

    On to the main topic , let us see how we can enable Google Keep dark mode as well as the process to disable Google keep dark mode .

    First and foremost thing make sure you are you have updated your Google Keep app to its latest version .

    As of now Google Keep is not offering the exact black theme for its Dark mode . It rather uses dark grey colour . Also Google keep as of now in its initial launch of dark mode is not completely a dark mode app as many of the ares still uses the old light theme .

    Now if you want to use Google Keep dark mode then follow these steps –

    • First launch to the Google Keep app . And make sure you run on the newest updated version of the Google Keep application .
    • Then Tap on to the settings section of the app .
    • Under the Display Options settings you can find that there is an option given to toggle on or toggle off between Dark theme “Enable Dark Theme “.

    Toggle it on if you would like to use Google Keep on Dark theme.

    It is expected that Google Keep dark theme might get more updates soon with the launch of Android Q . So at that time we can expect to use Google keep Night mode with full features on the dark theme .

    On desktop version to use the Google Keep in dark mode there isn’t any option displayed under the settings as of now . We will update you if there happens any changes in its web version settings . But using a chrome dark mode extension can allow users to enjoy the feel of dark mode to some extend on Google Keep as well .

  • Whatsapp Dark Mode – How to enjoy the Night mode Whatsapp

    Whatsapp Dark Mode – How to enjoy the Night mode Whatsapp

    We may be aware of the fact that there are so many apps that are having its dark mode / dark theme / night mode . Whatsapp being one of the popular messenger service used world wide . This application will also soon release its Night mode . So Whatsapp Dark mode may be a good experience for all its users .

    As of now those who would prefer the WhatsApp Night mode on their phone has some settings option to give you almost similar feel of Whatsapp dark mode on your Whatsapp chats .

    How to use Dark Whatsapp / How to change Whatsapp Background Colour to Solid Colour – WhatsApp Dark Mode

    Let us see how this is possible by analyzing the steps to get the desired night theme on Whatsapp –

    First go to your Whatsapp settings option , for this click on the three vertical dots that you see on the upper right hand corner of the Whatsapp . There you can find the settings option .

    Now you can see variety of options ranging from your profile name to Whatsapp Help . From the so called options pick out the Chats option .

    Now from the Whatsapp Chat settings click on the Wallpaper 

    There you get some option , from that click on Solid Color

    There you can see so many dark colour / solid colors . If you want the rich feel of dark mode then go for the black color . Check the same in preview before setting it .

    Click on the set option .

    This method is mainly for changing your Whatsapp wallpaper . This gives dark mode feel only on your chat page . Don’t worry you will soon be able to use the actual Whatsapp dark mode with its new update roll on.

    In case you want to use Whatsapp Web dark mode then that is possible with the help of using the chrome extension for the dark theme.