Category: Tech

  • Factory reset iPhone without password or iTunes with data backup

    Factory reset iPhone without password or iTunes with data backup

    Security, Safety, Password etc These are not just words but necessity for our life to protect personal things,documents,files and it becomes important for people those who have iPhone or any other phone. Lot of people use password in their phones to protect their data, files, important documents etc. This article will tell iPhone users how to Factory reset iPhone  with backup data? People always reset or fix their setting when they are about to sell their iPhone or iPad for that they don’t want their personal data on it. To safe guard phone data, people restore iPhone to factory setting. The factory restore erases the information and setting on your iPhone or iPad to prevent your any personal data  from being misused. It is really a good way to protect your personal data.

    Factory reset iPhone without Password:-

    Factory reset iPhone  is always a tough decision, as it means all the important data on iPhone will be lost. It is the security measure that put in place to prevent unauthorized access to the private files, but you can always perform a system restore to prevent your data. And this article will guide and provide you with effective approach on how you can Factory reset iPhone without password.

    There are two methods to restore iPhone without password.

    1) Factory reset iPhone without password with Power Button – 

    It is one of the most easiest way to reset iPhone if iPhone buttons are available.

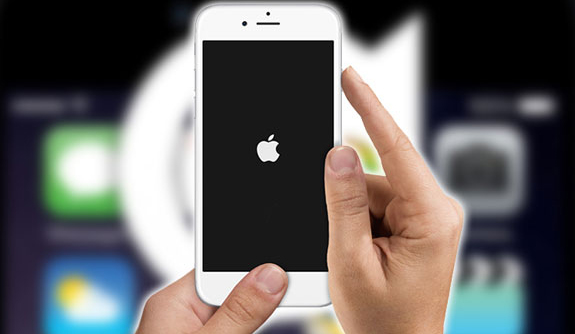
    Step 1 – First thing you need to do is to press home button long (at the bottom) and like wise press the power button (on the top) simultaneously.

    Step 2  Now long press the both buttons and wait till it gets shut down and restart again like wise go on  let it go you see the apple logo appear on the screen.

    Read Also : Cancel / Reverse Venmo payment : When a Venmo payment goes wrong

    2) Factory reset iPhone without password with iTunes –

    This method will help you only if have synced your iPhone using iTunes in the past, and for that you will not be asked again for your password.

    Step 1 – First you need to Backup your data, because all your iPhone data will be removed by a factory reset.

    Step 2 – Now connect your iPhone to your computer with USB cable.

    Step  3 – Install latest version of iTunes on your computer.

    Step 4 – Turn your iPhone off.

    Step 5 – Press and hold down your iPhone home button and connect the other end of the cable to phone.

    Step 6 – Wait until; iTunes appears on the computer screen, and then releases the home button.

    Step 7 – Finally CLICK on ‘Restore button on iTunes’.

    This way you can Factory reset iPhone using iTunes without password .

    Read Also : Venmo User Guide for Safe Transactions – Venmo payment

    Factory reset iPhone with Password:-

    Password can protect your important content from being misused or misplaced.  If you remember your phone password then you can restore your iPhone with the following methods:-

    1) Restore iPhone with password via menu

    If you still remembered you iPhone password then it is well and good as you can access your iPhone successfully. But it could be little bit hard to reset iPhone via menu.

    Step 1 -First Go to setting } General } Reset and select now “Erase all the content and setting”.

    Step 2 – Now click OK button to confirm  your restore iPhone factory setting.

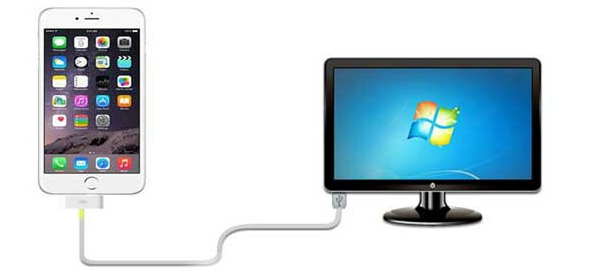
    2) Factory restore iPhone without iTunes

    Without using or synced your iPhone to iTunes you can restore you phone easily. But you are required to follow the step.

    Step 1 – Connect to WI-FI, before backing up you need to connect your iPhone to WIFI, otherwise you won’t be able to restore your phone. You can also use hotspot and other network as well.

    Step 2 -Now go to your setting } icloud and then click on “Backup” button at the bottom. You will see the data of your last icloud backup as well. It might take time to backing up depending on your data.

    Step 3 – Lastly you can restore a backup from your iPhone. Do this by going to Setting } General and find “RESTORE”, And select all “erase content and setting” option

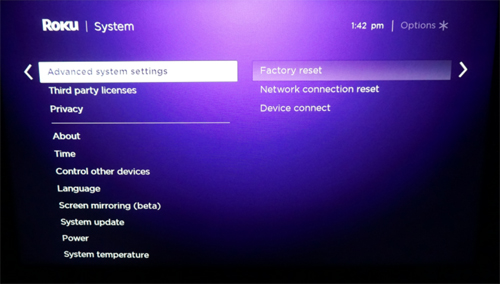
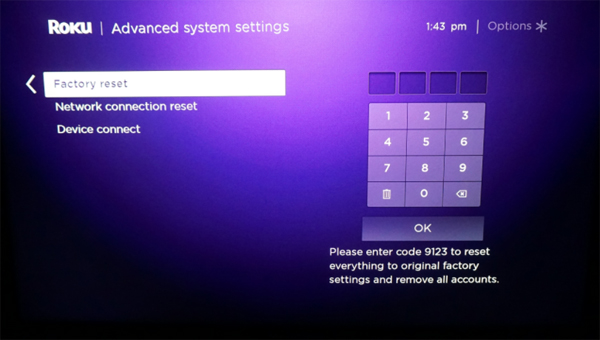
    Read Also : Hard and Soft Reset Roku Manual – Fix Frozen Roku Streaming Stick

    How to hard reset iPhone ?

    If your iPhone is not responding as well as you are thinking of how to hard reset iPhone to the factory setting by erasing all its data and restoring a backup in iClouds and iTunes. You can easily follow the steps below to factory reset your iPhone by carrying out a hard reset.

    Step 1 – Shut down the iPhone normally so that you can reset it again. Hold down the power button long until the slide to power off message appears.

    Step 2 – Now you can press and hold the reset button ( shut down on its own ) and start to restart.

    • iPhone 6S and earlier : power button + home button
    • iPhone 7S and 7plus : power button + volume – down button.

    Step 3 – Continue holding both buttons, Do it for 10 seconds.

    Step 4 – Finally Release the button once you see the “Apple logo”on screen.

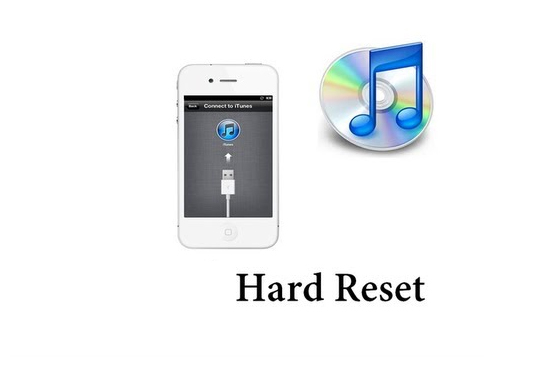
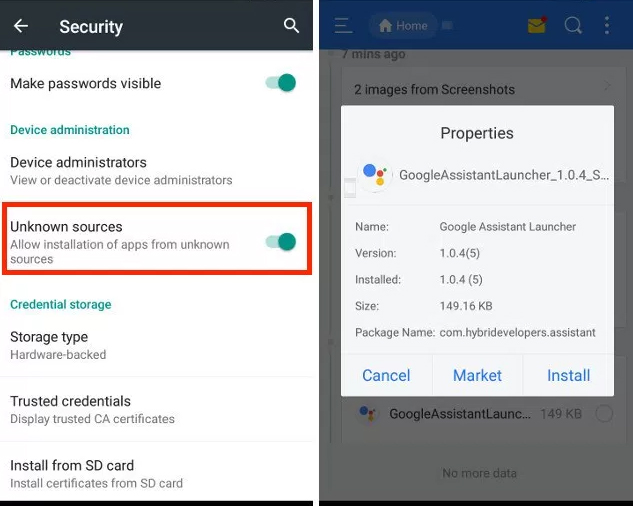
    Read Also : How to Use Google Assistant on Android Devices (Without Root)

    Backup iPhone before Factory reset

    It is good and safe to backup your iPhone before factory reset as as factory reset will clear your iPhone data. So it is better you backup your data from iPhone before factory resetting if you don’t want to lose your data.  It is simple and easy method to use that allow you to select backup and you can also preview and store your data before back up. In 3 steps you can back up your iPhone before factory reset.

    How to backup iPhone

    Here is the steps on How to backup iPhone

    Step 1 – First you need to launch dr. fone toolkit  to backup your iOS data backup and restore on the computer. To connect your iPhone to computer  you need to click on “iOS data Backup & Restore”.

    Step 2 – Now select data type,  once back up is completed the programmer will scan your iPhone data , this process will take few minutes to complete it.

    Step 3 -Finally you can select/choose the content to backup for that you have to Click the button “Restore to device” or “Export to PC”.

    You all (iPhone user) have to know that once you factory reset your iPhone all your text and SMS messages will be deleted  only after a successful reset and new setting of your iPhone. Furthermore the entire data to the third party apps are going to be lost as well. So before factory resetting your iPhone you need to carefully read and understand everything in a very detail. Sometimes in hasty result lead to loss of data.

  • Android: Prevent apps from running at startup(Stop/Disable Apps)

    Android: Prevent apps from running at startup(Stop/Disable Apps)

    Android: Prevent apps from running at startup(Stop/Disable Apps)

    I have been installing too many apps on my Android device(after all what’s the point of having an android if you don’t have all the apps you might need). The device performance became slow and choppy(which make’s me mad occasionally and some days frequently). Digging deep I realized there were tons of android apps(out of a millions i installed) loading at startup and most of them had no setting to prevent apps from running at startup.

    Android OS is cool enough to kill all your low priority background apps and free up your device’s precious memory. Though there is no built in feature to control this there are some solutions that would help you to control or disable already running apps if necessary(“necessary” that is basically the reason you are reading this).

    Luckily there are some good and effective solutions to permanently prevent apps from running at startup.

    Now there are 2 ways for this:

    1) The boring technical ways(for technology enthusiasts)
    2) Completely Automated(install an app for preventing apps to load startup)

    1) The normal unanimous boring technical method(for technology enthusiasts)

    Lets begin the little boring technical way itself . After all a technology related problem should be given a technical solution .

    1st Method: Dynamically Freeze Apps

    There are some Android devices that specially provide a way for you to Freeze apps which is also known as Disabling app though this feature is useful for those apps that came with your device and cannot be uninstalled(if you still remember them).

    You can generally freeze an app with these simple journey of steps:

    i) Open Settings > Applications > Application Manager.
    ii) Choose the app you wish to freeze.
    iii)Select either “Turn off” or “Disable” depending on your priorities.

    Important Note: Options can(will definitely) vary depending on the device you own and version of the Android OS you are running.

    2nd Method: Startup Cleaner

    Again some Android phones have this special feature. The app comes pre-installed. The app runs dynamically when you click on it and prevents selected apps from running when you boot your Android device. Follow these simple steps:

    1) You can find it by searching in your Android phone for startup.
    2) Launch the app and tap the minus (–) symbol next to all the apps you do not want to run at your startup.

    If android failed to boot you can also fix it easily.

    Important Note: You would just want to disable items listed under the User tab. Be sure you know what you are doing if you disable items under System but since you got here I expect you to be with some technical background.

    That is all my friends and Now the selected apps would not run whenever you restart/boot/root.

    Read Also : Best Apple Watch Alternatives-Affordable Gadgets

    Read Also : Best Truecaller Alternatives to find Caller Identity

    Read Also : Best free calling Apps for all Smartphones

    2) Almost Intelligent Apps(Not as much as us Obviously)

    A well designed/developed task manager can easily list all the running tasks on your phone even if they are in background. This includes system process and tasks and foreground running apps(basically everything).

    I personally picked a special list(Just for you my friends) of apps from our beloved Google Play Store which are capable to accomplish this task for you. These apps can control all your running android apps and can even stop or pause current running apps or system apps including process and manage background apps intelligently (Just like your Smartphone).

    Read Also : WhatsApp Exclusive Guide – Everything about WhatsApp Features

    My First Favorite App: Advanced Task Manager

    Advanced Task Manager is special task manager designed to kill tasks(murder them), free memory which speeds up your phone saving battery life and offer just one tap to boost your phone.

    Advanced Task Manager’s BoostIt can kill selected tasks while monitoring CPU lagging apps also optimizing your Android apps. It auto kill’s tasks on almost every screen off. All this while showing battery life and cleaning & boost device memory.

    Read Also : Safeguard Facebook Pictures-Prevent profile picture downloading

    My Second Favorite App: All-In-One Toolbox (Cleaner)

    All-In-One Toolbox is a special Android cleaner and memory optimizer app equipped with as many as 29 Android system tools. It is designed to clean up junk files and boost memory, protect private info and speedup your Android with just a one tap on cleaning and process killing.

    It can help you to disable running apps from system boot making your system run fast and boost speed up. All this by killing running tasks whenever device slows down or freezes(so it itself run’s in start up). It can disable unwanted startup apps from system boot and keep Android device running at optimum speed.

    Read Also : Improve The World With Smartphone -Top 10 Hacks

    My Third Favorite App: Smart Task Manager

    Smart Task Manager is an all in one system app which can manage many different Android tasks, Application, SD card, Device and System Information in one single shot. This app can display list of service, background, empty applications and service process and this application show’s you the detailed information of any particular apps like restricting process, boot, delete and some more detailed information including execution of application, update, data usage, evaluation and other details.

    Read Also : 10+ Best Alternatives to Whatsapp you will love this year

    My Fourth Favorite App: Startup Manager

    Startup Manager basically aims at either disabling or enabling startup items from system boot. Android devices which includes most smartphones and tablets can be utilized to see all the system processes that start with main Version of boot from system tabs(better try not to mess with them since it could be potentially harmful). Some processes may not seem necessary to start due to our normal natural using habits and preferences.

    You can simply check and uncheck the processes if and only if you know well about the after effects of disabling them because this app can analyze and monitor all android services (containing many of the user applications along with android processes) in the foreground and can easily stop any apps from getting auto started at your device’s boot.

    So concluding all these researched pieces of precious information and all the required information given above I would like you to have the required details. Once you’re done, then experiment any of the apps since they all pretty much do the same things in this case. Though do not mistake to take apps for granted since they could cause some serious damage to your phone. So be wise and keep sharing.

  • Hard and Soft Reset Roku Manual – Fix Frozen Roku Streaming Stick

    Hard and Soft Reset Roku Manual – Fix Frozen Roku Streaming Stick

    Hard and Soft Reset Roku Manual

    Over years, we have been listening to music on devices like tape-recorders; have been watching movies on cassettes, which then evolved to what we called the ‘Walkman‘, which was portable. As years passed by and we entered the millennium-2000’s, we were fascinated to have the Media players- MP3 players. There has been a high competition among makers of these portable players- Philips with Audio-Video media players, Apple with their iPods, also   other companies like Touchmate. In recent times, certain companies have introduced set-top boxes where they can use USB drives to play movies. Another transformation in these digital media devices, wherein Streaming sticks came into existence.This article will mainly explain on Hard and Soft Reset Roku .

    What is Roku?

    Roku is a streaming media player, wherein the content is taken from the Internet and is displayed on the TV.      Roku has different models, with unique performance and features. All the models of Roku have access to more     than 3500 channels. We shall now see some general features of Roku models:

    • Full 1080p HD support
    • Shortcut buttons on the remote for popular channels, e.g. Netflix, Hulu, HBO GO, etc (buttons change by         the model)
    • Search across multiple content providers
    • Mobile app available for casting personal media to your TV and providing remote capabilities
    • Ability to use the app in locations wherein Wi-Fi has to be logged in places like hotels and dorm rooms

    Roku Models:

    In this section we shall have a look at the different models of Roku. These models have the features of less    expensive ones, unless it has certain unique additional features. Roku has a PDF Comparison chart, giving a      quick review of differences among these models.

    Roku Express/Roku Express+- Price $29.99/$39.99: 

    These are the base models and hence do not have the advanced features like others. However, Express+ has an added advantage of being played even on non-HD TVs. It also has an advantage over other streaming player rivals- Fire TV, Apple TV, Chromecast. 

    Roku Premiere: 

    The price of the Roku Premiere model ranges from $79.99. Its features are better than Express+ in different ways. For instance, it works on Quad Core processor dual band wireless connectivity of 802.11 ac.  It has an effective support for 4k videos. There is a Micro SD card slot for additional memory storage for additional apps and games if the box runs out of space. It supports screen mirroring from compatible PCs and mobile devices. A unique feature that makes the Premiere model to stand out is that it has a Night listening mode, which enables in enjoying even at night without disturbing others.

    Roku Premiere+-Price $99.99:

     Here are the advantages of this model over Premiere, Express+,Express  and other streaming sticks. It supports HDR video. It has an Ethernet port. It has a more complex remote control (but not so advanced as the Ultra model):

    • It includes a headphone jack, so the streamed content can be enjoyed without disturbing others
    • The remote need not be directly pointed to the Roku player as the Streaming stick censors the signal. 

    Roku Ultra- Price $129.99: 

    This is the most advanced model of Roku, supporting both 4K and HDR        videos.  The only lagging feature of this model is that the features are available only to those having 4K            or HDR TVs, and the streamed contents are available only in 4K/HDRs.

    There are a few added advantages of the Ultra model-

    • It comprises an Optical Out audio port to connect to home theater systems.
    • Presently the only model with a USB port to attach to a device to play your personal media files.
    • It has an improved version of remote providing voice search and has gaming buttons.

    What is Roku Used for?

    1. Streaming Videos:  What makes Roku different from other media players is its incomparable number          of channels offered. By ‘Channels’, in Roku is defined as what is called Apps. There are over 2500 channels     in the public database, with a few top ones for movies and TV programming- Netflix, Amazon Video, Hulu, Google Play, HBO GO/NOW, PBS, Lifetime, YouTube, WatchESPN, WWE Network, etc. They also offer a     few popular channels for children; news, educational,fitness,food and a few other categories of videos; other   set of providers like ACORN TV(British series), Crunchyroll(anime) and so on. 
    2. Listening to streaming audio: Roku also has a good set of music services too, such as Amazon Music, Pandora, Spotify, iHeart Radio, and Sirius XM.
    3. Play Games: Roku has a great collection of free as well as paid games, in which the popular ones are      Angry Birds, Sudoku, Toons and so on. If one wishes to play on Roku. there need to be an extra storage   capacity included in model 2,3 and 4 models having a Micro SD card slot.

    Read Also : Kindle Fire Silk Browser Alternatives

    When should you reset Roku?

    Before taking you to the methods of Hard and Soft Reset Roku we will

    Roku is quite compact, replacing the usual cable TV and can be placed in the palm of your hand. It can be really         a useful device if one wishes to enjoy playing movies with the TV connected to internet. It   streams the video      through sites like Youtube, Netflix and a few others. However, like every device, Roku too has some limitations.       It does get stuck sometimes. When such situation occurs, like when Roku hangs, we need to reset streaming  stick, and the best option is to Soft Reset. If Soft Reset does not solve the issue, Hard Reset is done on this streaming stick.

    So now we will detail you the guidelines to Hard and Soft Reset Roku.

    Methods to Hard and Soft Reset Roku or Streaming Stick:

    Here are the exclusive methods to Hard and Soft Reset Roku by step by step guidelines.

    Hard and Soft Reset:

    Resetting this streaming stick to factory settings is quite easy. However, the lagging point is that one needs to           log in to all the accounts once again, its guiding manual is so informative like no other product could have, when      in difficulty. There are 2 basic methods to reset Roku Box or streaming stick-Hard and Soft Reset Roku

    Soft Reset Roku: 

    Assuming the navigation through Roku’s menu, reset the factory settings:

    1. Navigate to Settings menu
    2. Choose Advanced System Settings                                                                                                                             

    3. Click Factory Reset                                                                                                                                                                         4. Enter the code                                                                                                                                                                                                                                                                                                                                                                                                             

    Roku provides a code, asking for a combination of button presses. By following the instructions, Roku gets             into the Factory settings in a short while.

    Read Also : uBlock Origin Replaces Adblock plus(Best Adblock Plus Alternative)

     Hard Reset Roku : 

    If all the steps in Soft Reset fail, the ultimate option is the Hard Reset. This is not the most ideal way;                 however if the device constantly has a hanging issue or some problem prevents from using the reset software,       then Hard Reset is the ideal choice.

    • Locate the Reset button on Roku: This button would differ depending on the model of the streaming stick.         Earlier, these Roku boxes required a paper clip or a pin to reset as that in a digital watch. Newer models include the real reset buttons as in the Roku 4  and  Roku Streaming stick. 
    • Hold down the Reset button until the device really resets: Do NOT hold the button till the screen goes dark;    it restarts the device. Instead, hold the button for a few extra seconds until the Roku logo appears on the TV screen. From that point, the setup process can be resumed. If the process is successful, the device is ready to   be played on.

    Why Do We Reset Streaming Stick:

    Roku has become quite popular among youngsters who are movie buffs. It has won everyone’s hearts by its ease       of use, its looks- how compact and portable. However, This streaming stick gives trouble at times when it hangs or freezes. At this point, the device needs to be reset. We have already seen the ways to reset streaming stick–    Hard and Soft Reset. 

     Soft Reset:

     It is used to restart Roku without losing the data or settings.

    • On Remote: When Roku hangs, it can be reset using the Remote by pressing these buttons:
      • Press Home 5 times
      • Press Up 1 time
      • Rewind << 2 times
      •  Fast Forward >> 2 times

    These steps word in all Roku models.

    • On Menus(New models- 4, Premiere & Ultra): 
      • From the Home screen, select “Settings“->”System“->”Power“->”System Restart
    • On Buttons(Older types):
      • Reset button can be seen behind or at the bottom of the device. Certain models require a pin or a     paper clip to press this button
      • To reset streaming stick, press the Reset button and release it after a second.
    • Power Pull: If none of the above procedures work, Disconnect the power cord for 20 seconds and                   re-plug it.

    Read Also : Cancel / Reverse Venmo payment : When a Venmo payment goes wrong

     Hard Reset:

    It clears all the settings and reset streaming stick to factory settings by default.

    • Using Buttons- Older models: 
      1. Remove all cables except Power cord
      2. Press and hold “Reset” button for 20 seconds
      3. Continue holding “Resetbutton unplug the power cord from behind the unit
      4. Release the “Reset” button and re-plug the cords back to the device

    Roku box is reset to factory settings, thereby taking through the Setup process again.

    Guess now you are clear with the ways to Hard and Soft Reset Roku.

    Roku would be chosen as one of the top-rated streaming stick or media player for the next few years until something better comes! Let the youngsters in the upcoming generations get to enjoy every bit of Roku for    watching  movies and playing games in HD version. Let us hope that Roku would have lesser chances of freezing.

  • PayPal Vs Google Wallet : Best Online Money Transfer / Payment System Compared

    PayPal Vs Google Wallet : Best Online Money Transfer / Payment System Compared

    Day after day we come across sales be it retail or online. The newspapers and online shopping sites are flooded with offers which have us drooling over them. Though payment is a hurdle it can be crossed. We have so many secure apps that help us with this problem. Have you been thinking about going cashless? Then do it soon. Going cashless is burden free. The numerous online wallets make your pocket as well as wallets light. This will focus on comparison between PayPal Vs Google Wallet.

    Digital wallet directs to the electronic devices used for making payments. Mobile wallets or e-wallet apps permit you to pay your phone, DTH, electricity bills from your mobile. Make payments to merchants who are listed with the wallet service provider. Money needs to be loaded into these mobile wallets. Linking your credit and debit cards is also possible, though some apps acquire a small fee in some cases.

    Here we’ll have look at PayPal Vs Google Wallet. PayPal as you all know is one of the leading online money transfer services around the world. Google wallet too needs no introduction.

    Before we begin with PayPal Vs Google Wallet , we will see a rough introduction on PayPal & Google wallet.

    PayPal

    An American online payment company started in 2002; PayPal has always been preferred by many around the world. Through PayPal customers can send and receive payments for online auctions, buy or sell goods, and also donate and receive donations. You don’t need to have a PayPal account for doing so. It’s free to download on iTunes and Play Store. The users can start by creating their account on PayPal and then linking their debit /credit cards.

    Read Also : Best Low Cost Fund Transfer Methods An Overview

    Google Wallet

    Google wallet developed by Google is an easy and fast way to send money to others. It was started in 2011 and has now had many add-ons that benefit the common people. The payment system is fairly simple. You can transfer money with just a phone number or email address of the receiver. When you receive money it will be automatically credited to your default payment option as in your debit card.

    Read Also : How to secure bank account from hackers

    PayPal Vs Google Wallet

    Here is the top comparison views on PayPal Vs Google Wallet.

    • While PayPal can be used around the world Google wallet transactions are restricted to the U.S. In 2013 Google merged with Gmail that made sending money through Gmail attachments possible. Even then this facility is available only in the U.S and U.K
    • PayPal need to be connected via website but Google money can be sent through email. You just need to compose an email and attach the amount you wish to send. Both have mobile apps too.
    • Checkout has never been faster with PayPal’s one touch feature. You can finish a transaction fast and secure. You can choose to stay logged in and the security is not compromised.
    • The bank transactions through Google wallet takes place within 3 business working days, whereas with PayPal it will be 5-6 business working days.
    • When you’re buying with PayPal, you don’t have to create an account, whereas with Google wallets you need to have a Google account which may not be a big issue since every person will be having one or wouldn’t mind creating one.
    • Gmail payment charges 2.9% as fee for transaction through credit card while it’s free for debit cards. PayPal also charges a 3% fee for credit/debit card transactions. It’s free to use through bank accounts and wallet balance in both cases.
    • Both have strong fraud protection methods that can’t be hacked so easily. They assure you that your data will be in safe hands.
    • The refund time to claim unauthorized charges differ in both cases. PayPal gives only 60 days and Google up to 180 days.
    • PayPal has a larger audience since it was started way before Google wallet. If it’s only peer to peer money transfer Google wallets is apt but in case of huge businesses people prefer PayPal. That way Google wallet has not made much impact on the minds of the people. Since it has good track record in being the world’s best email service, there are chances that it can catch up.
    • Customer support is a main area people focus on. Being able to reach a help desk and be provided with proper instructions is something every person wishes. In PayPal any problem with the checkout process you can contact them over the phone or email. However, it’s not the case with Google wallets. Here you have only email as the option which at times is a hurdle because clearing doubts over a call is much preferred.
    • Stability is another issue. PayPal’s main motive is in offering various payment modes. Google wallet is considered as a ‘side project’ as it’s only one of the many faces of Google. And the problem with side projects is that they can be called off or taken for granted at times.
    • Businesses on eBay would find PayPal an easier option as its owned by eBay and you don’t need verification. While purchases through Google apps will find Google wallet easier.
    • While there are advantages like the ease of access where you don’t have to search for cash or worry about leaving your wallet at home and easy use by transferring cash with a email id or phone number there are disadvantages as well. The network connectivity will be a concern since all the transactions are done online through the app or website.

    Do not worry anymore about clinking sound of the coins or dirty notes to hold. Digital wallets are here to stay. Hopefully this little comparison will help to decide which is a better service to be used, PayPal Vs Google Wallet. Both have their fair share of positives and negatives.

    Read Also : PayPal Vs Venmo : Best Online Money Transfer System Compared

    Read Also : Venmo User Guide for Safe Transactions – Venmo payment

    Read Also : Cancel / Reverse Venmo payment : When a Venmo payment goes wrong

    These little nuggets of wisdom can help a lot in decision making. Whether you like it or not digital wallet is going to be the new pocket. We should be able to adapt to changes. As these kinds of changes are for our betterment. Everything works according to our mind; if we don’t incorporate the change in our heads we will not be able to accept it. So brace yourself, shake your fears and start learning a thing or two about this technology that will help you in your further run.

  • Cancel / Reverse Venmo payment : When a Venmo payment goes wrong

    Cancel / Reverse Venmo payment : When a Venmo payment goes wrong

    Mistakes are human nature but with technology we learned a word ‘UNDO’ .When it’s connected to money a mistake is so crucial to bear . Suppose you make an online payment to a wrong person then what can be done. So if you committed one such in Venmo then here is the way to Cancel / Reverse Venmo payment.Today,an individual can order a car through Uber,book a room through Goibibo, pay a friend through Venmo with just a 3G/4G mobile phone.

    The ubiquitous access to the internet afforded by laptops,smartphones & tablets has laid the groundwork for many startups .

    How does Venmo work ?

    Venmo carries out money transfers between persons/organizations ,permitting  consumers to pay back people in their contact for any so forth  reason. A linked credit card,debit card or bank account is required to use this service. Besides this, the beneficiaries i.e. the users  can sends money to  friends or receive payments that can then be stored as a Venmo balance for use at a later date or can be  cashed out immediately to a bank account.

    Is Venmo safe?

    A major drawback of being digitised  is that everything goes on the network ,even the person’s personal details, adhar card nos. etc, which can become a threat to someone, if went in wrong hands. Yes,Digitsation brings convenience,but it’s security is also a major concern.

    We know that applications that  are directly linked to one’s bank accounts must be held to the highest security standards . However, in 2015, Venmo became the target of criticism due to security breaches of user accounts. And hence as a result ,it uses bank level security  & data encryption to protect users against unauthorized transactions & allow users to set up a PIN for mobile application access for additional security.

    Read Also : Venmo User Guide for Safe Transactions – Venmo payment

    How to Cancel / Reverse Venmo payment

    When someone sends money to a Venmo user, the amount is directly added to his account balance . Since transfer of money through Venmo is so instantaneous that one can’t cancel a payment once its been made.

    Suppose you transferred a venmo payment to someone else by mistake instead of the actual person. Then you will worried about the ways to Cancel / Reverse Venmo payment.Here you can request to do a payback from the person to whom you transferred by mistake.

    In order to do this you should write to that concerned person requesting a pay back . If you don’t hear back from them or need help sending a charge request,contact the support team of Venmo & they will help you to Cancel / Reverse Venmo payment.

    When you contact Venmo support team to Cancel / Reverse Venmo payment, please be sure to include the following details to expedite the process:

    • Username of person to whom you sent the funds
    • Amount of payment
    • Date of payment
    • Username & phone number of person to whom you were about to pay

    Read Also : Credit Card Debt Myths – Top 8

    Some simple steps to Cancel / Reverse Venmo payment:

    You can Cancel / Reverse Venmo payment easily .

    Cancel / Reverse Venmo payment If you paid the wrong person:

    1. Open the Venmo app.
    2. Tap the Send/Request icon at the bottom right corner of the app.
    3. Search for the person to whom you accidentally sent money.
    4. Search the person’s name in the currently searched list.
    5. Type the amount to be sent,next to the dollar sign.
    6. Leave a message into the message box,mentioning what it is meant for & to whom(optional).
    7. Click “Request” icon.
    8. Click” Confirm Request” icon.
    9.  Set a reminder,so that you can be notified.
    10. Approach  Venmo help centre, if your request is not accepted.

    Cancel / Reverse Venmo payment If you paid someone who doesn’t possess a Venmo account :

    1. Open the Venmo  app.
    2. Click the menu icon.
    3. Choose “Incomplete” icon.
    4. Click” Payments” icon.
    5. Click “Cancel” icon near the payment. By doing this the entry will be removed from the list, and the money will be refunded to the card or account from which it was sent.

    Read Also : Exclusive Nest Egg building guide for painless millionaire dreamer

    How to secure a Venmo Account:

    As we all know,evolution of technology & its increasing applications in our day to day life had made life easier & convenient .

    Just with a click of button, we can carry out all important banking transactions ,pay our bills,can do important business conferences/meetings through Skype, can interview for job also & even with the introduction of MOOC’s one can learn any skill/subject of his interest at his residence only.

    But,in the case of carrying out financial transactions & other banking processes, we are a bit more concerned about security of that service provider,since its linked to someone’s personal details & monetary savings. With a single loophole in the service, it can become a threat to a consumer .

    So, let us learn here ,how to secure a Venmo Account from thieves,hackers & snoopers :

    1. Create a Very strong password & immediately log put of the app,when not in use.
    2. One can add a two step authentication like a password with a pin or some pattern etc.
    3. One can set a not to easy detectable authentication to the phone also,in addition to Venmo,so that an unknown can’t access your phone without your consent.
    4. One can set his account’s settings to “privacy”.
    5. Twice check whether you are sending money to the right person/company.
    6. Timely keep an eye on notifications.

    Overview about Venmo security & service:

    With the recent introduction of Venmo’s Multi-factor  authentication feature, is now more secure to use , it automatically adds an extra step authentication to the user,when you attempt to login from a new device.

    It will send an OTP to the registered phone no. of the user & only after submitting that OTP, you can access the account.

    This feature is designed to maximize security while continuing to provide a quick and easy sign in experience to the users. If you have any query, you can contact Venmo team or can approach the help centre.

    So this is the overview of Venmo online payment and its security along with methods to Cancel/Reverse Venmo payment & Venmo account security tips.

  • Venmo User Guide for Safe Transactions – Venmo payment

    Venmo User Guide for Safe Transactions – Venmo payment

    Gone are the days when you shuffle your pockets for cash or run frantically for a cheque or DD to be cleared for transaction. Now it’s the time for Venmo, a mobile payment app where you can transfer money on the go. So this will be all about making you familiarize with this mobile payment , in detail a  Venmo user guide.

    WHAT IS VENMO?

    “Necessity is the mother of invention”. Same was the case with the founders of Venmo. Started out in 2009 by two friends, the idea of a digital wallet came up when one of the two friends forgot his wallet on a trip. The tension and hassles that followed led them to create Venmo. It’s a mobile wallet that helps the masses to transfer money to each other through the website or the app.

    HOW DOES VENMO WORK?

    Venmo works like a virtual bank. Thus the working of Venmo is too simple .Users can connect to Venmo through their Facebook profile or create a new account in the Venmo app. They can link their bank accounts, debit or credit cards or use their Venmo balance for transactions. A 3% fee is charged for each credit card transaction while it’s free when done through bank or debit cards. Venmo will first use your venmo balance, In case there is a shortage of funds the app will automatically retrieve the remaining amount from the bank or card linked.

    HOW TO TRANSFER MONEY USING VENMO?

    If you want to transfer money using Venmo then it is very simple as the normal transaction.

    On the top right corner of the screen is a pen and paper icon. Click on it to get a payment and request form; fill the necessary amount and details and. You can decide to pay one or many friends the amount with a note. Once done select “pay”. If your requesting for money click “charge”.

    HOW TO ADD DEBIT/CREDIT CARD ON VENMO?

    It’s the same method as all websites.If you want to add debit/credit card on venmo then follow these simple steps.

    Click on “Add debit/credit card” and provide your card information.

    If using Venmo app:

    1. Tap the drop down icon on the upper left corner of the screen
    2. Go to “settings”, click “Bank & Cards”
    3. Click “Add Debit/Credit card” and provide the card information.

    Once completed you can set a primary funding source from Settings

    “Bank & cards”

    One important thing to keep in mind is that 3% is charged for credit card transactions while for bank and debit cards it’s free. The processing fee is generally applied for all credit cards.

    Read Also : Pros and cons of credit cards – All the Hidden Facts on Credit cards

    Read Also : Purchase without credit card top hacks

    IS IT SAFE TO USE VENMO?

    Security and privacy are two main points that tops our checklist during an online transaction. It is quite risky to provide bank and card details on an app at a time now when there’s a lot of hacking happening. However, if you have checked their app they have mentioned the precautions taken such as: data encryption, encryption and storage, account protection. As a safety measure always monitor your accounts and opt for notifications/alerts. With proper privacy settings Venmo is safe to use.

    Read Also : How to secure bank account from hackers

    Read Also : Safe Online transactions Tips & top 12 safe online transactions methods

    PROS AND CONS OF USING VENMO

    Like the two sides of a coin every man-made material has a good and bad side to it.

    The pros of Venmo are that it is free to use, easy and friendly in terms of understanding the app. It is a fun way to pay friends or contacts in the list with quick payments. You can also split the bills with friends while on an outing.

    The Venmo cons or the disadvantages include questionable security claims along with transactions to be made through an email ID which is unsafe considering hacking while the details are open. Transaction takes up several days though you pay 3% fee for credit card transactions. The transfer limit is restricted and does not work outside the US. Once a payment is done, it can be cancelled and there is no seller and buyer protection. Thus it is avoided for goods and services.

    HOW TO CANCEL A VENMO PAYMENT?

    Once a transaction is done the amount is available in the venmo account of the other person to use. While you have no way to cancel a wrong payment in venmo you can send a request for the money back. The only exception is if it was sent to an address or number that’s not signed up on Venmo.

    You can send reminders. If you still haven’t heard from them after a day or two contact the Venmo support team will help out. Though this is a disadvantage for sellers, Venmo has the option of cancelling a venmo payment.

    HOW TO REVERSE A PAYMENT?

    A completed payment means the amount as reached the receiver. The only time when a payment is reversible is if the amount is still in Venmo systems. The support staff at Venmo can reverse it only with the recipient’s permission.

    Few details you need to provide the support staff to reverse Venmo payment :-

    • Username of the person you sent the funds
    • Amount sent
    • Date it was sent
    • Username and phone number of the person you originally had to pay

    HOW TO USE A CARD ON VENMO?

    We have discussed above how to add a debit/credit card to Venmo. Once the card details are added you can set the primary funding source for all your transactions. Go to settings  –>    Banks and cards –> Add card.

    Conclusion

    Depending on the features and feasibility many would suggest Venmo is more user-friendly since we live in a digital world. Nonetheless PayPal has its own set of followers. Venmo is easier to use for peer to peer transactions and Paypal is better for person to business transactions. Venmo, as an App is easy to use and a very friendly app. Any common person can use it if you have a smartphone and a valid email ID since the transactions are done through email.

  • How to Use Google Assistant on Android Devices (Without Root)

    How to Use Google Assistant on Android Devices (Without Root)

    Google Assistant is the latest iteration of Google which is just considered as an upgrade or extension of Google which is designed to be personal as well as an expression of google’s existing  “OK Google” voice controls. Using Google Assistant on Android Devices will make you learn that the Google Now features smartly pull out relevant information for you. The Google assistant knows where you work, knows your meeting locations. travel plans of yours, a sports team you like, and what interests you. This whole data is being presented to you in the cards and through the reminders on the Android devices.So most of them prefer to use Google Assistant

    This article will mainly focus on the different methods to get Google Assistant on Android Devices (Without Root).

    Best Things Google Assistant can do:

    The Google Assistant is getting smarter than the Google Now. It not only supports more than one language but it also will soon feature more robust third party integration, which can help you to control your digital life thoroughly not just of your Google life! Assistant is just similar to the Google now and in this, you can ask the questions and answers. The Google assistant works on the wide range of Android devices which runs on Android  6.0 Marshmallow and 5.0 Lollipop.

    Unlock your Pixel: The Google assistant responds to your voice when the screen of your device is off, but if have put PIN or Fingerprint to unlock, then firstly you need to unlock the device. Use the Google Assistant’s voice command to unlock your device. Just go into the Google Assistant settings, select OK Google Detection followed by trusted voice.

    Open apps with your voice: If you want to see your latest Google+ notifications while eating. You can just say, “OK Google, open Google”, and you can see Google+ opened. Now you can use this command only to open other apps or any third party apps.

    Image Search on Google:  If you had a hard day at work than what’s better that pictures of the baby animals to boost your courage. You can ask your google assistant to perform Google image search of baby animals and hence you will feel better within some time.

    Gives advice where to Eat, Drink, Dance or shop: Suppose, it’s Friday night and you are even out with your friends but clueless where to go for dinner or dancing. For this Google Assistant can help: with the help of its nearby feature, you can easily find out the places. The Google Assistant also offers the list of the restaurant names with its star ratings, and you can tap on listing to get the address and directions.

    Read Also : Best Apple Watch Alternatives-Affordable Gadgets

    Cue your favorite Netflix shows and movies: If you want to enjoy a new movie or just an old TV show with your family, you can just ask Google Assistant to start streaming your show.

    Read the news for you: Delivering the favorite news on daily basis is one thing but, the Google Assistant read the news for you each morning. For this only tap up the software button and then, the popup came with the question “How may I help you?” say, “Good morning.” It will reply with personalisation “Good morning” and just give you the weather in your city, as well as latest as reading latest news from customized news sources.

    Tell about the daily emails and appointments: The Google Assistant can easily draw the information from another application and services such as Keep, Calendar, and Gmail so as to provide the information at a moment’s notice. If you are being scared that you have missed yesterday emails, you can ask Google Assistant “Did I Miss any emails from yesterday?” and moreover the assistant will pull up the emails unopened.

    Jog Your Memory: Sometimes it happens with us that we forget little things such as the place where the car is parked, or where left car keys or wallet. But for the Google Assistant, it is very easy and you can take the benefit of the digital helper’s ability and set reminders. For this just say “OK Google, remind me that my car keys are in the kitchen on the counter,” and thus it will help you to recall when you ask again.

    The Google Assistant is the best voice assistant available in today’s time. This has been better than other voice assistants such as Siri and Hound. It has the capability to carry out the long conversational dialogues. Today with this article I am going to share how you can install and use Google Assistant on your Android devices without rooting your device.

    That’s about how google assistant is really an assistant for your day to day life . Now moving to the main section of the article and Here will discuss the methods to use Google assistant for lollipop , Marshmallow and Nougat without rooting.

    Read Also : Record iPhone iPad Screen on Windows & Mac

    Google Assistant on Android device without rooting on Lollipop:

    For the Lollipop device, I will discuss different methods which you can use to install Google Assistant on your device. The methods which, I am going to discuss will work without rooting the device.

    Here we will discuss ways to use Google Assistant on Android Devices (Without Root)

    Read Also : Kindle Fire Silk Browser Alternatives

    Get Google Assistant Via APK File:

    Here is the way to  use Google Assistant on Android Devices via APK file this is for your Android lollipop device to access google assistant.

    1. Download Google Assistant APK and ensure that you have allowed installation of the apps from unknown sources by going to Settings>Security.
    2. Launch the app and go to “Your Stuff” and click on Add Reminder. (Note: Just make sure that your Google is updated to the latest version)
    3. Make Google Assistant your default voice input method. For this, go to Settings- Language & Input>Voice Input >Enhanced Google Services
    4. Back to the home screen and long press the home button and make Google Assistant default voice method and enjoy the things provided by it.

    Read Also : uBlock Origin Replaces Adblock plus(Best Adblock Plus Alternative)

    Get Google Assistant Via Nova Launcher

    If you find that APK file method is not so soothing then you can use Google Assistant on Android Devices via Nova Launcher . This is also the best method to get Google assistant on Android without rooting.

    1. Install Nova launcher on your device and add activity shortcut on the home screen and just set it as your default home screen. Now install the Google Assistant APK  by following the steps given above in APK file previous method.
    2. Long press on home screen and just open widgets panel and add activities in Nova Widgets.
    3. The page of activity afterward will be opened, you can scroll down and find Google Assistant Launcher, just click on it and then you will get two option, select the one with Assist in subtext.
    4. Once the shortcut creates, you can click on it to launch Google Assistant app and add a reminder by making Google Assistant your default voice input.
    5. For making the Google Assistant your default voice assistant long press home button.

    Get Google Assistant Via Activity Launcher:

    1. Download and open the Activity launcher app
    2. Click on the recent activities in the Header section and select all activities by opening the app. Wait till all the activities are loaded
    3. Scroll down on all activities and search for Google App. Click on Google app and expand all activities available
    4. Click on it & expand it, and then select com.google.android.apps.gsa.staticplugins.opa.hq.OpaHqActivity.
    5. You will get the Google Assistant explore screen where various actions are available such as Search, Ask me Buddy, Song Explorer, etc.
    6. Now tap on your stuff in the Header
    7. Then, click on Add Reminder to Open Google Assistant
    8. Lastly, complete the hotword setup process. Teach it to recognize your voice, and you’re done! Access the Google Assistant now by saying “OK Google”.

    This way you can get Google Assistant on Android Devices on lollipop without rooting .

    Read Also :The ultimate guide to make Windows run faster (Boost Computer Speed)

    Google Assistant on Android device without rooting for Marshmallow and Nougat:

    You can get Google Assistant on Android Devices like Marshmallow and Nougat without rooting by simply following these steps.

    1. Download latest Google APK from any website
    2. Download latest Google Play Services
    3. Enable to install the applications from unknown sources by going to Settings
    4. Install both APK’s you have already downloaded
    5. Visit settings>apps>Google App> storage> manage space >clear all data then, go back and clear the cache from device
    6. Restart the device
    7. Launch Google app from app drawer by long pressing home button
    8. Follow on-screen instructions
    9. Swipe left-hand menu in Google app and click on settings
    10. Then, tap on the Google Assistant settings and enable Assistant.

    This way Google Assistant on Android Devices like Lollipop , Marshmallow and Nougat without rooting is done easily .


  • The ultimate guide to make Windows run faster (Boost Computer Speed)

    The ultimate guide to make Windows run faster (Boost Computer Speed)

    When you buy a new laptop or a PC, it seems to start up quickly in the beginning. But after some time when, you install it with some games or apps and fill the hard drive with music, documents, photos, it slows down and takes minutes to start up. There are various things which can easily make the Windows slow, but you should be aware of restoring with most of its original speed without spending any money. Here we will discuss the ways to make Windows run faster.

    The ultimate guide to make Windows run faster (Boost Computer Speed)

    If you had a laptop which has traditional hard drive rather than the modern SSD, then it can be well worth spending some time as well as money for buying SSD. It is the single and most effective performance upgrade or most people.

    Not considering the computer hardware, there are many things which you can easily do to speed up windows of your laptop or computer.

    If your computer is running slow, you don’t need to just spend thousand dollars to a technician to fix it, with this ultimate guide you can get some tips to make your computer run faster. This guide is for the ones who look out for the option for running their computers faster. Through this guide, I will explain you step by step for the Windows 7, 8, 8.1 and Windows 10.

    Some steps for Windows 7 to Run it Faster:

    Here is the guide to make Windows run faster especially for your Windows 7

    • Uninstall unwanted programs and services from startup:

    To remove the unwanted programs just type misconfig in the run window, then go to the Startup tab and uncheck the programs as well as services which you did not require during the startup. Do not remove any necessary startup program. This will make Windows run faster .

    • Disable Aero Experience:

    If you want to just improve the performance of your desktop not the appearance than disabling experience in your Windows 7. Disabling it will definitely affect the performance of your PC and you can gain some physical memory.

    Read Also : uBlock Origin Replaces Adblock plus(Best Adblock Plus Alternative)

    • Increase virtual memory:

    The Windows 7 consumes much memory than Windows XP and lesser than Windows Vista. If you are a heavy computer user who used to open many programs as well as windows then you can easily increase your virtual memory of your desktop. Hard disk space will be used as the virtual memory so as to keep the temporary information which is much rarely used by the programs or OS. While increasing the virtual memory of your desktop just make sure that OS is working smoothly.This will speed up Windows 7 Computer . For this step just right click on My Computer, select the properties options, then go to advanced tab and click on setting button which is under performance.

    Afterward go to advanced tab in next window, press change button under the virtual memory

    By going here you will see the current virtual memory size. Virtual memory is also known as page filing. Next, you can make the screen under custom size and enter the size you want to allocate for virtual memory. The size depends on the hard disk size and virtual memory. Just make sure that it is not less than the recommended size of system

    • Disable Visual Effects

    Disabling the visual effects will help you in reducing the load on RAM and VGA. Just go to advanced option again by right click and go to the option of setting the here click on Visual effect and then set it as adjust the best performance. This will bring all visual effects to a standard level and also help to make Windows run faster.

    • Disk Clean Up:

    Just remove the unwanted and temporary files from the disk of your Windows 7. This will further reduce the access time on the system and your files to make Windows 7 run faster.

    For this step, you need to go on each disk and then right click on it where you will get the option of properties and then click on the disk cleanup button.

    • Defragment disks:

    The defragmentation helps in improving the access time of all the files by managing free space and arranging the locations of the files on the disks. It is generally advised to run the defragment tool frequently when you have a lot of data on your computer. For defragmentation step, you need to go to properties, of each disk and then select the defragmentation under each tool and start. The defragmentation runs according to to the size of partition and data and make Windows run faster.

    • Run error check on the disks:

    Another method to improve the performance of the disk this will check and correct any system file or physical disk error on Windows 7 computer.

    For this step select the error check under the tools in each of the disk with both options selected. If a partition is system then boot or paging file then error check will get started at next boot.

    • Disable side bar:

    If you are not using the sidebar and gadgets in your desktop then remove them as this will help to gain some resources on RAM.This will make Windows run faster.

    • Disable windows defender:

    If you are using third party protection software such as Norton, AVG, MacAfee, etc then just disable windows defender ass it does the same work. So, it is not necessary to use two similar programs same time as it can make system load much. For disabling windows defender visit control panel.One thing you can do to make Windows run faster.

    • Disable user access control:

    User Access Control(UAC) is a window pop up for the administrative tasks that require actions. In windows, 7 UAC does not hamper you such as in Windows Vista but still, to run faster you can disable it.

    • Compatibility of drivers and programs:

    Just make sure that the drivers you are installing have compatibility with your windows. Installing the non compatible driver in your desktop can cause issues with the system performance and sometimes crash your system.

    • Disable Indexing:

    The indexing helps in improving the speed of the Windows search as when you search a file or folder on the Windows, and if that file or folder is already indexed by indexing service results will instantly appear from the indexed cache.  But if you are using the third party indexing search program such ass the Ava Finder or other then disable indexing service. Indexing can be found in the control panel>Indexing>Modify button.

    • Eliminate the applications and utilities running automatically:

    Each program or app you install nowadays has some part of it which runs in the background as well who runs and take up the precious resources that causes speed issues on windows system.

    There are various things which can be managed through the AutoRun, but with this guide, i will explain you some tabs only.

    • Services: Do check out this tab and uncheck each thing which references the software that is not in use. Also, you see some services which are related to the old printer or smartphone you had used once. Just be careful and err on the side of caution and don’t uncheck anything unless you are sure completely that is not in use.
    • Scheduled tasks: This tab shows the program which is scheduled to be run at some specific time. Also, it definitely has some utilities which check for software updates.
    • Internet Explorer: Use this tab if you use the internet on this browser. Remove the plugins from here usually some malware bytes clean this butt you will find some browser bars and other utilities left.

    Read Also : Kindle Fire Silk Browser Alternatives

    Some steps for Windows 8 and 8.1 to Run it Faster:

    If you are worried about the Windows 8 performance or windows 8.1 speed then here is the guide to increase windows 8 speed effectively.

    Remove the junk and duplicate files:

    If an individual is using his laptop for several years then surely it gets filled up with the data in hard drive which results in decreasing its performance. The performance decreases because now your laptop needs to go through all the unnecessary junk file in order to get the required file. The best solution for it is to download the software known ass Easy Duplicate Finder which is much easy to install and work. This software searches all the duplicate files on Windows 8 and 8.1.

    Uninstall programs, not in use:

    Just make sure to uninstall all the programs which you think are not in the use anymore as it might happen that they are running in the background. Don’t worry for this you do not need to download or install much software simply search uninstall on the windows search and select under settings. Afterward, you will see the list of the programs and its sizes. Just scroll down the list and uninstall the program which is not in use.

    Defragmentation:

    The good news is that in Windows 8 and 8.1, you do not need to worry about the defragment as the defragmentation takes place once in a week. If you want to check that defragmentation is taking place automatically in your laptop then, search defragment by tapping on windows button and then click on Defragment and optimize your drives.This helps to make Windows run faster.

    Remove unwanted programs from launch:

    There are various programs which start up when the laptop is being started and the user does not need it. For getting rid of the issue a user needs to press Ctrl+Alt+Delete simultaneously and the select Task Manager. After visiting the task manager go to the start up the menu within task manager where you can see the list of the programs which are being launched during the startup disable the programs which you think are not to be used during startup.This will make Windows run faster.

    Note: You can also try all the steps which are used for Windows 7 and try them as well for the Windows 8 and 8.1 to keep your laptop faster and smoother.

    Read Also : Record iPhone iPad Screen on Windows & Mac

    Some steps for Windows 10 to Run it Faster:

    Here are the tips to run your Windows 10 faster . So this will help to boost windows 10 performance easily.

    Disable program run on startup:

    If you are feeling that your windows id much sluggish them, surely your window is running with various programs to be run in the background which is not in use or been used rarely.

    Adjust Performance Options:

    If you do not care about the look of the windows and want to improve its performance then you can change some settings to adjust for best performance. For this go to control panel and then click on the system and security then click on a system than on advanced system settings then select advanced and finally select settings in the performance option.

    From this performance option, you can easily select and adjust for the best performance to get the most performance. Else you can select the Custom and check fancy windows stuff you like.

    Scan for malware:

    Usually, malware is one of the main reason for the less performance issue in the Windows. there are three tools which can be used to check this issue such as Malwarebytes, Spybot, and Microsoft security essentials, All the tools used for the malware are free to be used and they are best for finding the malware on your computer system.

    Scan for Virus:

    if you have a trustworthy anti-virus package such as Symantec, McAfee, or Kaspersky then just ensure that it is activated as well as updated. if no antivirus is present then install a free AVG anti-virus and scan with it.

    Read Also : WhatsApp Exclusive Guide – Everything about WhatsApp Features

    Conclusion:

    With this guide, you will get the steps for making the performance faster of the computer.This will help you to Boost speed and performance for Windows 7,8,8.1, or 10. You do not need to spend any amount on the technician to speed up your computer now.

  • uBlock Origin Replaces Adblock plus(Best Adblock Plus Alternative)

    uBlock Origin Replaces Adblock plus(Best Adblock Plus Alternative)

    uBlock origin is becoming the best alternative to Adblock plus is a trending talk .

    Nowadays usually most of the individuals browse on the web most of their time and are familiar with the advertisements which are used to drive the site’s revenue. The thing which individuals are not aware is that these advertisements can be blocked entirely using the ad blocking extensions. One of the most popular AdBlock extension used on Firefox and Chrome is AdBlock Plus. This AdBlock blocks all the advertisements on most of the website and is widely adopted to be compatible with most of the advertisements in plugins such as Youtube, video players, and other websites.

    Previously, AdBlock Plus was much demanded by the older machines which required a decent amount of the processing power and memory which multiplies browser tabs and hence the advertisements are blocked. But, this Adblock has some of the flaws i.e. it can not block certain advertisements from some big companies such as Google, Microsoft as they are paid for the advertisement service. To avoid this issue, the alternative has been introduced and one of that is- uBlock origin best alternative to AdBlock Plus.

    What is uBlock origin?

    uBlock is much better AdBlock Plus alternative. This AdBlocker is completely free to download. It is somewhat less resource heavy but is much better than the AdBlock.  If you are using a laptop or an older machine then it is a good idea test it on most ad cluttered websites and you will get the results much well. You can also have a look about uBlock on Reddit and read the comments which are positive. One major flaw of the uBlock is that sometimes it gets much aggressive in blocking ads. Sometimes it might happen that the non-ad pages just loaded blank. So as to avoid this issue you may simply click the icon in the browser and then, click on the Power button to turn it off for that site.

    uBlock origin vs Adblock Plus:

    The open page interface of the uBlock Origin is minimal and it only provides ad blocking toggle and some stats. The icons show on the websites allows the users to inspect the page element and thus request logs but most of the time these all the functions are extraneous and none of the use for the common individuals.

    While the interface of the AdBlock Plus is much larger and eventually give more detail by default and as well offer the sharing option.

    Due to this difference, the advanced user usually prefers for the uBlock Origin’s advanced tools and simple users usually prefer for the Adblock’s plus which has a simple set of functions. The interface cannot illustrate too much difference about both the Adblockers but the options menus of both can easily illustrate it.

    Options:

    The AdBlock Plus offers a simple set of the options which are been based on the filters, whitelists, and whether or not their main button thus appears on each web page you visit. This Adblocker used only one filter by default, but more can also be added at user’s whim.

    An additional note is  “Allow some non-intrusive advertising” button, if you uncheck this box, you can completely block the ads from the big companies also such as Google and Microsoft.

    While the other one is uBlock Origin which offers a set of customization with the ability to block advertisements placeholders which can be spotted around the web by AdBlock Plus users. The uBlock origin remains independent so there is not any way to get any type of the paid advertisement.

    An additional note “uBlock origin offers a large list of the 3rd party filters ” and has much of them enabled by default.

     Read Also :Record iPhone iPad Screen on Windows & Mac

    Other Top Adblock plus alternatives

    Opera:

    Opera is a powerful browser with various great features which make it apart from the competition. This browser is much similar to the Chrome in look and feel. and much easy to be used. The pages on this browser are loaded at competitive speed and is a solid alternative for AdBlock. This is one of the best adblock plus alternative.

    Ghostery:

    This is a browser extension which is installed millions of times by the users. This extension has a flaw regarding what they do with the data but this will surely keep most of the ads out of sight. The extension is completely free to be downloaded.

    Disconnect:

    This is a tool which allows the users to browse the internet safely. This tool displays their recommendation prominently on their website and can be downloaded free.

    Privacy Badger:

    This is a Chrome add-on which can help you to be safe while browsing on the internet. It is free to be downloaded and can easily block the ads as well as adverts and trackers by aiming to get the interest or to get information in some form. This is also a top adblock plus alternative .This add-on keeps the track of the adverts as well as content which usually come from the same source or company and eventually block the ads which keep following you from site to site.

    Read Also : Kindle Fire Silk Browser Alternatives

    Advantages of using an ad blocker:

    Speed up Web Browsing:

    The ads on the websites take up the biggest chunk of the data to be transferred as well the video ads and animated ads tend to take up most of the CPU resources. The worst ads usually start grating the audio in the background and hence puts a strain on the bandwidth. The AdBlockers which used to block the ads not only hide the elements but they also effectively avoid transferring them from servers. These adblockers can save you hundreds of megabytes in months and hence can increase the speed of the web browsing.

    Safety and Malware Concern:

    Do you know that your laptop or computer get malware from ads? Most of the time Ad networks are hacked or infiltrated to serve as manipulated ads in a practice called malvertising. These ads are been served on the various websites due to which the attackers easily spread up their malware to hundred or thousand of the victim PC’s within minutes. To avoid such situations AdBlockers are been introduced which provides complete safety about the malware concern.

    Read Also : WannaCry Attack Security Tips- Protect computers from Ransomware

    Privacy:

    One of the major concern of the individuals is privacy when it comes to ads due to which they choose adblockers. This is one of the best advantage of using the adblockers.

    Conclusion:

    Blocking the Ads is just one thing but it much important to keep the personal information much secure. The privacy provided by the internet sometimes tend to be murky enough thus it is necessary to take the precautions to stay safe, Taking the precaution before the trouble can be helpful as it helps in keeping the offenders away.

    Basically, there is not much difference between the uBlock Origin and AdBlock Plus. Only the uBlock Origin offers greater capabilities of customization by using fewer system resources but still, AdBlock is perfectly fine at its function. If you just want to use a much powerful AdBlocker or the AdBlocker you have is using much processing power then you can switch to the uBlock Origin. Well, AdBlocker still offers the goods and acceptable ads platform which is just not the worst thing in the world and is ideal for many users. If you want to make the change you can find many alternatives here in the article you can just switch according to your requirement.

  • Kindle Fire Silk Browser Alternatives

    Kindle Fire Silk Browser Alternatives

    The advancement in the computer technology has changed the way of the individuals interact with others. Computers are much powerful with different functionalities but they offer convenience in our daily life. Let’s take an example earlier the individuals who enjoyed reading just has a limited resource of book or newspaper but nowadays individuals get various options for reading through the online version such as magazine, book, newspaper, and much more. These all online version can be read using a computer or electronic reader such as Kindle Fire Silk browser or Apple’s iPad. Nowadays people are searching for the Kindle Fire Silk Browser Alternatives as silk browser is slow and has some security issues. Security is a big issue in this browser ass usually the individuals always interact with the Amazon clouds and never can interact directly with the secure websites.

    What is Kindle Fire?

    Kindle Fire is one of the popular tablet computer which is developed by Amazon and built with the Quanta Computer. Firstly, Kindle Fire was released in the month of November 2011, featuring a color, multi-touch display of IPS technology and running on a custom version of Google’s Android OS known as Fire OS. Next Kindle Fire HD was released in September 2012 and next Kindle fire HDX in September 2013. In the month of September 2014, the fourth generation was introduced with adjectives Kindle was dropped. In September 2015, the fifth generation Fire 7 was released with the sixth generation Fire HD 8 which released in September 2016.

    What is Silk browser and why it is slow?

    The Amazon Silk browser is the web browser which is developed by the Amazon for the kindle fire and fire phone. This browser uses a split architecture in which some of the processing is done on the Amazon server so as to nurture the web page loading performance. Basically, the architecture is based on the Open source chromium.

    Mainly the issue with the Kindle Silk browser slowness is that the default settings are attempting a desktop browser on little 7 which can not use the screen space well. Due to this, the browser is set to the desktop mode and flash is enabled by default. Also with this, the browsers shutter dies, chokes, skips, and generally a pain to deal with.

    As silk browser became slow people started looking for Kindle Fire Silk Browser Alternatives.

    Kindle Fire Silk Browser Alternatives

    As Amazon wants various users for their silk browsers so they have not made any alternative for the browser on the app store.You can just get a way to install google play to take advantage of more browser options. But if you are not technically skilled you cannot go with such a process to install the browser.

    The alternative apps in the list features following:

    • No need of rooting
    • Does not require any additional software
    • Available as an APK file to download from developer official website

    Below are some steps which allow installation of the apps from unknown sources:

    • “Settings” > “Security” > “Apps from Unknown Sources” > “On“
    • “Apps” > “Settings” > “Applications” > “Apps From Unknown Sources” > “On“
    • “Settings” > “More” > “Device” > “Allow Installation of Applications” > “On“

    Here are the Kindle Fire Silk Browser Alternatives and their installation procedures.

    1.Firefox mobile:

    This browser is available as a simple APK which can be download from your kindle fire or any other Android device. This app contains lots of bells and whistles and supports add-ons such as Adobe Flash and ad blocker.

    Some steps to install Firefox:

    • Open silk browser and search for Mozilla FTP
    • Select file which ends with extension of .apk
    • Notification will appear than which says downloading, tap the notification and downloading will gets started.
    • Tap download complete and select install

    This is an all time favourite browser which is truly the best Kindle Fire Silk Browser Alternatives .

    2.Naked Browser:

    This browser is very basic, speedy, and easy to be used to on the Kindle Fire.

    Steps for installing naked browser:

    • Open silk browser and search for the naked browser android
    • Select the link which has a .apk file
    • Notification will then be appeared of downloading, tap on the notification browser will start downloading
    • Select install

    3.UC Browser:

    This is a browser which adapts speed of your connection. this browser usually trim down the web page if a connection is not strong.

    Steps for installing UC browser:

    • Open the silk browser and search for the UC browser
    • You will get the .apk file of UC browser select it.
    • Notification will appear than on top of screen which says downloading tap on it download will be started
    • Select install

    4.Maxthon Cloud Browser:

    This is one of the most powerful browser which you can get on the android device. Most of the users consider this browser fast. This Browser contains all the features which an individual need in a browser.

    Steps for installing the Maxthon browser:

    • Get started with silk web browser and visit www.maxthon.com
    • Then select the link of android and select .apk file
    • You will then receive a notification on top which says downloading tap and gets started with downloading
    • Select install

    Google Chrome:

    This is one of the best browsers for all OS Windows, Mac, or Android. With your Google passwords, you can sync your bookmark tabs, password, recent research, and history on your history. Also, you can use the ignition window if you do not want the browser to record what you browse or what you download. With this browser, Voice search is also available.

    Steps for installing Google Chrome:

    • Open the Silk web browser and search fo the google chrome
    • You will get the .apk file tap on it
    • You will then receive a notification on top which says downloading tap and gets started with downloading
    • Select install

    Dolphin:

    This is the popular browser among all the users of Android. This browser provides free, full featured internet browsing. this browser interface is intuitive and enables a user to sync bookmark, tabs, history & passwords across devices. Thus Dolphin browser is a best Kindle Fire Silk Browser Alternatives .

    Steps for installing Dolphin

    • Open the Silk web browser and search for the Dolphin
    • You will get the .apk file tap on it
    • You will then receive a notification on top which says downloading tap angel set started with downloading
    • Select install
    • Now you have successfully installed Dolphin browser .

    Opera Browser:

    This is a well established third party browser for PC as well as MAC. This browser is being used as the best Kindle Fire Silk Browser Alternatives and its latest version has featured news which notices the content you like and offer more related news. This browser allows a feature of speed dial shortcut, bookmarks, and tabs.

    Steps for installing Opera:

    • Open the Silk web browser and search fo the Opera
    • You will get the .apk file tap on it
    • You will then receive a notification on top which says downloading tap and gets started with downloading
    • Select install

    Top Kindle Fire Silk Browser FAQ:

    Here is the top Kindle fire Silk Browser FAQ to clear many of your buzzing quest.

    How to get an update of these apps?

    If you are installing the app from the app store, you will receive the notification of update but installing outside from app store you will not get any kind of update notification. For this, you need to visit the developer website and check for the latest update.

    Do I need to uninstall the previous version before installing a newer version?

    If you have downloaded the APK file, then you do not have to uninstall the previous version as it can automatically replace the previous version simultaneously.

    Do all these options work on all versions of Kindle Fire?

    Yes, they work on all the versions of Kindle Fire Silk browser which includes Kindle Fire, HD, and HDX.

    I am getting an error while installing via APK file?

    Just make sure that you have installed the correct APK file according to your processor as some are 32 bit while others are 64 bit.

    Read Also : Record iPhone iPad Screen on Windows & Mac

    How to speed up Kindle Fire Silk browser?

    Still you don’t want to switch to any Kindle Fire Silk Browser Alternatives and you just want to speed up your silk browser then have a look at this section –

    Usually to speed up the browsers we just disable the flash. While disabling the flash we also disable the page “accelerate” feature and then just change the browser to Mobile mode. Well, there is just no reason to access the sites on the little 7 screen and end up trying to zoom each and every single page.

    Here are some useful points which can actually speed up Kindle Silk Browser:

    • Open the Kindle fire Silk web browser
    • Click the menu button at bottom of screen
    • Click on the setting button
    • Disable the plugins
    • Uncheck the accelerated page loading
    • Click on mobile view

    It is not necessary to change the browser into the mobile view, it is just recommended. While browsing disabling of the flash and accelerate page loading can just make a big difference. Also, you can change the plugins by allowing them on demand but it actually ends up with many annoying prompts. It is advised to check the YouTube working fine while the flash is disabled.

    Making these changes in your browser will surely make your browser suddenly speedy. Also, you will see the mobile version of various sites which is not a bad thing since everything will be much fast.

    Read Also : Best Apple Watch Alternatives-Affordable Gadgets

    Conclusion:

    If you do not know which browser is best for you, then just try to download all Kindle Fire Silk Browser Alternatives and give them a try. Through this article, you can get the top list of browsers, if you know any other browser just share it in comments so that individuals can be aware and give a try.

    Guess this helped everyone in finding the best alternative to Kindle Fire Silk Browser.