Virtual Reality is the latest rage in the tech market and it is pretty awesome, right? You get to experience other worlds without being actually present there. In the gaming world this is even more awesome, you get some stunning visuals and get to perform your own action. Currently Oculus rift is the best VR gaming headset in the market. Here is a complete Oculus Rift setup guide made with simple step by step guide on How to setup Oculus Rift .
Oculus Rift Setup Guide
Let us take a look at the step by step user manual of Oculus Rift Guide Setup in detail –

To begin with one must have 2 hardware components essentially . First and foremost a Oculus Rift and secondly a computer with support for VR (Virtual reality ) .
Install the Oculus Software
Before doing anything you need to install the Oculus rift software on your device. While it is downloaded and installed you may begin with unboxing and making the connections. This is the first step in the process of
Oculus Rift setup .
In case you can’t download Oculus rift software then you can download Oculus Rift Patch .
Check for the minimum specs :
Running Oculus rift setup requires some minimum specs in your system which are as follows:
- Nvidia GTX 1050 Ti / AMD Radeon RX 470 or better
- Intel Core i3-6100 or better
- 8GB of RAM or more
- HDMI 1.3 output
- 1x USB 3.0 port
- 2x USB 2.0 ports
- Windows 8.1 or newer
Some of the best Oculus games require even higher specs than the minimum requirements but they still run if you have the minimum specs. It also requires proper physical space a minimum of 3 by 3 feet so that you may not knockout something while playing and thus you can play freely.
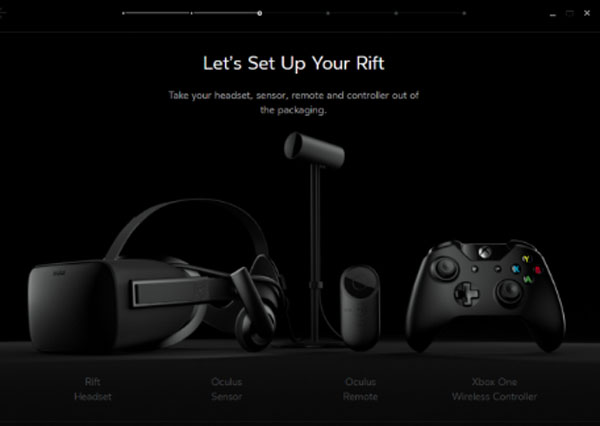
The Unboxing of Oculus Rift
Firstly create an Oculus account on the Oculus software. You may sign up with any mail or may use your existing Facebook account as well. Then take out all the components from the box and make sure to remove all the plastic wrappings since they can be a hurdle for the sensors and the controllers.
Making the Connections –
The very first thing you need to do is connect your headset to the HDMI port in your graphic card remember not on the motherboard. Then connect your headset’s USB cable to a USB 3.0 port on your device (blue in color).
Then connect the USB wires of the two sensors to two USB ports, make sure atleast one of them is 3.0 port. Once all these connections are made you will see a green colored OK on the software.
Connecting Oculus Rift Remote –
Pull out the plastic piece thus connecting the battery. Then simply hold the main button of the remote and it is automatically connected.
Connecting Sensors –
In the software Click on Devices option in the menu then on Configure Rift and then Sensor setup. Now enter your height there.
Then adjust the sensors with your eye level where your headset is going to be. Make sure that there should be no obstacle between the sensors and the headsets.
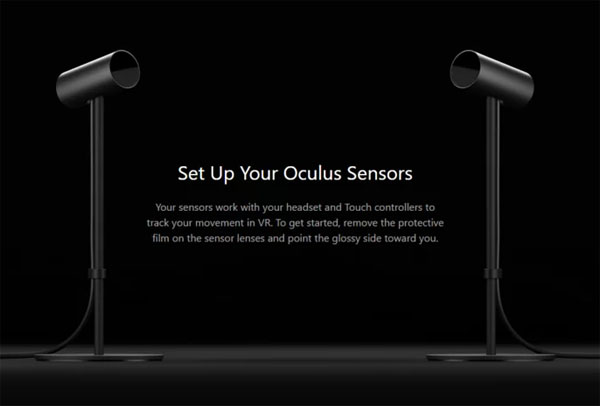
Then move the headset in different directions assuring the connection and once connected you will be notified on the software. Do this for both the sensors.
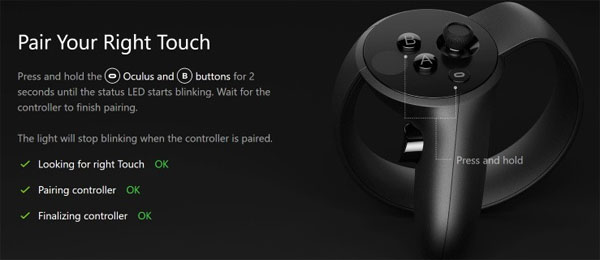
Connecting Touch Controllers –
In the software Click on Devices option in the menu then on Configure Rift and then Add left Touch. There the instructions will be displayed to configure the left touch. Follow them. Do the same for right touch.
Setting up Guardian system –
The guardian system means the place where you will be playing using the headsets. In the software Click on Devices option in the menu then on Guardian System. There follow the instructions to set up the guardian system.
It is necessary since you require proper space for playing, you should not knock out something while playing and you can play freely.
So you can see that setting up the Oculus rift is not that difficult but yeah it requires proper engagement and time. But once done you can play lots of awesome games and enjoy the VR experience. do share with us if you face any kind of problem.
Leave a Reply