We may be aware of the fact that there are so many apps that are having its dark mode / dark theme / night mode . Whatsapp being one of the popular messenger service used world wide . This application will also soon release its Night mode . So Whatsapp Dark mode may be a good experience for all its users .
As of now those who would prefer the WhatsApp Night mode on their phone has some settings option to give you almost similar feel of Whatsapp dark mode on your Whatsapp chats .
How to use Dark Whatsapp / How to change Whatsapp Background Colour to Solid Colour – WhatsApp Dark Mode
Let us see how this is possible by analyzing the steps to get the desired night theme on Whatsapp –
First go to your Whatsapp settings option , for this click on the three vertical dots that you see on the upper right hand corner of the Whatsapp . There you can find the settings option .
Now you can see variety of options ranging from your profile name to Whatsapp Help . From the so called options pick out the Chats option .
Now from the Whatsapp Chat settings click on the Wallpaper
There you get some option , from that click on Solid Color
There you can see so many dark colour / solid colors . If you want the rich feel of dark mode then go for the black color . Check the same in preview before setting it .
Click on the set option .
This method is mainly for changing your Whatsapp wallpaper . This gives dark mode feel only on your chat page . Don’t worry you will soon be able to use the actual Whatsapp dark mode with its new update roll on.
In case you want to use Whatsapp Web dark mode then that is possible with the help of using the chrome extension for the dark theme.
Google was bringing the dark theme / dark mode to most of its applications and websites . Now with the arrival of Android Q nearing its release date . Google has enabled dark mode for different apps . One such we will discuss here is about Google Calendar Dark Mode .
What is Google Calendar ?
It is one of the popular online time management apps for managing your schedules , meetings , reminders etc . Almost we can call it as a e-calendar . But it has more features to offer you other than being a simple calendar .
Now coming on to the point of Dark Mode / Night mode / Dark theme , we have already discussed on what it is .
Google Calendar Dark Mode
To be precise we will take a look at how to enable Google Calendar Dark Mode .
So as usual go to the General settings of Google Calendar in your Android Phone .
( SETTINGS — GENERAL )
Now go to the Theme option in Google calendar settings .
In this you get options to select three themes – Light theme , Dark theme and finally Set by battery saver .
Select Dark theme to turn on Google Calendar Dark Mode .
In case you are not getting this feature on your Android device then try these settings option after updating Google Calendar App .
Go to the Google play-store and update your G-Calendar application .Even after this if its not working out try to upgrade your Android OS . Because this dark mode wide update is mainly focusing on Android Nougat and its higher OS Versions .
In case you want to use Google Calendar dark mode on Web , try to use Google chrome browser and get your browser installed with add-on for dark theme .
In the Android Q operating system , it is clear that the users will have option to switch their phone to Dark theme by default settings . Thus the users who want to use all their apps on dark mode need not to focus on the dark theme settings of each apps.
In case you want to disable dark mode for Google Calendar then work on the settings the same way and in Theme select the light theme .
Dark theme is very good for vision and good for your eye health especially during the night time or during low light period . As well as using dark theme for applications can save your device battery to a great extend .
In the first session of Penetration Testing we have given the basic concept of defining What is Penetration testing and benefits of the Pen test. Now our second section will cover about the Types of Penetration Testing in detail .
Three Types of Penetration Testing
Basically there are three types of Pen tests in existence . They are – White box Penetration Test , Black box Penetration Test and finally Grey box Penetration Test .
Black Box Penetration Test
First we will discuss about the Black box penetration testing and its features. Also about the merits and demerits involved in the black box penetration testing .
What is Black Box Penetration Testing ?
In Black box testing , the black box tester is not having any idea or knowledge about the internal source code or the internal structure . He is just like a hacker who doesn’t have any internal information about the system . He can do the pen test on the system with only the public information that is available .
The black box penetration testers are not given any information about the architectural diagrams that are not open to public visibility . Thus this kind of pen test will help in identifying the security flaws in the system that can be attacked by any of the external person with no knowledge of the internal data .
The black box tester will try to collect as much as information about the targeted network / System . The tester will not examine any of the codes . He will be aware about only the expected outcome not about how this outcome will arrive .
Advantages of Black Box Pen Testing
Now we will focus on the merits of back box pen testing / the advantages of Black box pen testing .
A black box pen tester need not to be an expert , nor is necessary for him to have any knowledge about languages .
Black box tested is supposed to verify the contradictions in the system.
Black box testing usually takes place from the perspective of the user . It has nothing to do with the designer aspect .
Disadvantages of Black Box Testing
As we all know everything has its own merits as well as demerits .So here we will point out some of the disadvantages of the black box testing process.
Difficulty in design is one of the drawback faced while conducting a black box pen test .
In case if the designer has conducted the test , then the black box test will not be worth in actual .
Now on the Types of Penetration Testing , there are two more types left . Next we will focus on white box test .
White Box Penetration Test
The second Types of Penetration Testing is White box Penetration testing . We will discuss what is white box pen testing and its merits-demerits .
What is White Box Penetration Testing ?
In white box penetration test , the tester is given information about the system or its network . The white box tester is given idea about the source code , schema details , IP , OS and almost all necessary information needed . Its generally an attack from internal source itself .
White box penetration testing is also known by different names such as – open box testing , auxiliary and logic-driven testing , clear box test , glass box testing etc .
White box testing is straight opposite of black box test . Because here the tester has all necessary information regarding the architecture design , data , source codes etc . In White box penetration the pen tester will check path testing , data flow testing and loop testing . As well as he analyses the code coverage .
Advantages of White Box Pen Testing
Discussed below is the advantages of white box penetration testing .
White box test can help in finding out the internal and external security vulnerabilities in a system / network.
Ensuring all the independent paths of each module has been exercised.
Verification of all the logical decisions by means of accessing their true or false value is ensured in white hat pen testing .
Typographical errors can be found as well as there will be a syntax checking process .
Can help in finding out the design errors that has risen due to the difference between actual execution and logical flow .
Disadvantages of White Box Testing
Focusing on the disadvantages of white box penetration test let’s discus it in brief –
The tester has to sort out the flaws by knowing so much of internal information thus it might create some confusion as well .
Have to go through a huge amount of data that is time consuming .
They work on the basis of knowledge of system directly from the developer . A hacker will not have any idea about this information .So a white hat testers’s behaviour will be entirely different from that of a hacker who doesn’t’ have any idea about the system .
So that’s all about the white box testing , now we will focus on the next Types of Penetration Testing that is Gray box test .
Penetration Testing or very commonly known as Pen test in Online world . This might be a familiar team for all IT Security enthusiasts and tech companies . For those who are unfamiliar to this term , here we will give you an idea by defining the concept of Penetration test .
Introduction To Penetration Testing
Let us start with introduction to penetration testing by defining what is penetration testing .
Then we will learn the importance of the pen test . And why it is necessary to perform these kind of tests and so on .
Defining Penetration Testing ( Pen Test )
Let’s go for a simple definition to understand the concept . Pen test / Penetration test is generally a Security test to find out the security threats and security risk on a system .
This test helps in detecting the security risk on a system and thus makes the security analyst teams vigilant to rectify the insecurities of a system .
How Important is Penetration Test ?
Now you may be thinking why penetration test , what is the importance of penetration test . Let’s discuss it in short –
Imagine any software application or a website that has got security flaws . It can happen easily , when a developer develops an application or website errors can occur . Some of the minute errors like configuration errors , software bugs , design errors can lead to security threats . This can turn vulnerable when someone illegally enters into the site and make use of the security loopholes .
So its always necessary to find out the security flaws by doing a pen test .
This helps in understanding the security loopholes in system .
Makes to alert about the data that are under security threat .
You get an idea about the weakest section of your system through which someone can attack your system .
Gives you idea about possible areas where white hat techniques can be used to exploit your system security .
Protection against black hat attacks.
These reasons makes every company and its network to invest a good amount on their system security and network security . Especially government portals , agencies , big MNC’s , corporate companies and Banking sectors spend a good amount on ensuring cyber security .
Benefits of Penetration Test / Pen Test
Pen Test is to ensure a secured system . This can add more benefit to any organisation and not doing a pen test is risky business as well . Every company must ensure they do risk assessment of their system security as well . Sometimes your system insecurity can lead to financial insecurity of the firm and eventually may be into break of customer loyalty even.
Increases Efficiency of Management
If your system is secure and you have understood the flaws in the security system and rectified it . Thus during any unexpected or intentional cyber attacks your management can function without any tensions . Because pen test would have given you risk analysis report of your system security .
Ensure your customer loyalty
In case if your system’s security issues were not detected and rectified in a pen test then any time you can loose the trust of your customer on your brand . Because leak of customer data can be a serious problem .
Safe zone from Fines & Penalties
Data breach and leak of confidential data can lead to legal issues thus make you end up with paying huge penalties . Penetration test saves you from all such legal issues by putting an end to the chance of any kind of attacks to your system.
No Fear Data leak
Data leak is a serious threat of any insecure system , so doing pen test reduces the maximum chance of data leak.
Financial Safety
In case of banking networks or any payment gateway related systems , insecure system can increase the chance of financial loss , this can be avoided . And in case of other organisations they can avoid financial loss due to hack attempts and customer loss and penalties .
There are basically three types of pen test available on practice . Then there are different areas on which pen test is applied .
There are three types of pen testing , they are –
White box pen testing
Black Box Pen testing &
Grey Box Pen testing .
Now we have given a basic outline about pen testing and will continue more about the pen test like How pen test is performed and types of Penetration testing etc .
Believe me all the 90’s kids are going to love this article. Many of us these days thrive to live our childhood days again but that’s not practically possible, right? But you can definitely get to relive them a bit if you get to play all the cool video games you played in your childhood in same way you did earlier. There were a number of cool games we used to play like Super Mario, Tetris, Pacman and you can play them again. To have best gaming experience in your computer you can rely upon some of the Best emulators to convert computer into Retro Console .
This can be done using emulators on your very own personal device a computer or a laptop. You may want to know what emulators actually are. So let me explain that first, emulator may be some software or a hardware which make a system behave and function like some other system.
Best Emulators – How to Convert computer into Retro Console
Here I have compiled a list of some of the best emulators that are going to make you refresh your memories of your childhood :
RetroArch
As an adult you must want to relive some moments from your childhood and Retroarch can help you in doing so since it is one of the best emulators using which you can play most of your favorite childhood games.
Its not an ordinary emulator it is more than that since it makes your gaming experience even richer with cheats, filters and real time rewinding. Also that it is quite simple to use, has a light interface and is portable. Moreover it is available for Windows, Linux, Mac and mobile devices.
ScummVM
ScummVM is a quite a popular emulator and is most used for adventure games especially the classic click and point games. The major features for this emulator that it is very easy on the system you are using since it can work with a light processor and also with a low RAM.
It provides you with a number of configurations for the audio and video. Also it auto saves your games. It is available for Windows, Mac and Linux. Also say a game is developed for MAC only using this emulator you can play it on windows platform as well.
PCSX2
PCX2 is simply the PlayStation 2 emulator so letting you play nearly all the games of PlayStaiton2 on your own computer. Besides the gaming experience is purely like the play station, it has a number of other features which are going to make your gaming experience even better like using custom resolutions, text filtering and anti-aliasing.
Also it lets you record in game in HD and then you can share it with anyone you want. It uses plugins for adding different functionalities. It is available for Windows, Mac and Linux.
OpenEmu
OpenEmu is one of the best emulators for the MAC users. It has been designed keeping in mind the MAC interface and hence designed pretty similar to it.
It is best known for its gallery like feature where you can easily organize your games under different categories making it easier for you to find them and browse them later on. Categorization can be automatic or you can do it yourself. The backup for the games is also created automatically by the emulator
Dolphin
It is an emulator for two of Nintendo’s consoles namely GameCube and Wii. The emulator is mainly known for its high compatibility rate and also a number of features.
Such as it lets you play games in HD. Some people even say it makes the game better when played on dolphin emulator. Also it gets updates and hence is steadily increasing its features. It is available for all the platforms i.e. Windows, Linux, Mac and Android as well.
These
some of the best emulators according to me but there are lots of more out
there. Do share with us your experience of playing your favorite video games
using these emulators and also do tell us if you are using some other emulator.
Virtual Reality is the latest rage in the tech market and it is pretty awesome, right? You get to experience other worlds without being actually present there. In the gaming world this is even more awesome, you get some stunning visuals and get to perform your own action. Currently Oculus rift is the best VR gaming headset in the market. Here is a complete Oculus Rift setup guide made with simple step by step guide on How to setup Oculus Rift .
Oculus Rift Setup Guide
Let us take a look at the step by step user manual of Oculus Rift Guide Setup in detail –
To begin with one must have 2 hardware components essentially . First and foremost a Oculus Rift and secondly a computer with support for VR (Virtual reality ) .
Install the Oculus Software
Before doing anything you need to install the Oculus rift software on your device. While it is downloaded and installed you may begin with unboxing and making the connections. This is the first step in the process of Oculus Rift setup .
In case you can’t download Oculus rift software then you can download Oculus Rift Patch .
Check for the minimum specs :
Running Oculus rift setup requires some minimum specs in your system which are as follows:
Nvidia GTX 1050 Ti / AMD Radeon
RX 470 or better
Intel Core i3-6100 or better
8GB of RAM or more
HDMI 1.3 output
1x USB 3.0 port
2x USB 2.0 ports
Windows 8.1 or newer
Some of the best Oculus games require even higher specs than the minimum requirements but they still run if you have the minimum specs. It also requires proper physical space a minimum of 3 by 3 feet so that you may not knockout something while playing and thus you can play freely.
The Unboxing of Oculus Rift
Firstly create an Oculus account on the Oculus software. You may sign up with any mail or may use your existing Facebook account as well. Then take out all the components from the box and make sure to remove all the plastic wrappings since they can be a hurdle for the sensors and the controllers.
Making the Connections –
The very first thing you need to do is connect your headset to the HDMI port in your graphic card remember not on the motherboard. Then connect your headset’s USB cable to a USB 3.0 port on your device (blue in color).
Then
connect the USB wires of the two sensors to two USB ports, make sure atleast
one of them is 3.0 port. Once all these connections are made you will see a
green colored OK on the software.
Connecting Oculus Rift Remote –
Pull
out the plastic piece thus connecting the battery. Then simply hold the main
button of the remote and it is automatically connected.
Connecting Sensors –
In
the software Click on Devices option in the menu then on Configure Rift and
then Sensor setup. Now enter your height there.
Then adjust the sensors with your eye level where your headset is going to be. Make sure that there should be no obstacle between the sensors and the headsets.
Then
move the headset in different directions assuring the connection and once
connected you will be notified on the software. Do this for both the sensors.
Connecting Touch Controllers –
In the software Click on Devices option in the menu then on Configure Rift and then Add left Touch. There the instructions will be displayed to configure the left touch. Follow them. Do the same for right touch.
Setting up Guardian system –
The
guardian system means the place where you will be playing using the headsets.
In the software Click on Devices option in the menu then on Guardian System.
There follow the instructions to set up the guardian system.
It
is necessary since you require proper space for playing, you should not knock
out something while playing and you can play freely.
So
you can see that setting up the Oculus rift is not that difficult but yeah it
requires proper engagement and time. But once done you can play lots of awesome
games and enjoy the VR experience. do share with us if you face any kind of
problem.
Many of you might not be aware of the fact that you are being tracked using the mails you receive. We all know how user’s data is exploited these days and then used by some for targeting the customers while some just use to scam the users. So you are being tracked using your emails like when do you opened the mail, clicked on which links, your device’s info and sometimes even your current location as well. So we will discuss about how to prevent email tracking as well as how to detect email tracking .
First of all no one should be tracking such information and that too is done without the permission of the user is even worse. It feels like a direct attack on your privacy. Here I have listed some methods of how you can protect yourself from such online tracking. But first learn how this email tracking works.
How Email Tracking Works?
So
there are basically two ways in which you can be tracked using your emails,
firstly by embedding images in your email and secondly using links.
Email Tracked Using Images:
In this way very small images of pixel size 1×1 is embedded in your email and because of this small size the image is invisible to the user. The image is called pixel-beacon. These images connect you to tracking server software without your knowledge.
Email Tracked Using Links:
Some external links are attached to your email and as soon as you open these links you current location and device info is sent to the tracker.
How to detect Email Tracking ?
Here we will discuss on how you can find out whether a email you received tracks you . Let’s understand how to detect email tracking in Gmail or any other email clients .
1. Look for External Images
Most of the leading email service providers ask for
user’s permission whether to open external images or not. This way you can
decline this request but should be careful as you may decline images containing
some information. Also consider large number of images as an alarm to some kind
to tracking.
2. Don’t open the link
Sometimes the sender sends you link to read the content of the email on that link. Beware never open such links as they are most of times to track your information. As soon as you open such link your location and info are sent to the desired party.
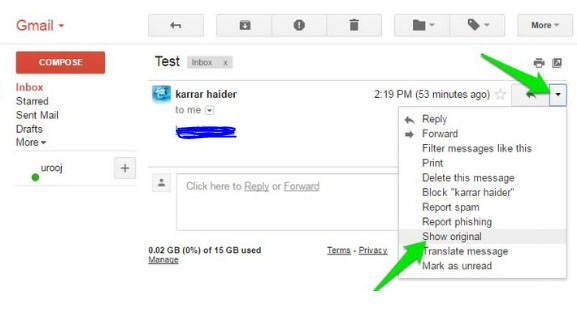
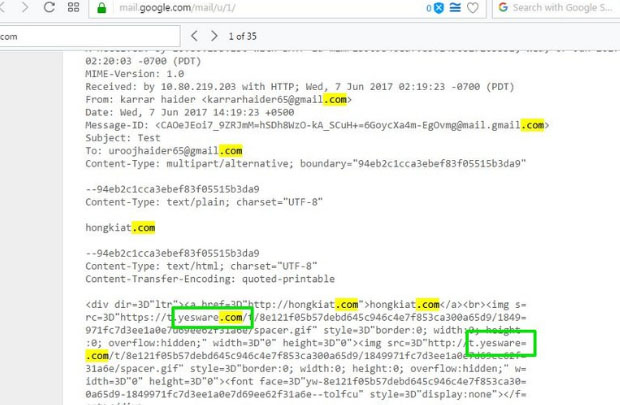
Some of the trackers send you along with the email, the server’s side email or some website URL. Now click on the options for the email and Click on option Show Original Content. Here use the Keyboard shortcut Ctrl + F to find some keywords to judge whether email can be tracking you or not.
The search for keywords can be like Track, Tracking, .com or Yesware (a quite well known email tracking service provider). This way you can judge the nature and purpose of the email yourself.
Detect & Disable Email Tracking automatically :
Detecting such fraud emails manually is neither foolproof nor quite easy. So we have a number of third party tools which can perform this task for us with much better accuracy. One such tool is Ugly email. It is available as an extension in Google Chrome.
Ugly email automatically detects all the tracking emails and blocks them. It is one of the best tools available for this. It also tells you about the tracking service used in the tracking email. It forms an eye in front of the tracking emails.
The only issue is that it is limited to Google chrome and Gmail users. But there are other tools as well such as PixelBloc and Trakbuster.
There are also so many email tracking apps for Gmail , Outlook and other popular mail client services available . If you are someone who rely on chrome browser , then you can add chrome extension for Email tracking to detect & prevent email tracking .
If you ever wished to be anonymous while you mail someone , then here is a must read for you . Know the top sites / anonymous mail providers that allows you to send anonymous emails to anyone .
Why use Anonymous emails?
So the reason being that you actions and data on the internet are constantly tracked by someone to target you as their potential customer or even for some kind of fraud or scam.
The free email services you are presently using are free only because they show you advertisements and you get adds as per your interest as your activities are tracked online even your emails. Using anonymous emailing service you can protect yourself from these things and ensure yourself some privacy.
Now we will take a look into the best sites to send anonymous emails . Before you begin this you must know one important factor . Before sending anonymous emails hide your IP with the help of any of the VPN service available .
There are basically three categories in which we can divide the anonymous email services –
One where you require complete privacy, one where you just need to send some mail and don’t want any feedback and one where you just need to receive some email such as a conformation mail. So here are these:
Encrypted or Anonymous Email Service
The email services when you want complete privacy and want to both send anonymous emails and receive anonymous emails from that:
TorGuard
TorGuard is one of the best anonymous email services which provides you with end to end encryption and 10MB of storage.
It provide you with complete anonymity and 100% privacy with a tons of privacy features. Also it is available for all the browsers, desktops and the mobiles as well.
GuerillaMail
It lets you create self-disposable emails. You need no prior registration, use it anonymously for 1 hour and then it is disposed leaving no trace of you behind on the internet.
Secure Mail
It lets you send both mails and SMS anonymously and requires no personal information and your IP address for registration. Mails are sent using the SSL encryption.
The Anonymous mail
It is also an amazing email service and you need to
register to get an email address and then you can use it anonymously. It
requires no personal info upon registration hence hiding your identity.
Send Anonymous Emails
When you only want to emails without any prior registration and don’t want any feedback to it. Such emails also get destroyed after some specific time.
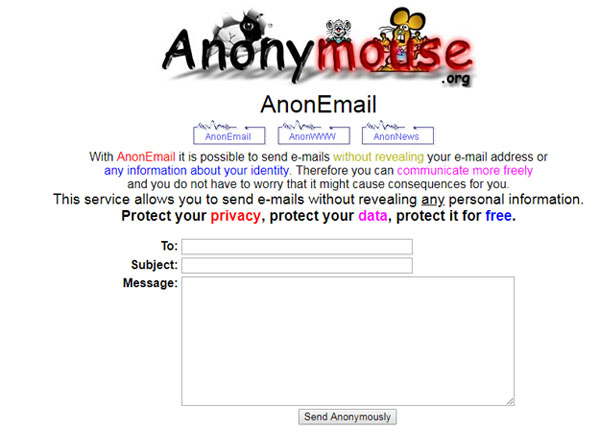
AnonymousEmail.me
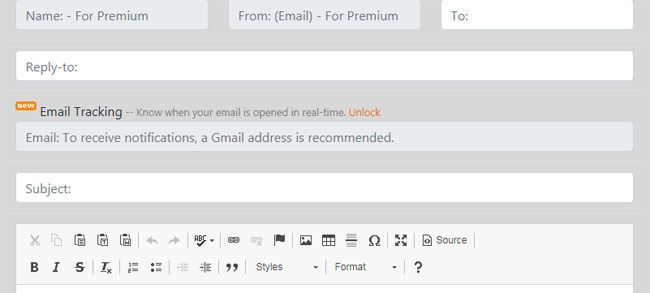
It is like a simple form. Just enter the receiver’s address, subject, content and attachments. You can add a reply address if you want some feedback. So you can send mails anonymously easily.
5ymail
It also lets you send you emails completely anonymously but you will need an actual email to register and then acquire its services. Also it has an amazing text editor which can help you beautify your messages.
W3 Anonymous Remailer
It also pretty simple to use and has a very easy interface. Just add recipient’s address and the content and subject for email and send.
Anon Email
Anon mail lets you send emails without reveling your actual info to anyone. Just add sender address, subject and content and you work is done.
There are a number of other services which also operate and in almost similar ways such as CyberAtlantis, SendAnonymousEmail.net, Send-Email.org, VenomPen. All these will also get your work done.
When you just want to receive some mail mostly in case of conformation emails and you don’t want any follow up on the mails received afterwards then these are used.
myTrashMail
You can either use public account for receiving a mail or get a one with password but for that you will need to register yourself first. It provides you an easy for blocking all the spams and newsletters. Also the mails are disposed after a certain time period.
Mailnesia
It is another disposable email service and is going to be very helpful if you sign up on different sites and services pretty often. The reason is it lets you open all the conformation or verification links automatically in the background.
Spambog
Spambog is another such email service which provide you with disposable emails which get destroyed after 7 days. The reason I have placed it in this category is because you cannot send anonymous emails using it, you can only receive, reply or forward mails using this.
TempInbox
and Mailinator are other such email services which operate in a similar way.
So
you must understand how important your data is and try to ensure that you are
not tracked unknowingly. Hope these anonymous email services will be of help to
you. Also don’t forget to share with us if you use any other service and your
experience with that service.
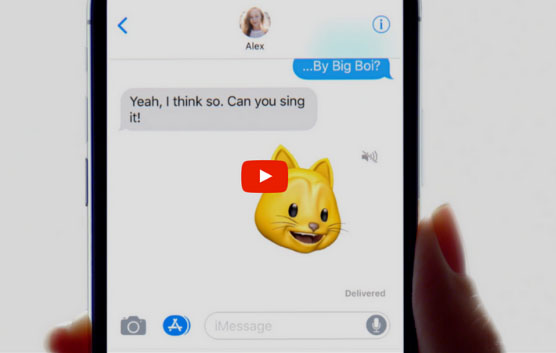
Here we will find how to create Animoji Karaoke or Memoji Karaoke on iPhone. Before getting into this let us first answer a question in your mind about what is Animoji or memoji. Hope this will be interesting for most of you .
So first let’s learn a bit about these, Animoji is animation plus emoji. So basically these are animated and 3D versions of the simple emoji which can be recorded using iPhone X camera and can be sent as video files along with audio as well.
Memoji is an even updated version of animoji available with iOS 12. These are like avatars which somewhat look like you and also have similar facial movements. These features can be accessed using the iMessage app.
Next question is what is animoji or memoji Karaoke. Hope you are familiar with dubsmash , if so let me make it simple . Animoji Karaoke or memoji Karaoke is like a dubsmash with avatar . Now let us begin with how to Create Animoji Karaoke .
How to Create Animoji Karaoke / Memoji Karaoke on iPhone
To begin with , all you need is to select the music of your choice first . Let us take a look more about the process on how to Create Animoji Karaoke / Memoji Karaoke on iPhone –
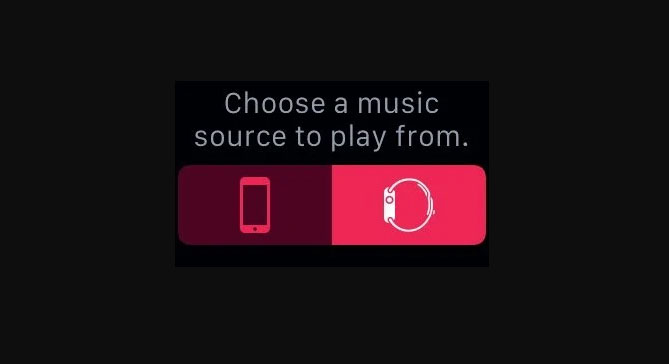
Music Source
The first and foremost requirement is a music source. The only thing you should care about this is that the volume should be high enough that it can be clearly recorded by the iPhone. Remember, for playing the music you will require some device other than your iPhone since you cannot play music and record an animoji on it simultaneously.
Learn Lyrics
You definitely to memorize all the lyrics for whichever song you want to create the karaoke for a cool and appealing video. Since if your lip sync won’t match with the lyrics of the song, it will simply ruin your video. Display lyrics on the music device, it can be helpful.
Use Animoji
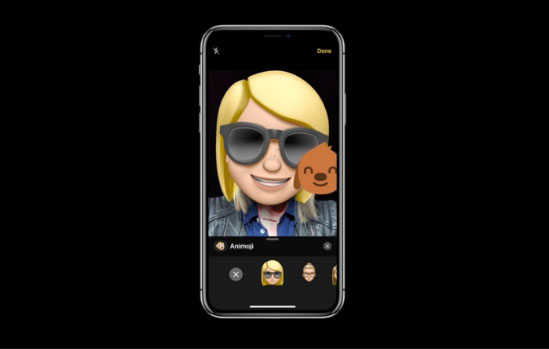
Now you need to select the appropriate animoji to express your karaoke video properly. Also instead of animoji you can go for a memoji. This way you can display your expressions pretty well.
For selecting the animoji or the memoji, these are available only on the iMessage app on your iPhone. There create a new message and to view the animojis there click on the monkey icon. After this you select from the animojis available or your own memoji.
If you can’t find out any right animoji for your karaoke video then you can refer to a number of third party apps where you can create animojis yourself. One such app is Animoji Studio.
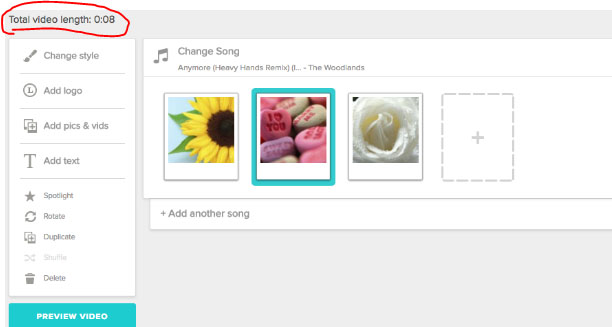
Decide length
The next thing is to decide your Animoji / memoji Karaoke Video length . For Half minute videos , i mean 30 seconds ones ; you can record it easily by holding the record button. In case you got to create long Karaoke videos , then you use iPhone screen recording feature .
For starting the screen recording pull down the control menu from the horn button, click upon the screen recorder and swipe up to close the control menu. Now record as long video as you want whether a small clip or a complete karaoke. For switching off the screen recorder, click on the side button.
Share Animoji Karaoke
Using your iMessage app you can create your Animoji / Memoji Karaoke and can share the same on any of the messenger apps or social media sites .
So it is quite easy to create some cool and fun animoji karaoke videos. Actually you can make up your karaoke game if you can sing well. Then you may not lip sync but sing the song in your very own original voice. It can be even more fun, right? Do share with us your experience of making animoji karaoke videos on your iPhone.
Web Designing is a very important these days. How your web page looks actually has a considerable effect on the user. Of course the beautiful web pages definitely help you to attract more users. For having an appealing web page you need to select proper colors and patterns for background. The pattern should not be too chaotic that it distract the user from the actual content of the page but neither too simple. It should appeal to the user and enhance your page’s interface. Creating some amazing patterns can be quite difficult and time taking job. Therefore there are a number of tools which provide you with some amazing patterns which you can edit as per your wish and requirements. Here I have compiled a list of some of the best free pattern generators.
Free Pattern Generators for creating Seamless Patterns
Let us take a look at some of the best pattern generator tools available to create patterns easily –
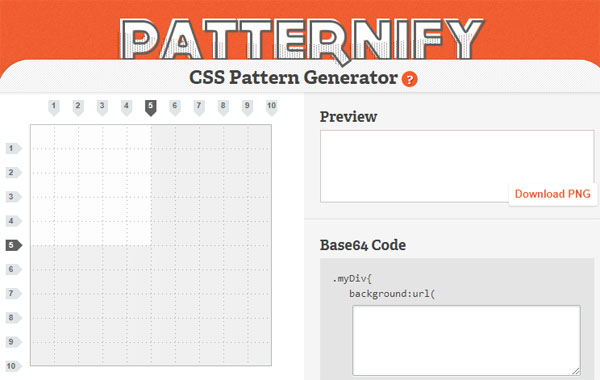
Patternify
It is an awesome tool for creating patterns with minute details and the reason for this is that the tool lets you create your pattern pixel by pixel. This means you can have different color for every pixel. Also the tool provides you with the options of colors and you can set the transparency for each pixel.
The tool is apt for creating patterns for small icons. You can download the image in PNG or the Base64 format. This is one of the best free pattern generators available .
Stripe Generator
If you want some strips in the background then this is the best pattern generator tool for you. The editing features lets you to select the width, spacing and colors for the strips.
You can change the angle for the strips and also add shadows to the strips. Another amazing feature is that you can browse among the patterns created by other users. Once done you can download them in PNG format.
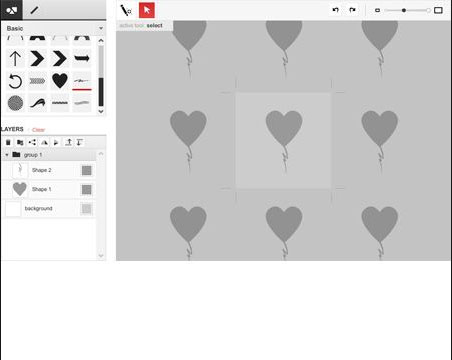
Though this tool is known mostly for the color palate it provides for the patterns but it also lets you create some amazing and beautiful patterns. In this tool you can generate patterns by selecting different shapes and lines from the panel then you need to simply drag and drop them. You can further resize or rearrange them as you want.
Geopattern
I think it is one of the coolest and the most innovative tool for generating patterns. And once you will use it you are also going to agree with me. All you need to do is type random words on the screen. With each new character you type it will generate some new random pattern. It generates some amazing backgrounds.
PlaidMaker lets you select the color palate for your patterns and then lets you create the horizontal pattern and the vertical pattern separately. You may use mirror images. Also if you don’t want to create a new pattern you can browse among the patterns created by others in a separate section.
Delaunay Triangle Pattern Maker
It also generates somewhat triangular patterns and also have a 3D effect in the background. You can create patterns by selecting the size of canvas, color scheme, distance, depth and other features. The results are definitely amazing. Other option is that you can click upon the Randomize button to save yourself from setting all the features.
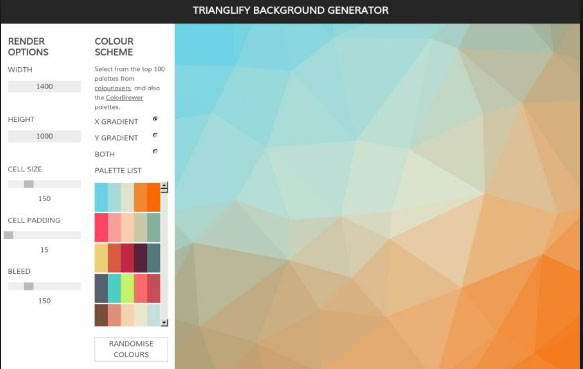
Trianglify Background
It lets you create some stunning patterns of adjoined polygons. All you need is to select the color palate, the size of the polygons and the variance. The result some gorgeous backgrounds with beautiful color combinations. It has predefined 27 color schemes to select from but you can make your own as well. Then you can download in PNG or SVG format.This is also a good choice of free pattern generators .
Waterpipe.js
It has a basic background image of something like smoke floating. All you need to do is select the colors for the pattern and you are done. The images are simple but stunning.
These are some of the best free pattern generators. Hope you liked these. Do share with us which one you liked the most or if you use some other tool do share that as well.